

Leave runs in teamspace through request and approval — the employee submits a leave request from time tracking, the approver sees it in their notifications and decides. Deputy rules take effect automatically when the approver is away themselves. Which leave types exist, when leave expires and who is allowed to approve are set up once — see Set up leave.
Request leave
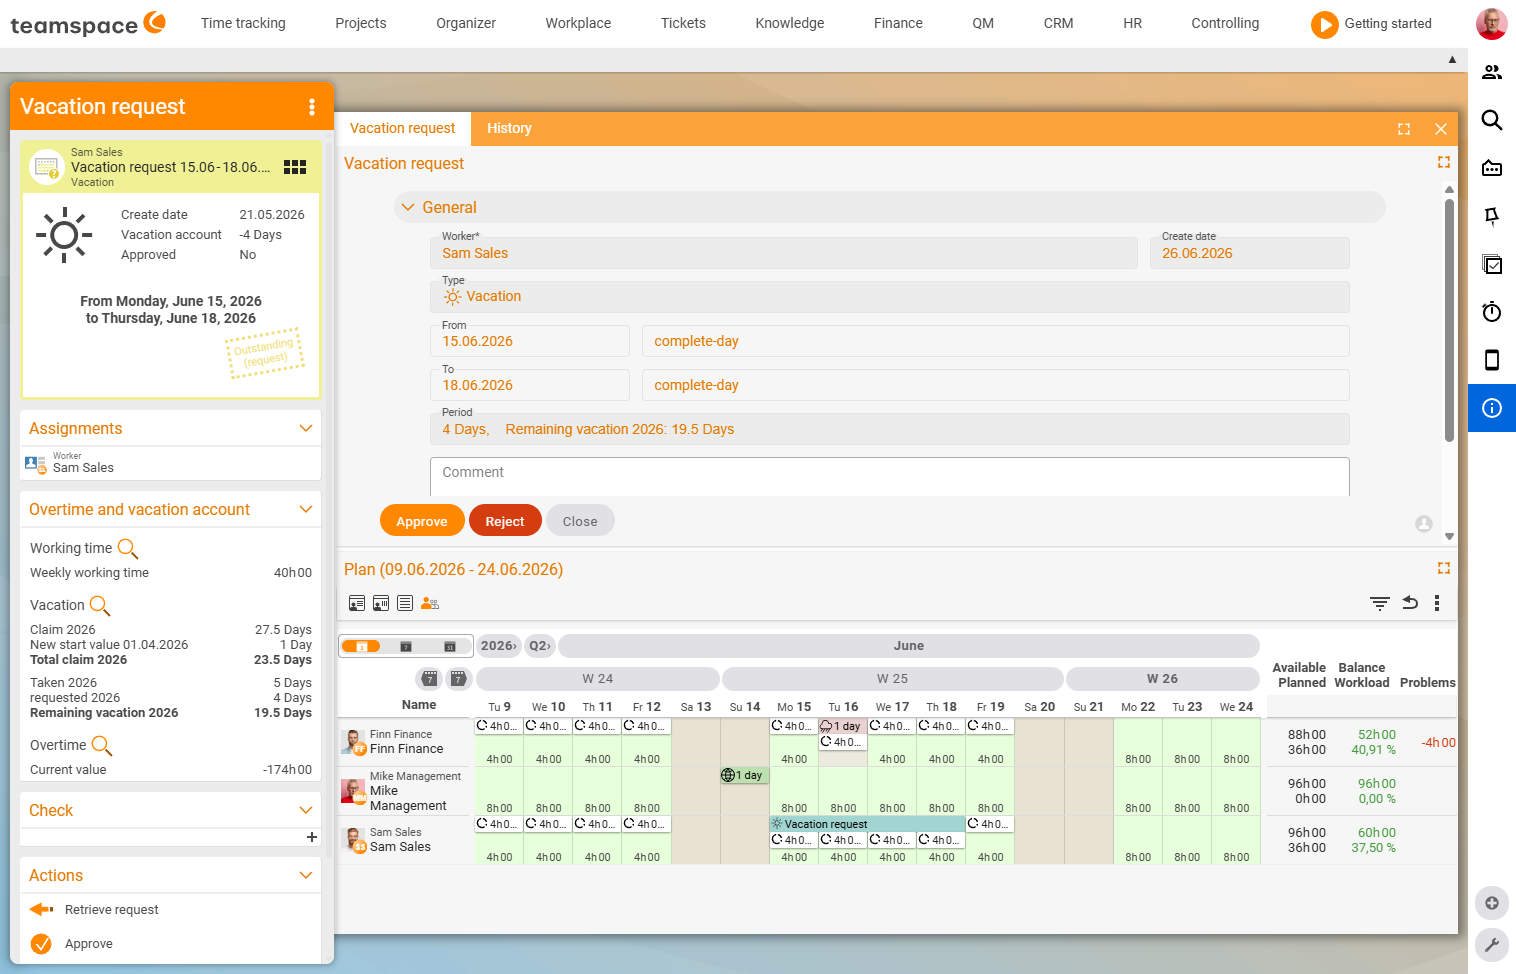
The employee goes to their time tracking → Overview / My leave and sees their current leave balance. A click on Request leave opens the dialog with the following fields:
Employee*— pre-filled with themselves.Type—Leave,Reduce overtime, and depending on the configuration alsoSpecial leave,Educational leave,Unpaid leave.From— start, with a mode drop-down on the right (Full day, and half days if half days are enabled).To— end, with the same mode drop-down.Period— calculated by the system, e.g.4 days, remaining leave 2026: 23.5 days.Overtime— a display-only field for theReduce overtimetype: shows the current account balance.Comment— free text.
The employee clicks Request leave (alternatively Save as draft or Cancel). The request goes to the responsible approver and appears in their own leave overview with the status Open (leave request).
ℹ Info: If a department is flagged with a minimum staffing level, the employee can see at the time of the request — and the manager before approval — whether too few colleagues would be present as a result.
Approve leave
The approver receives a notification. They click through and see the request with period, remaining allocation, type and comment. Below it, teamspace shows the resource schedule as a weekly CW grid — who else is on leave during the same period and who takes over the tasks.
They click Approve or Reject. With Approve the status changes immediately, and the entry moves into the calendar and the capacity planning. Important: the leave account only decreases when the days are actually taken — not already at approval. For the employee, the request then shows in time tracking as approved.
ℹ Info: The leave overview in the
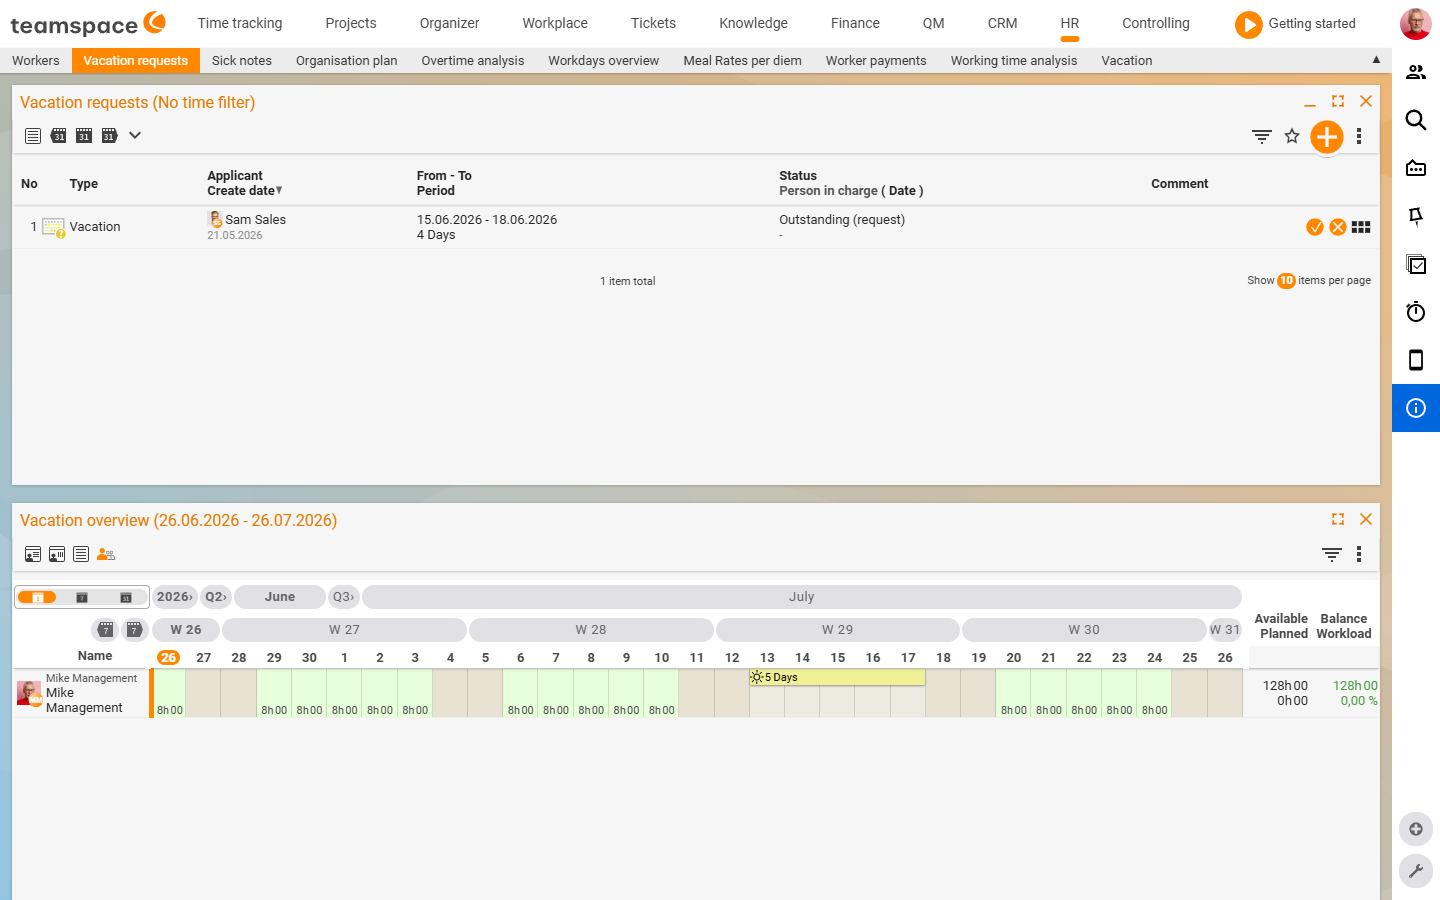
Leave requeststab shows an employee calendar grid at the bottom with weekly CWs, status colour areas, half days (4h00/-4h00) and public holiday markers. This lets you see at a glance who is on leave and when.
Understanding “Reduce overtime”
Reduce overtime is technically a leave request, but mechanically it is not leave: employees see the absence like normal leave, the leave account stays untouched, and instead the overtime account is reduced — and only when the days off are actually taken. More under Overtime account.
Check your own leave balance
In their time tracking → leave overview, the employee clicks the magnifying glass and sees the detailed calculation: the contract start date, the current entitlement, days already taken, remaining leave. Using arrows they switch into the past and future and filter by year. This also lets them see whether they have used up their previous year’s leave by the expiry date.
Common questions & needs
| You want to … | How to |
|---|---|
| Request leave | In time tracking Request leave, type Leave, choose the period, Request leave. |
| Reduce overtime instead of taking leave | When requesting, choose the type Reduce overtime – the leave account stays untouched. |
| Check team coverage before approving | In the request, look at the resource schedule (weekly CW grid). |
| Understand your current remaining leave precisely | In the leave overview, click the magnifying glass – it shows the full calculation. |
| Request half days | In the mode drop-down at From/To, choose the half day (if enabled, see Set up leave). |
Related topics
- Set up leave Personnel & HR Configuration
- Overtime account: adjust & pay out (with video) Personnel & HR How-to
- Manage sickness reports (with video) Personnel & HR How-to
- Leave management