

A fair amount can change in employment contract data over time — working hours, pay or leave days. The important thing is to change the data simply and yet traceably. teamspace solves this with time slices: you create a new entry from an effective date instead of overwriting the existing one. This way the history is preserved. In this article, Viktor reduces his working time from five days to four — his leave, his salary and his fundamental contract data all need to be adjusted.
Step 1 – Adjust working time and leave
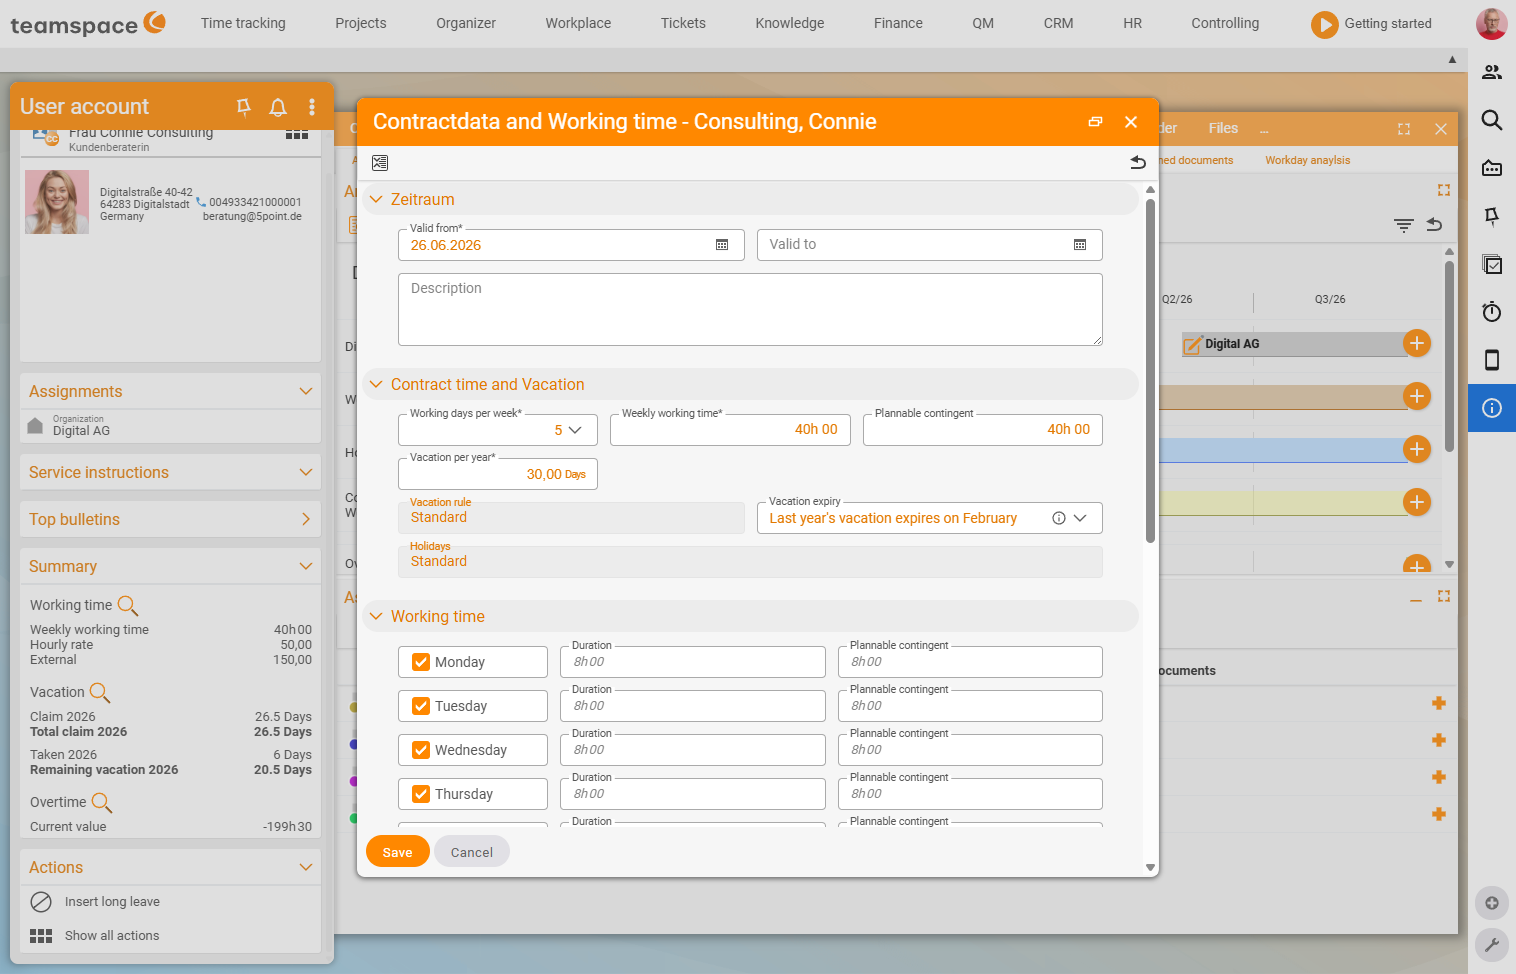
- Open
HR→Employee list→ the employee →Analysisand selectAdjust contract data. - Click the plus icon at the end of the current time slice — not the pencil. The plus creates a new entry from an effective date; the pencil would distort the past as well.
- Enter the effective date (for example the 1st of the following month; in the example deliberately retroactive, to show the effect on leave).
- Change the weekly working hours from 40 to 32 hours (hours, not minutes). The system initially distributes the 32 hours across the previous days.
- Reduce the working days from 5 to 4 and remove one day — Friday, say. The remaining days then each show 8 hours, which adds up to 32 hours.
⚠ Leave trap: If the leave entitlement stays unchanged, 30 days on a four-day week suddenly correspond to 37 days compared with the five-day week — which is not what you want. Convert the entitlement: annual leave ÷ 5 × number of remaining days. In the example: 30 ÷ 5 × 4 = 24 days. These 24 days correspond exactly to the old value of 30 days on the five-day week.
- Adjust the schedulable allocation if Viktor is to be scheduled internally for less — 28 hours instead of 32, say.
- Check the leave expiry setting and the type of time tracking (project time, attendance or trust-based working time) as well as the overtime carry-over.
Step 2 – Save retroactively and recalculate
Because the start date lies in the past, the system requires a recalculation. Click Save — teamspace recalculates all affected calculations for a moment. Afterwards you see two entries on the timeline, and the remaining leave is reduced, because Viktor now has to work less.
⚠ Important: A retroactive contract change takes effect retroactively. If, in doing so, you change the hourly rate for a past period, teamspace recalculates all affected projects with the new costs. Check what this does to projects that have already been invoiced.
Step 3 – Record the change as a document
You cannot simply change the data alone — a contract change needs evidence. In the same HR ▼ drop-down sits the sub-tab Assigned documents:
- At the bottom, choose the
Document type— for exampleContract amendment(others would beBasic contractsorNon-disclosure agreement). - Click the plus and enter today’s date.
- Drag the file into the storage area by drag & drop — a signed scan, for example.
- Enter a label, e.g.
Reduction of working time to 4 days, and save.
Step 4 – Adjust the salary
The hourly rate often does not change with a pure reduction in hours — Viktor simply works less. The basic salary, however, has to be adjusted:
- Go to
HR ▼→Hourly rates and salaries. - Click the plus (not the pencil — otherwise the entry is changed in a past-oriented way).
- Set the effective date, e.g.
from 1 January, and enter the new values — hourly rate and basic salary. - If needed, add salary components such as a Christmas bonus with the amount and payout month. Save.
Which fields are available here and how you view the salary later in the list is described in detail on the Hourly rates, salaries & remuneration page.
Common questions & needs
| You want to … | How to |
|---|---|
| Create a change from a date without altering the past | Always use the plus icon, not the pencil. |
| Convert the leave entitlement correctly when reducing days | Formula: annual leave ÷ 5 × remaining days. |
| Enter a pay rise from next month | In Hourly rates and salaries, create a new entry from an effective date via the plus. |
| Record the evidence for the contract change | In Assigned documents, choose the document type and attach the file by drag & drop. |
| Have a retroactive change calculated through cleanly | When saving, confirm the recalculation that is offered. |