
A campaign bundles several contacts together with one or more actions that you direct at all of them at once – a newsletter, an event invitation or an automated mail sequence running over several weeks. You create the campaign, assign the contacts and trigger activities in bulk. Each person’s contact history shows which email went out when and whether it was carried out.
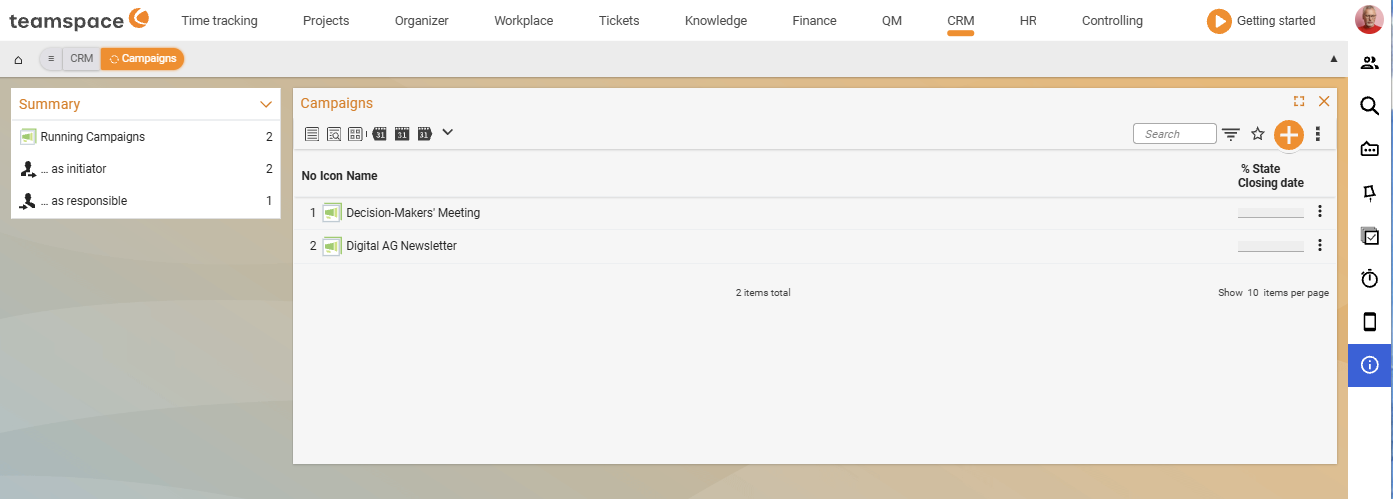
1. Create a new campaign
Two ways lead to a new campaign:
- From the
Campaignslist tab via the plus button next to the search field. This opens the creation dialog, where you enter the name, initiator (mandatory), and start and end date. - Directly from the contact list using multiple selection: mark the contacts that should go into the campaign and assign them to a new campaign in one step. They are then immediately included as participants. Filtering the contact list and using multiple selection is covered in Create and manage contacts.
Once the campaign is set up, you open it like any main object. The detail manager has six tabs:
Master data– name, description, initiator, responsible, assignments and status.Contacts– the assigned people, plus a display of which activities have already been carried out.Activities– the campaign’s actions, from sending email to producing a form letter.Files– a separate filing area per campaign (attachments, print data).Forum– internal discussion in the CRM forum area.History– change log.
Master data of the campaign
Name(mandatory): the internal title.- Description: what it is about – who is being addressed and what the goal is.
Initiator(mandatory): who launched the campaign.- Responsible: who is in charge of carrying it out.
Statistics and classificationsarea: classification values for reporting.Statusarea: progress display (percent completed, completion date).Assignmentsarea: project assignment, where the campaign belongs to an ongoing project.
2. Manage contacts
The Contacts tab shows who is in the campaign. The Summary sidebar block initially shows all CRM contacts; the filters let you narrow this down to the ones you want to add (A-customers in the Trades industry, B-prospects last 60 days, and so on). The plus button attaches the selection to the campaign.
Anyone already in the campaign has a tick in a green dot on their row. To take someone out again, remove them using multiple selection. You can also assign an individual contact to a campaign directly from its master data – multiple selection is simply the quicker route for large numbers of contacts.
Blocked list: if a recipient unsubscribes via the unsubscribe link, they are moved here. They remain visible (they were once part of the campaign) but receive no further activities. teamspace maintains this list automatically whenever the unsubscribe link is clicked.
3. Activity types of the campaign
The Activities tab is where you create the actions. The types differ in how sending takes place:
Mail: an HTML-formatted email with a subject, sent to all campaign contacts at once, with placeholders for the salutation and unsubscribe link.Export (form letter): an address export from the campaign contacts into an external letter tool.Form letter (PDF): a PDF form letter straight from teamspace, using a layout from the configuration – for printing and postal dispatch.Contact report (address labels): address labels for the contacts, based on a label layout.CRM activity: a general CRM activity created for each contact – for example for a call campaign that you share out across the team.
Which types your tenant offers depends on the configuration; the selection sits behind the plus button in the Activities tab. How an individual activity with its Date, keyword and status works is described in Activities and follow-ups.
Create and send a mail activity
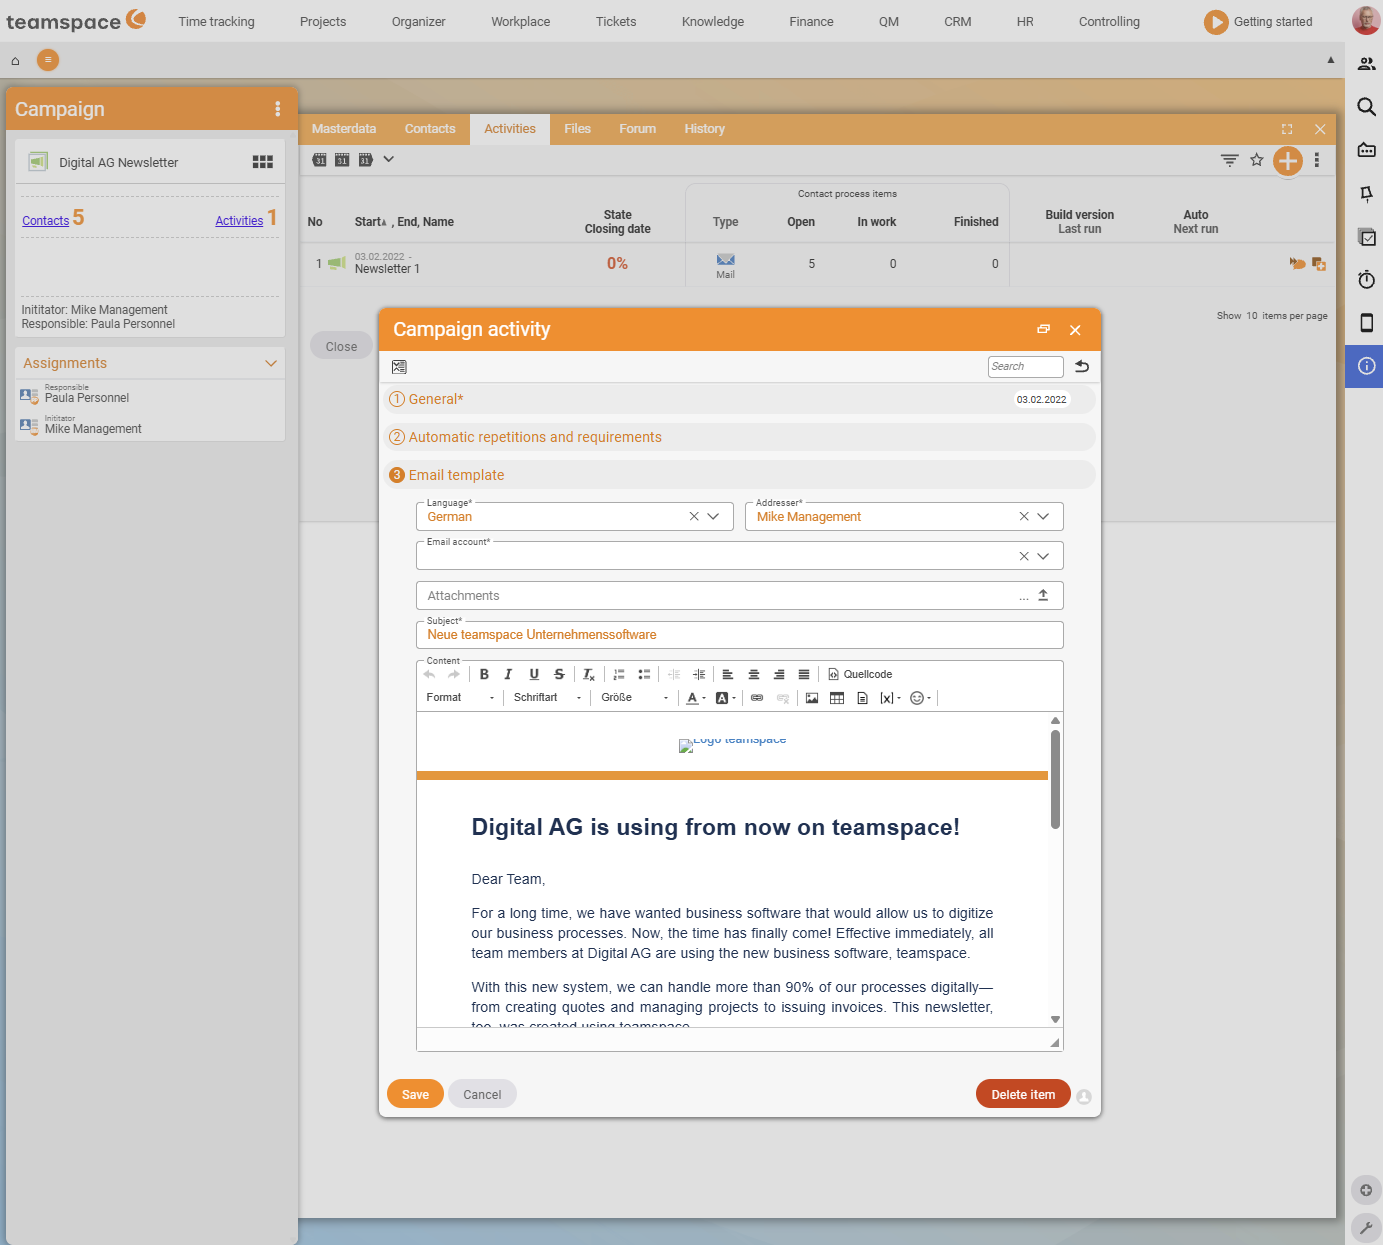
- Enter the subject and HTML body. The
[x]symbol lets you insert placeholders that build the personal salutation from the first and last name and add an unsubscribe link. You upload file attachments directly in the dialog. - Test email: enter your own address in the
Test email addressfield and clickCreate elements. You receive a single email, exactly as the recipient would see it – placeholders resolved and attachments included. - Once it looks right, switch to a sending option. The
Number of elements to createfield lets you cap the dispatch if you are working in batches. The icon with a speech bubble and fast-forward symbol triggers the dispatch. - Optional: set a send time – the email only goes out on the chosen date. With large numbers of recipients, the server spreads the dispatch across batches to avoid tripping spam filters.
⚠ Important: Without a test email, you will not catch placeholder errors – a misspelt salutation would otherwise reach a thousand recipients. A test email before every mail activity is a mandatory step, not just a recommendation.
Form letter and address labels
For a Form letter (PDF), you do not format the letter in the campaign itself; instead you use a predefined form letter layout from the configuration (font, letterhead, graphics). You simply enter the letter text with placeholders and trigger the generation, then print the resulting PDF.
Contact report (address labels) generates labels for the envelopes – this requires a stored label layout. Attaching a form letter and the labels to the same campaign keeps the address order consistent. Labels can also be generated outside campaigns, in any contact list using multiple selection.
4. Automate mail sequences
The activity dialog includes an area for automatic repetitions. You use it to build mail sequences: three emails two weeks apart, four emails every three months. Create the emails as individual activities and set the repetition pattern on the first one. teamspace then runs the sequence automatically. If someone unsubscribes in the meantime, they are moved to the blocked list and no longer receive the follow-up emails.
ℹ Note: Complex sequences with branching paths that depend on the recipient’s behaviour are not covered as standard. If you want to build something like this, speak to the consulting team.
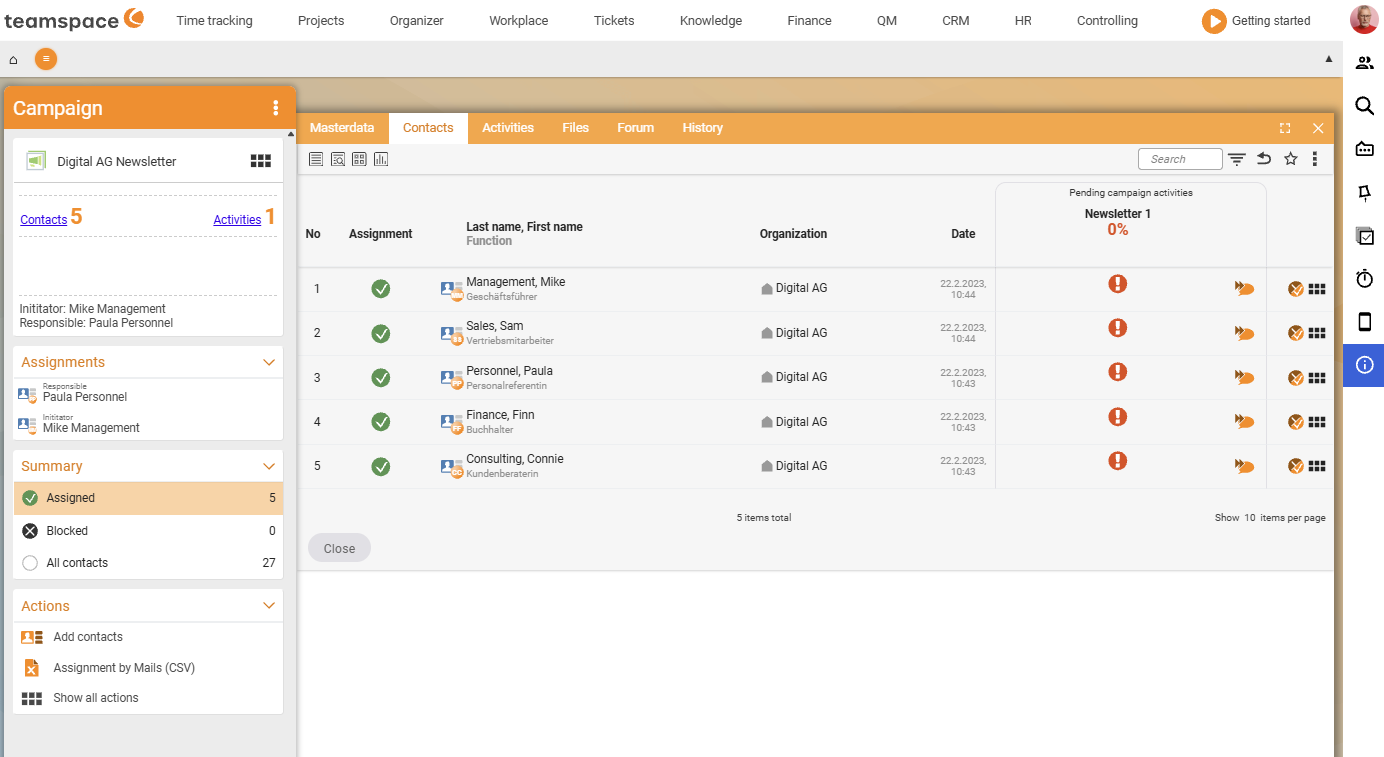
5. View status per contact
The Contacts tab shows, for each person, the state the activity is in:
- Red exclamation mark: not yet triggered – the email has not been sent.
- Yellow icon: created but not yet carried out – for example a scheduled email the server has not sent yet.
- Green icon: done – the email has gone out, or the activity is marked as completed.
This lets you see at a glance whether all recipients have been reached or whether something is still outstanding for individuals.
Example: setting up a reactivation wave
Anna Müller wants to invite the B-customers who have had no invoice for six months to a product promotion:
- In the contact list she filters to
B-customersand sorts by the date of the last activity, then marks the old rows using multiple selection. - Using
New campaign, she creates “Reactivation autumn” – the marked contacts are immediately included. - In the
Activitiestab she creates a mail activity: subject, HTML body with a salutation placeholder and unsubscribe link, and the product data sheet as an attachment. - Test email to herself – all good. She triggers the dispatch with a send time of tomorrow at 09:00.
- Over the course of the week she checks the
Contactstab: green icons for most, and three red ones (undeliverable). She corrects the three email addresses and triggers the activity for those three again.
Common questions & needs
| You want to … | How to do it |
|---|---|
| Quickly contact a filtered target group | Filter the contact list, mark the contacts and assign them directly to a new campaign using multiple selection. |
| Check how the email looks before the mass dispatch | Set the Test email address and click Create elements – you receive a single email with the placeholders resolved. |
| Insert a personal salutation automatically | In the HTML body, insert the salutation placeholder using the [x] symbol. |
| Allow recipients to unsubscribe | Insert the unsubscribe-link placeholder; unsubscribers are automatically moved to the blocked list. |
| Send by post | Form letter (PDF) with a layout from the configuration, plus Contact report (address labels) attached to the same campaign. |
| Automate a multi-stage mail sequence | Create the emails as individual activities and set the repetition pattern on the first one. |
| Send in batches | Limit the Number of elements to create field, or set a send time. |