


Clicking an appointment in the calendar or in the list opens the detail manager. Here you maintain all properties, check the participants’ availability, set permissions and alarms, and move, copy or delete the appointment.
How the detail manager is laid out
A row of six tabs runs along the top:
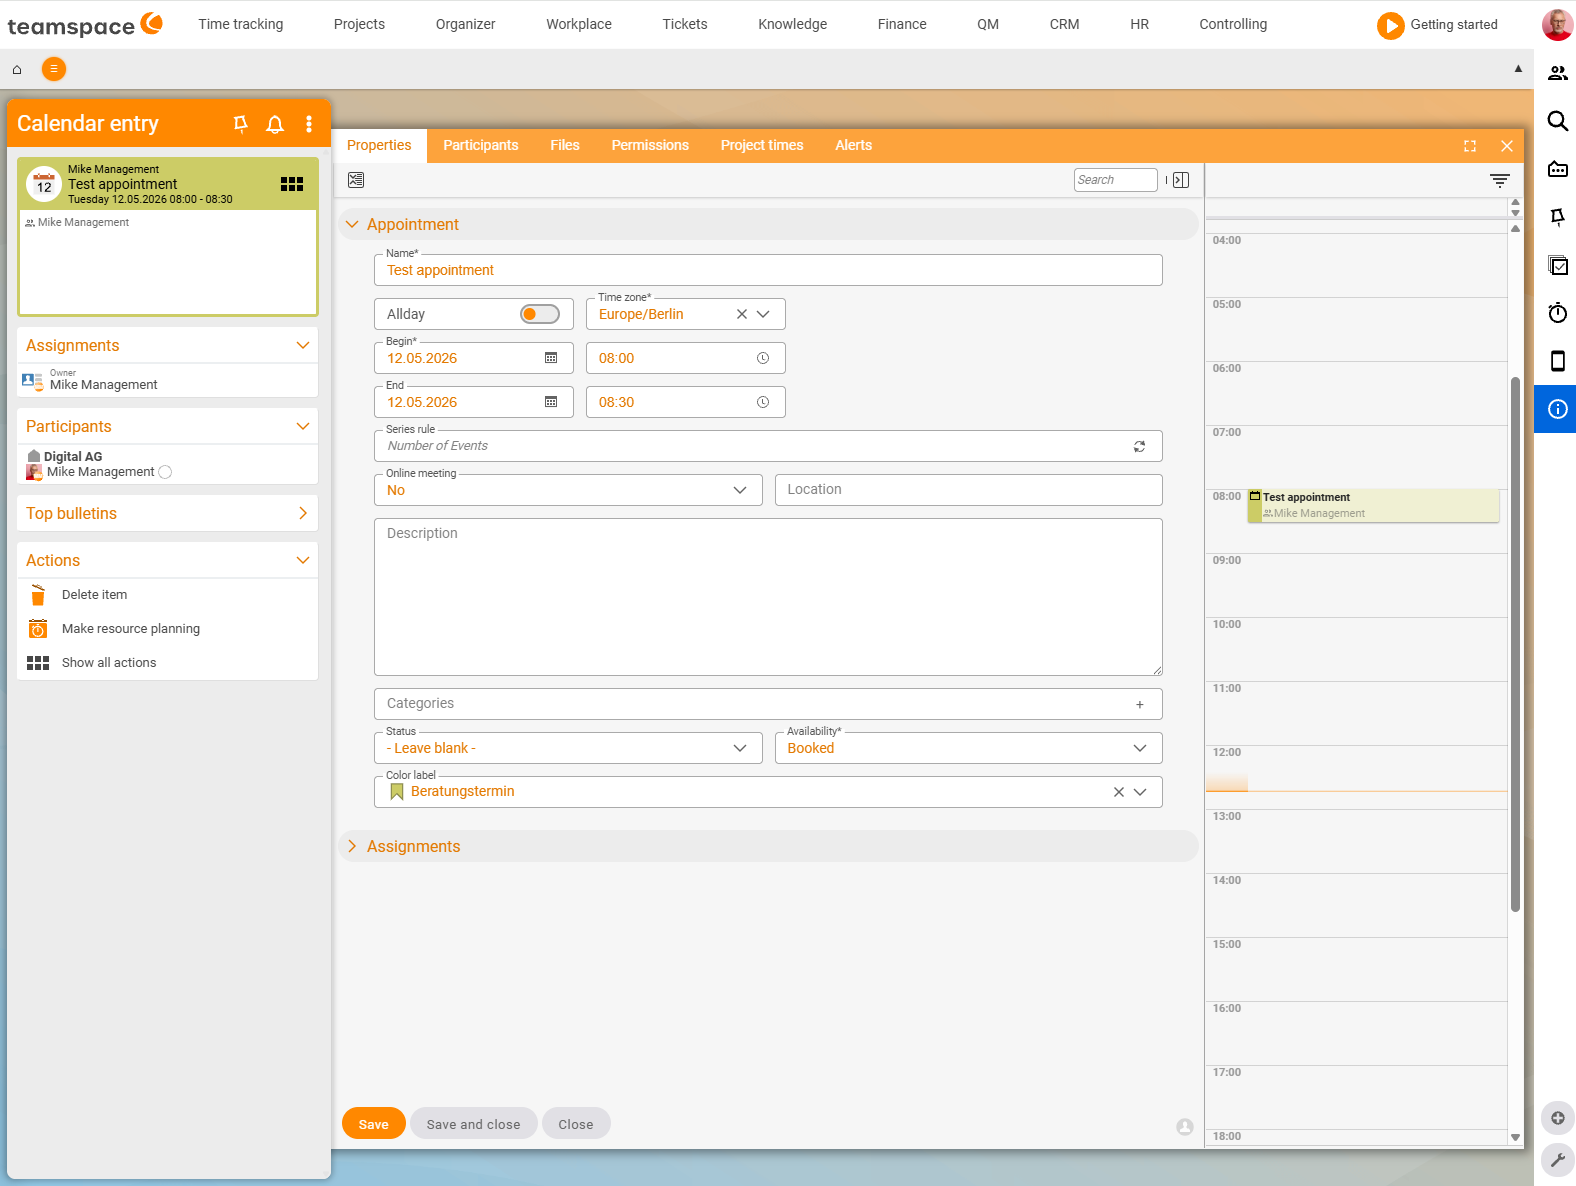
Properties: all the basic fields — name, time, description, categories, location, status, availability, colour marker, plus theRecurrencesection.Participants: a list of participants with avatar, response status and a horizontal timeline showing availability.Files: attachments on the appointment.Permissions: access mode and rules per person or group.Project times: times booked on the appointment, if it is attached to a project.Alarms: reminders for the appointment (see Alarms & reminders).
On the left sits the document card block with the appointment title, date, the Assignments box for linked projects and sales opportunities, and the participant list with status dots. At the bottom of the sidebar is the Actions block. Right at the bottom of the modal: Save, Save and close, Close.
Maintaining the properties
In the Properties tab sit the accordions Appointment (open by default), Assignments and Recurrence. The Appointment accordion holds:
Name*: the appointment’s label.- Toggle
All day: when active, the time fields drop out. Time zone*: defaultEurope/Berlin.Start*andEnd: date plus time.Online meeting: a drop-down —Noby default. With the Teams interface set up, you select Microsoft Teams here.Location: free text, such as an address or meeting room.Description: free text.Categories: a chip field; values are set by the administrator in the configuration.Status:- Empty -,Tentative,Confirmed,Cancelled.Availability*:Free,Tentative,Busy,Away.Colour marker: a drop-down with predefined colours (e.g.Consultation).
Recurring appointment and termination rule
If the appointment should repeat, open the Recurrence accordion and define a rule — daily, weekly, monthly, with an interval. A Termination rule ends the series after a certain number of occurrences or on a fixed date.
⚠ If you change a single occurrence, teamspace asks whether only that instance or the whole series is affected. A changed single instance drops out of the series and no longer follows later rule changes.
Checking and adding participants
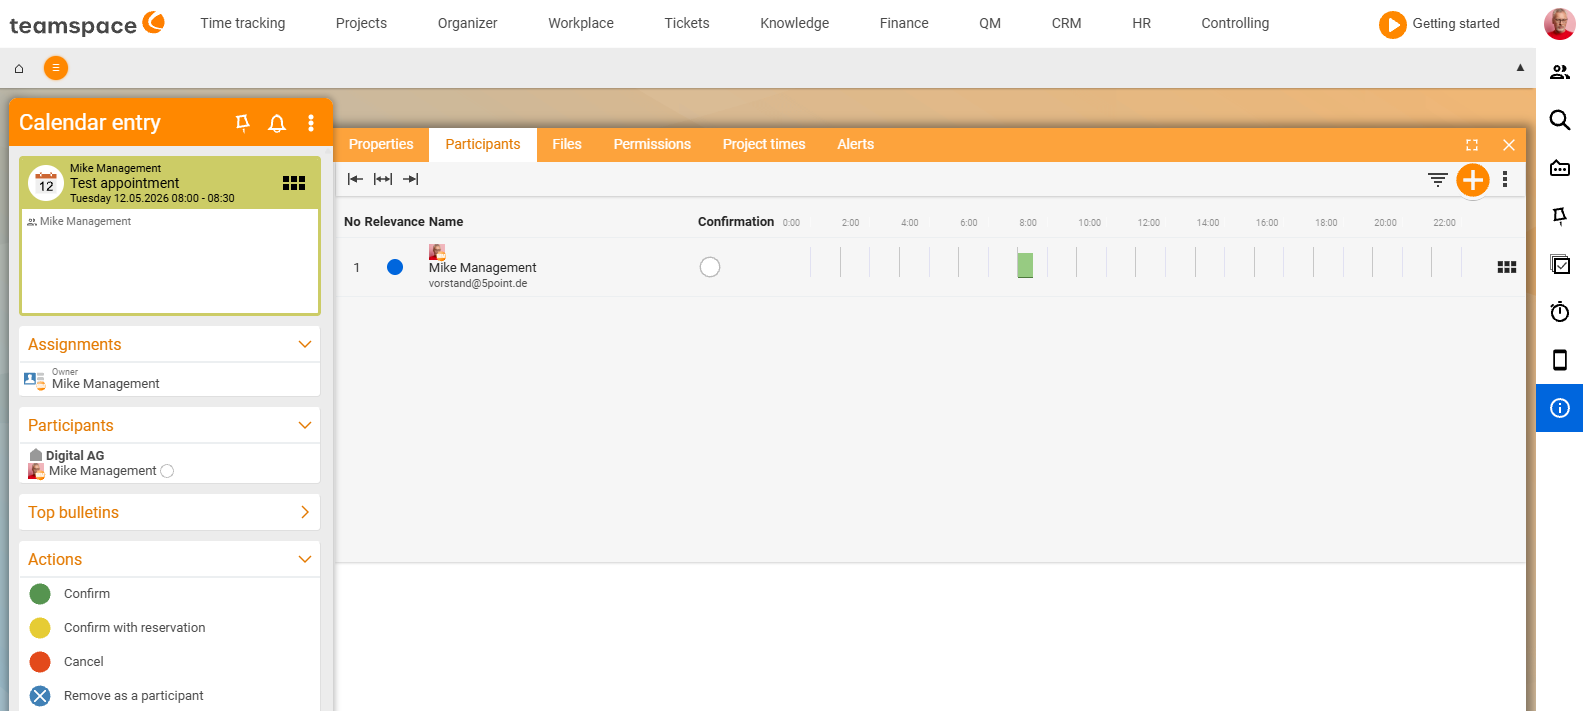
The Participants tab shows a timeline per person across the day:
- Green bar: the person is free.
- Grey bar: the person is already booked (another appointment or resource booking).
- Red bar: your appointment time clashes with a busy period.
You add new participants via the Actions sidebar — suggestions appear straight away, or you search via the search field. You attach external participants (contacts without a teamspace account) the same way.
You control responses via the sidebar — as soon as you are in the Participants tab, the actions change to Accept, Accept tentatively, Decline, Remove. The status dots after the name change accordingly: green (Accepted), yellow (Pending), orange (Tentative), red (Declined).
Permissions per appointment
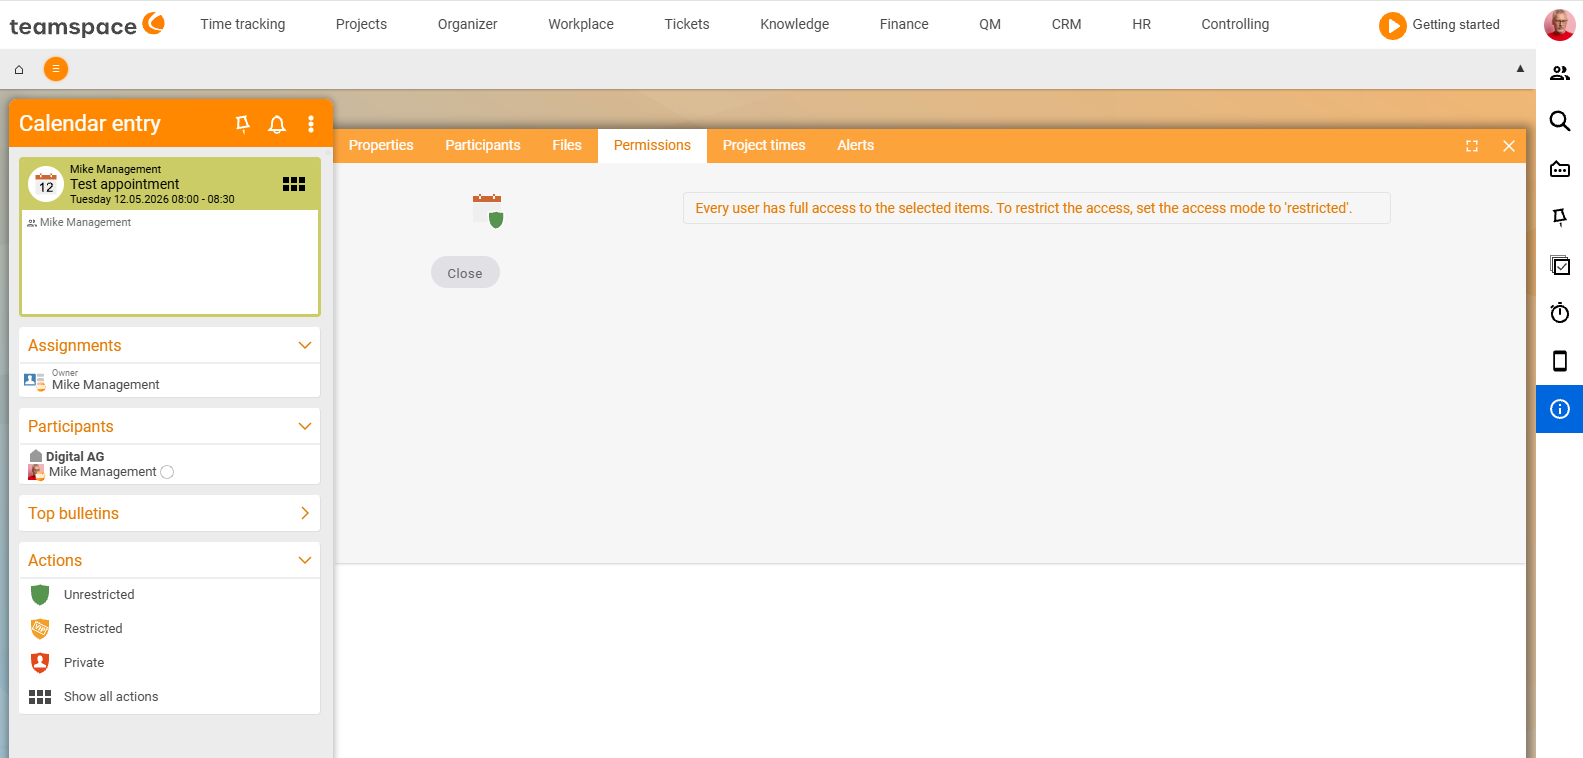
In the Permissions tab you switch between three access modes. The switch runs via the Actions sidebar — when you change to the tab, the sidebar actions change to Unrestricted, Restricted, Private.
Unrestricted: the header says All users have full access to the selected elements. — the appointment is visible to anyone with calendar permission.Restricted: the header changes to Access mode: restricted by access rules. A table with the columnsGroupandAccessshows who has which right. Values:Various,None,Read,Write,Full access.Private: only the owner sees the appointment. Colleagues only see that the time is taken.
In Restricted mode you add a rule by choosing a person or group, setting the right you want, and clicking Add rule. Participants get only Read by default. You can change rules at any time, as long as you have Full access yourself.
Resource allocation – when the appointment is a resource
If the appointment carries a resource schedule rather than a classic appointment — because you have scheduled an employee for a project, say — an additional Resource allocation tab appears. There you see how the resource was scheduled and for what. If the scheduled time is not booked onto the project, teamspace shows the planning in red — a clash or missing time entry.
Move, copy, delete
The Actions sidebar holds the most important actions directly; Show all actions opens the actions modal with the full inventory in four sections:
General:Details,Delete,New alarm,Create ticket.Calendar entry:Move,Copy.Attendance:Accept,Accept tentatively,Decline,Remove,Send email invitation.Time tracking:Book time,Start work.
You delete or move several appointments at once via Enable multiple selection in the three-dots menu Actions at the top right.
⚠ Delete removes the appointment permanently from the active calendar. For recurring appointments, teamspace asks whether only the single occurrence or the whole series should go — read the dialog carefully.
Common problems
Why can’t I change the permission rules?
You can only change rules as long as you have Full access to the appointment yourself. As a participant you get only Read by default — and then the rule table is locked for you.
Why is my resource appointment shown in red?
If the appointment carries a resource schedule and the scheduled time is not booked onto the project, teamspace shows the planning in red — a hint at a clash or a missing time entry. You only see the Resource allocation tab on such resource appointments.
Why does deleting a series remove more than I expected? For recurring appointments, teamspace asks before deleting whether only the single occurrence or the whole series should go. If you choose the series, all occurrences are gone — read the dialog before you confirm.
Common questions & needs
| You want to … | How to |
|---|---|
| See whether a colleague is free | Open the Participants tab — green bar = free, grey = booked, red = clash. |
| Add a participant later | In the Participants tab, search and add via the Actions sidebar. |
| Make an appointment confidential | Permissions tab → Private (owner only) or Restricted with rules. |
| Give a group write rights | Restricted → choose the group, set Write, Add rule. |
| Move the appointment to another day | Actions → Calendar entry → Move. |
| A copy as a template | Actions → Calendar entry → Copy. |
| Book working time onto the appointment | Actions → Time tracking → Book time or Start work. |
| Delete several appointments at once | Enable multiple selection in the three-dots menu, then delete. |
| Turn the appointment into a ticket | Actions → General → Create ticket. |
Related topics
- Create an appointment Calendar How-to
- View & filter appointments Calendar How-to
- Alarms & reminders Calendar How-to
- One calendar, many views Calendar Concept