
A public page shares a piece of content from teamspace by link – without a login, without an account. You need it when a customer should read an instruction, an external partner should view a description, or a list should be available outside your team as well. You create it via the master data of a wiki page, optionally set a validity period and share the resulting link.
Creating a public page
The most precise way is directly on the wiki page – via its own Public pages tab:
- Open the wiki page in the detail manager and switch to the
Public pagestab. - In the toolbar, click New public page (the star/plus icon). The “Interface – Public page” dialog opens.
- Fill in the fields – the only mandatory one is
Name– and click Save.
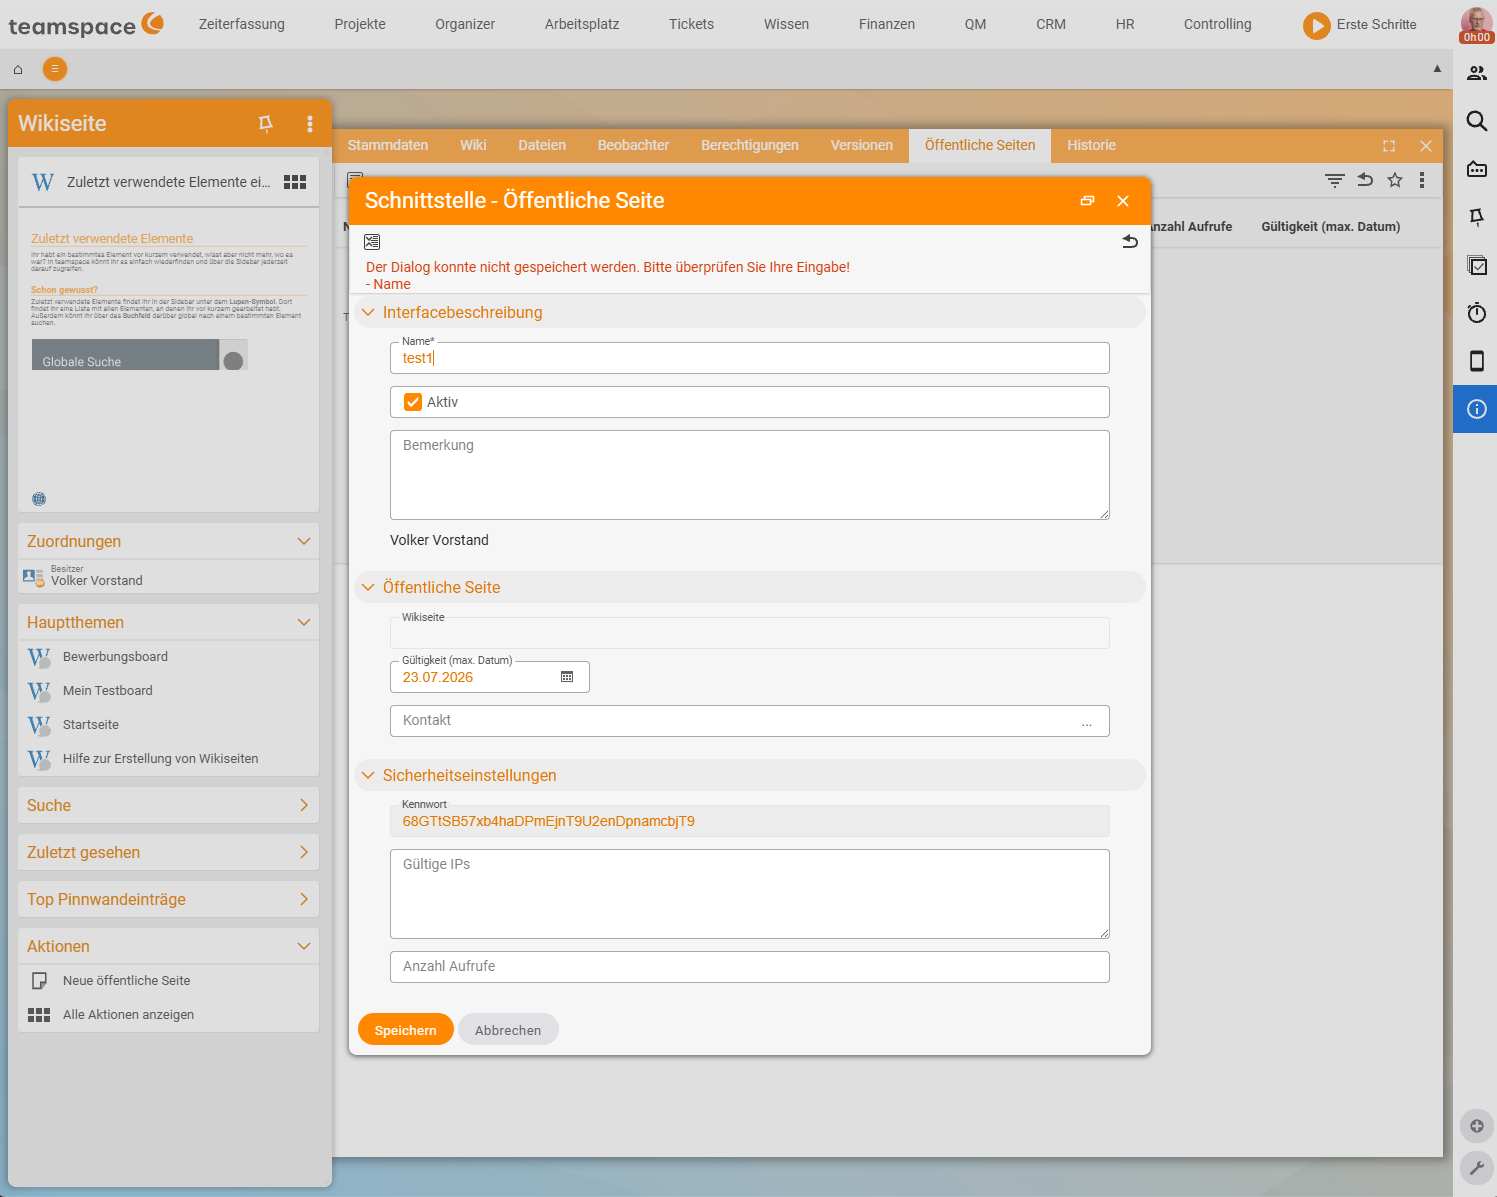
The dialog is divided into three sections:
- Interface description –
Name(mandatory; it appears in the access link and in the list), theActivecheckbox (set by default) and a freeCommentfield. - Public page – the
Wiki pageto be shared, theValidity (max. date)field (see the Setting a validity period section) and aContactyou can store as the point of contact. - Security settings –
Password,Valid IPsandNumber of views(see the Securing access section).
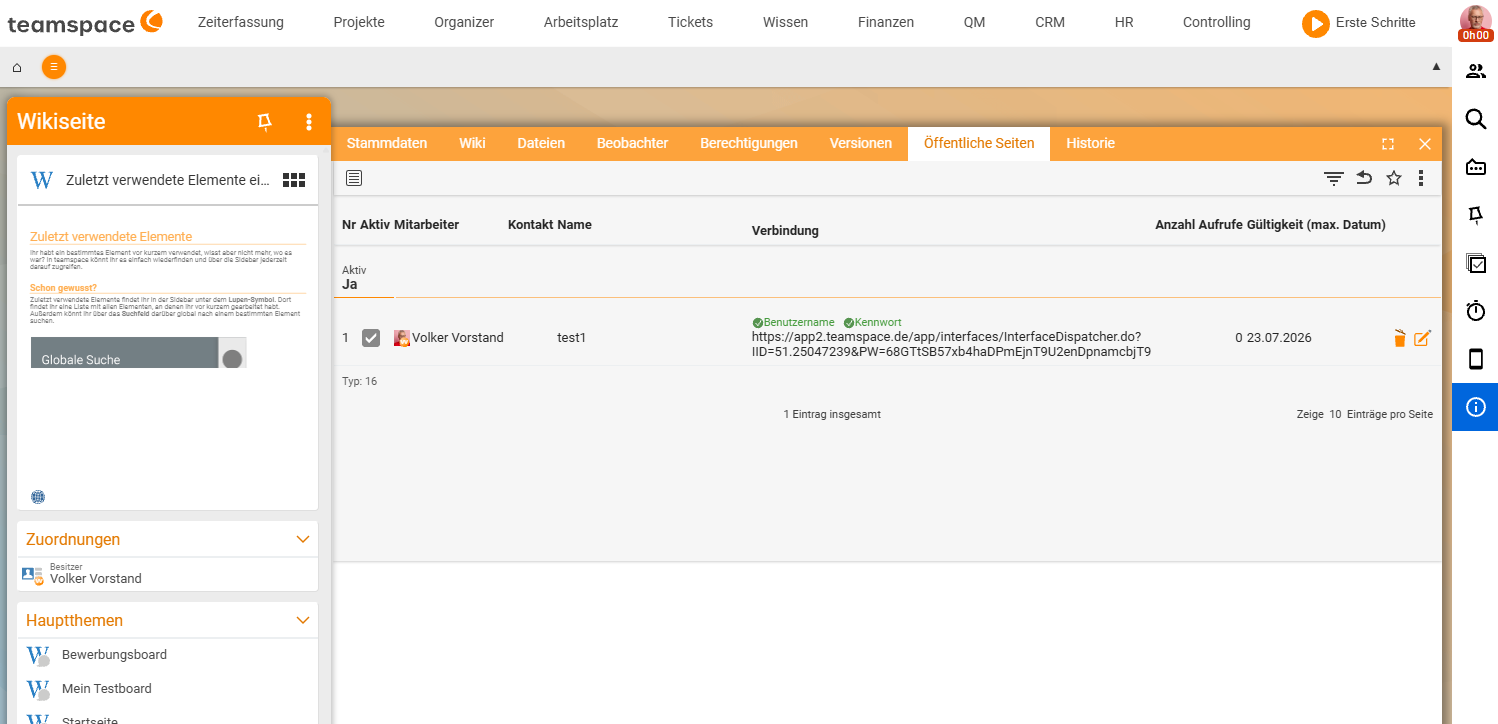
After Save, teamspace creates the public page and generates the access link automatically – there is no separate tick for it in this dialog. You then find the finished link in the same tab in the Connection column: it consists of Username and Password plus an InterfaceDispatcher URL of the form …/app/interfaces/InterfaceDispatcher.do?IID=…&PW=…. You pass this link to customers or external staff.
Securing access
By default a public page is reachable via its link by anyone who knows it. In the Security settings section of the dialog you narrow this down – all three fields are optional and can be combined:
- Password – teamspace automatically suggests a random password when you create the page. Anyone opening the link has to enter it; no password, no access. You can accept the suggestion or set your own. Note: the password sits as the
PW=…parameter in the access link – anyone who receives the full link has it automatically. For a real barrier, share the link and the password separately. - Valid IPs – if you enter one or more IP addresses here, the page can only be retrieved from those networks. Handy when only a specific partner site should have access.
- Number of views – limits how often the link may be opened in total. After the last permitted view, it is used up. teamspace counts the views so far in the
Public pagestab in theNumber of viewscolumn.
The quick way via the master data
If you do not need any security settings, it also works in a single click: in the Configuration section of the wiki page’s Master data, tick the Public page checkbox and save with Save or Save and close. teamspace creates the public page with default values; you can refine it at any time – for example add a password or validity period – in the Public pages tab.
Note: You can create public pages not only from the wiki – almost every module has the star function in the list toolbar. In the wiki, the
Public pagemaster-data checkbox is the direct route, because it targets a single wiki page.
Right required: Making a page public is a right of its own. If you lack it, the
Public pagecheckbox is greyed out and not clickable – then turn to your administration. This is independent of the internal wiki permissions: making a page public means making the content readable via a freely accessible link, even without a teamspace account, while the page is maintained internally in the wiki as normal.
Setting a validity period
A public page is active indefinitely by default. If the link should only be valid for a limited time – for instance until the end of a maintenance season or until an offer expires – you set a validity period:
- On the public page, click the edit icon.
- In the edit dialog, enter an expiry date.
- Save.
Once the date passes, the link becomes invalid – the associated wiki page remains unchanged in teamspace; only the public access falls away.
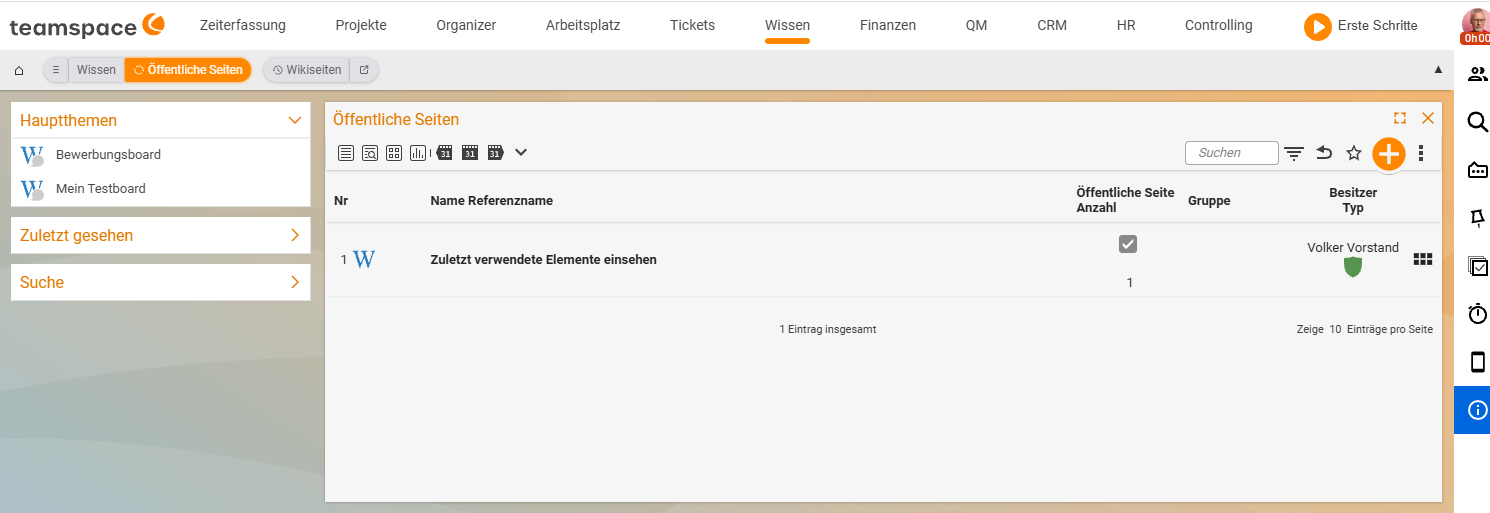
The “Public pages” list
Which public pages your tenant currently has is shown in the list of the same name (a tab in the Knowledge module). It gathers all the pages released from every module in one place – wiki pages, documents, boards, depending on what your team has shared.
This is also where you deactivate a public page without changing the original. The link becomes invalid immediately; the teamspace-internal content stays untouched.
When a public page fits
Three typical cases:
- Instructions for customers. Tom Kraus maintains a maintenance guide as a wiki page, releases it as a public page and sends the Schulz family the link with three months’ validity.
- Docs for external service providers. A service description a freelancer should access, without you setting up a teamspace login for them.
- Onboarding preview. A wiki page with initial information for new employees that you share before their first working day.
In all three cases you keep control: the content stays in the wiki, and the page disappears with the expiry date or a single click.
Important: A public page shows the current view of the software. Changes to the wiki page become visible in the public link immediately – if you link drafts or notes, they are public until you change them or deactivate the page. Read once what it says before releasing it.
Common questions & needs
| You want to … | How to |
|---|---|
| Share a wiki page externally | Public pages tab → New public page, or tick the Public page checkbox in the master data. |
| Get the link | After saving, read it off in the Public pages tab in the Connection column – it is generated automatically. |
| Secure access | In the dialog under Security settings, set a Password, Valid IPs or a Number of views. |
| Time-limit the link | The edit icon on the public page → enter an expiry date (Validity (max. date)). |
| Withdraw a release | In the Public pages list, deactivate the page – the link becomes invalid immediately. |
| See everything that is shared | Open the Public pages list – it gathers all releases from every module. |
Related topics
- Create and edit wiki pages Wiki How-to
- Wiki permissions: controlling visibility Wiki Configuration
- Wiki – introduction Wiki Introduction
- The online company wiki