
iPhone and iPad already support the CalDAV (calendar) and CardDAV (contacts) standards – you don’t need a dedicated client, you simply enter the connection details from your sync profile.
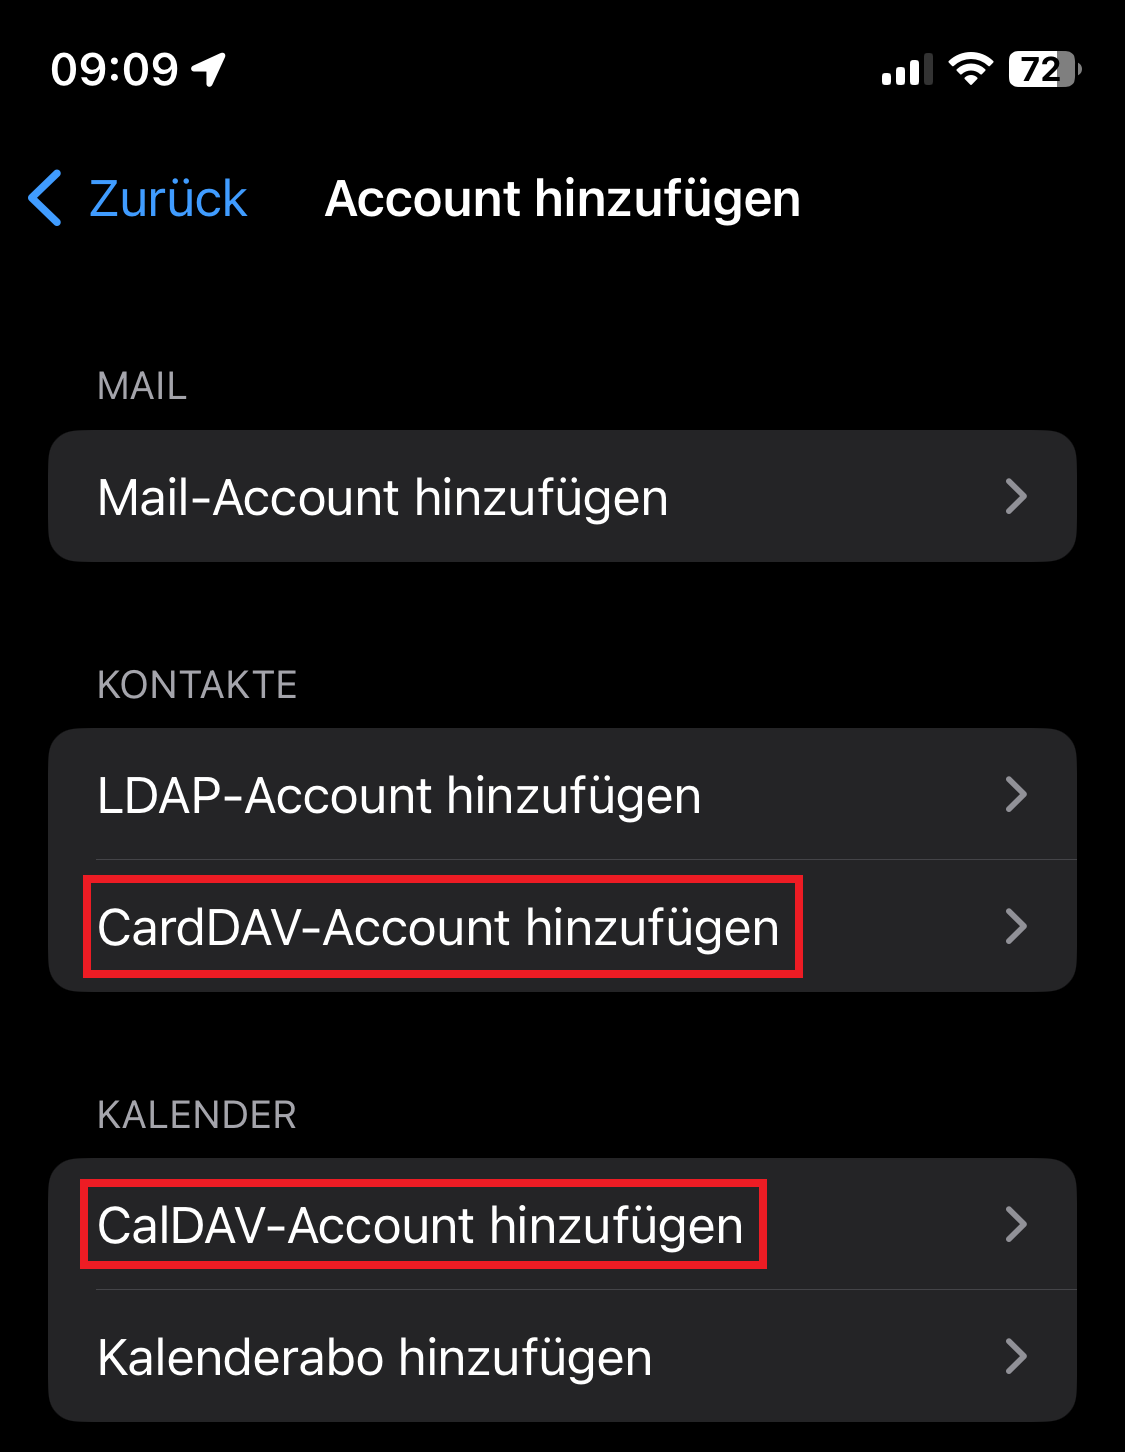
Add an account
- On the iPhone/iPad, open Settings and choose Mail.
- Go to Accounts.
- Tap Add Account.
- Choose Other.
- Now choose what you want to synchronise:
- Add CardDAV Account for contacts,
- Add CalDAV Account for the calendar.
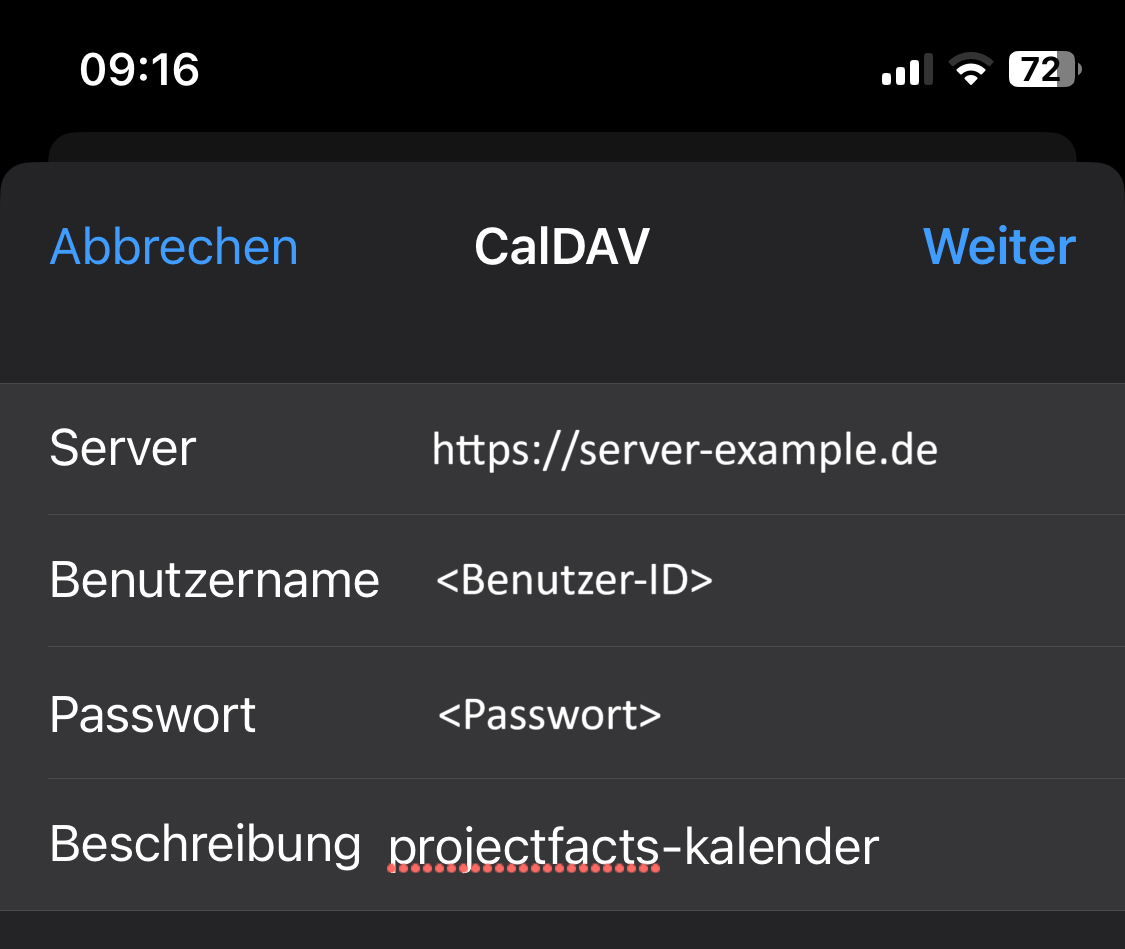
Enter the connection details
- Enter Server, Username and a Description. If necessary, use your device password as the username. Take the server and username from the connection details of your sync profile.
- Tap Next. If the credentials are correct, iOS confirms this with a green tick.
- Choose what should be synchronised and tap Save. The same applies to CardDAV synchronisation.
Check the result
Open your Calendar (or Contacts). For contact synchronisation via CardDAV, select the contacts there. You now see that the Mobile1 profile has been added.
Note: It can take a short moment for synchronisation to finish – depending on your device’s internet connection.
Related topics
- Create a sync profile and a device password teamSync How-to
- Sync calendar & contacts on Mac teamSync How-to
- teamSync – introduction teamSync Introduction