


You connect teamspace to Claude through a connector: enter the address, authorise via OAuth, done. Claude then works in teamspace with your permissions. The desktop app and the web behave identically, and the same procedure carries any other client – only the menus are named differently:
The principle is the same everywhere. Every client has a field where an MCP address belongs, and after that OAuth takes over. All that differs is the route to that field and what it is called – “Connectors”, “Konnektoren”, “MCP Server”. Once you have seen this flow, you’ll recognise it everywhere. Which clients are tested is listed in Supported clients.
Before you start: find your MCP accesses
Personal settings → Devices → MCP configurationsYour personal settings show which MCP accesses are enabled for you: on the Devices tab, the MCP configurations tile shows how many accesses you may use and what they are called.
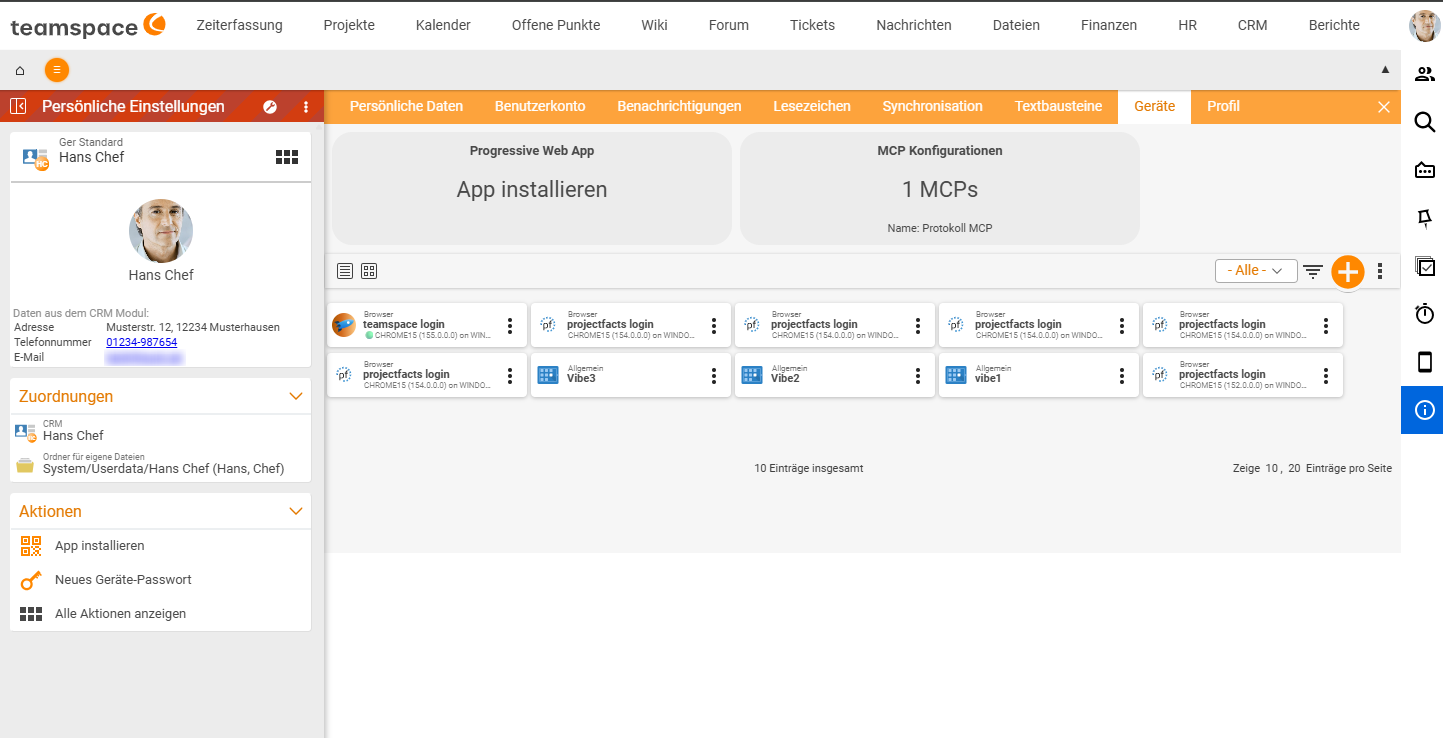
The same tab also holds your device passwords, which you create on the left via New device password – for example for an app you’ve built yourself in a vibe-coding project (see Topic: API). You don’t need one for MCP: you log in via OAuth.
Step 1: Open the connectors
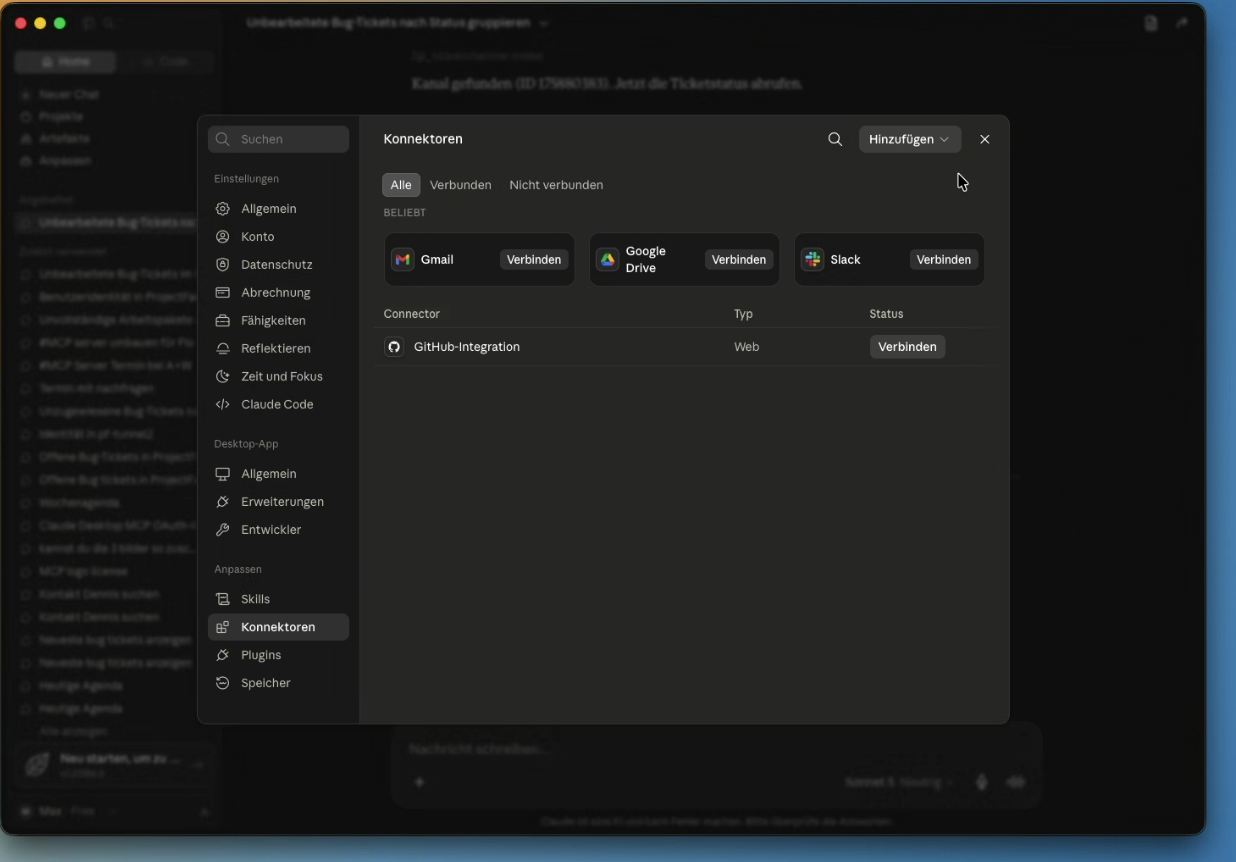
Claude → Settings → ConnectorsThe overview shows popular connectors at the top and, below them, the ones already set up with their status.
Step 2: Create the connector
-
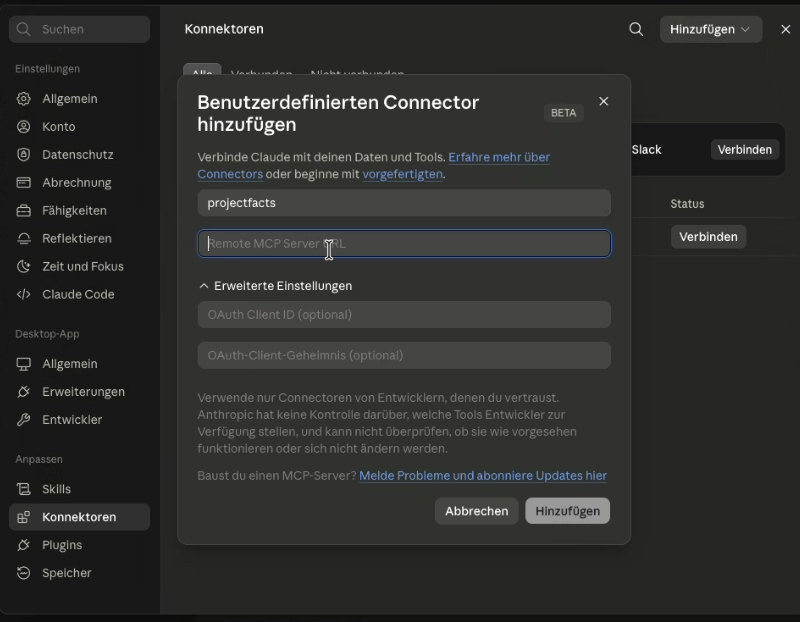
Click Add at the top right and choose Add custom connector.
-
Enter a name by which you’ll recognise the access – e.g.
projectfactsorteamspace. -
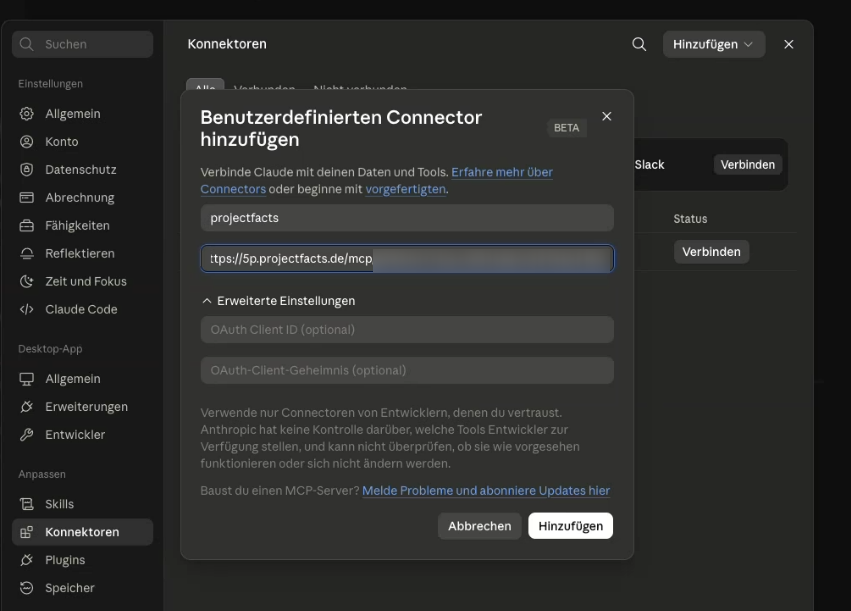
In the Remote MCP Server URL field, enter the address of your access – from your personal settings or from your administrator:
https://<your-tenant>/mcp/<identifier> -
Leave Advanced settings be. The OAuth Client ID and OAuth Client Secret fields stay empty – teamspace registers the client automatically.
-
Click Add.
Step 3: Authorise the access
Claude now takes you to teamspace’s consent screen: Connect with Claude. This is the most important moment of the whole setup – here you decide what the assistant may do.
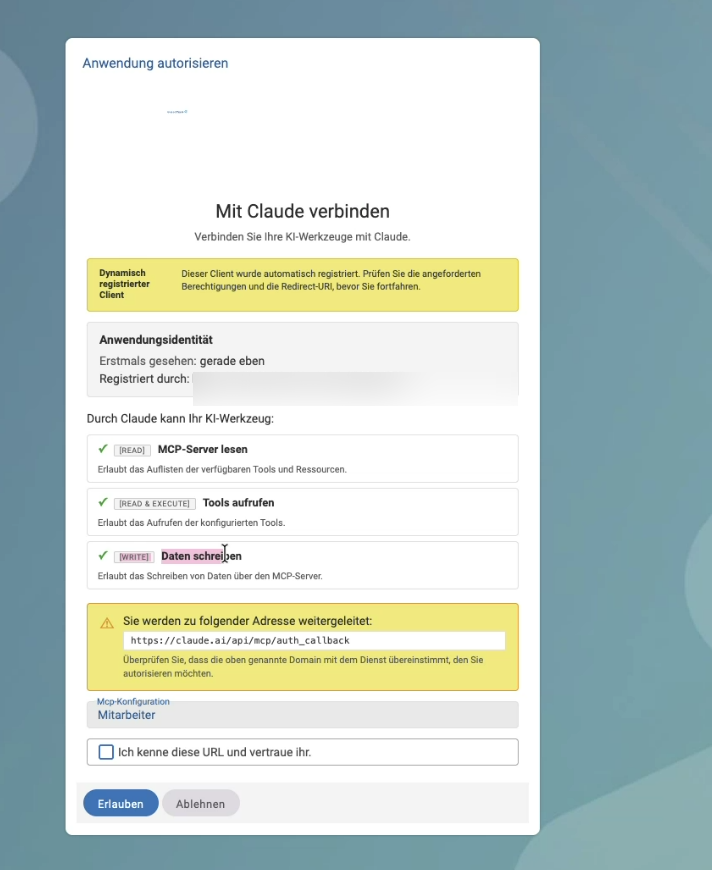
Take a moment for it and check from top to bottom:
- Application identity – Claude appears as a dynamically registered client: it signed up automatically. That is why the yellow notice prompts you to check the permissions and the redirect.
- The three permissions – Read MCP server, Call tools and Write data. What each of them means is covered in Security and permissions with MCP.
- The redirect URI – the actual check. For Claude it must read
https://claude.ai/api/mcp/auth_callback. If the domain doesn’t match the service you are about to connect, cancel. - MCP configuration – the name of the access you are authorising, e.g. “Employee”. This shows you which set of tools you are releasing.
- Tick I know and trust this URL and click Allow.
After that you land back in Claude, the connector shows as connected – and you can get going.
Step 4: Try it out
Ask a question that can only be answered from teamspace. Good ones to start with:
- “Who am I in teamspace?” – the quickest check of whether the connection really stands.
- “What’s in my agenda today?”
- “Show me all untouched bug tickets, grouped by status.”
If Claude answers with real data from your tenant, everything is set up correctly.
Common questions & needs
| You want to … | How to |
|---|---|
| Check that the connection stands | Ask “Who am I in teamspace?”. If your name comes back, it’s working. |
| Use several accesses at once | Set up each as its own connector – one access per address. |
| Withdraw access again | Remove the connector in Claude. In addition, your administrator can revoke the authorisation on the server side. |
| Use the same access on a second device | Repeat the process there – the OAuth consent applies per client. |
| Know everything the assistant can do | Available MCP tools – or just ask it yourself. |
| Use a different client | Supported clients – the process is the same, only the menus have different names. |
When it doesn’t work
| Symptom | Cause and remedy |
|---|---|
| The consent screen doesn’t appear at all | Check the address – usually a typo or a missing character in the identifier. |
| ”Not authorised” after allowing | Your account is not released for this access. The administrator enters you under “Authorised group or person”. |
| The connector connects but finds no tools | The access has no active tools yet – or the Active flag is missing. The administrator sorts out both. |
| Claude can’t find data that should exist | Via MCP, your normal permissions apply. What you may not see in teamspace, you won’t see here either. |
| The redirect URI looks wrong | Don’t confirm. Have the address and its origin checked by the administrator. |
Related topics
- Supported clients MCP & AI agents Reference
- Security and permissions with MCP MCP & AI agents Concept
- Available MCP tools MCP & AI agents Reference
- Introduction to MCP MCP & AI agents Introduction