

Every project – and, where needed, every subproject – has its own directory into which you place any files and subdirectories. This way all project documents sit right on the project, with version control and permissions.
Add files
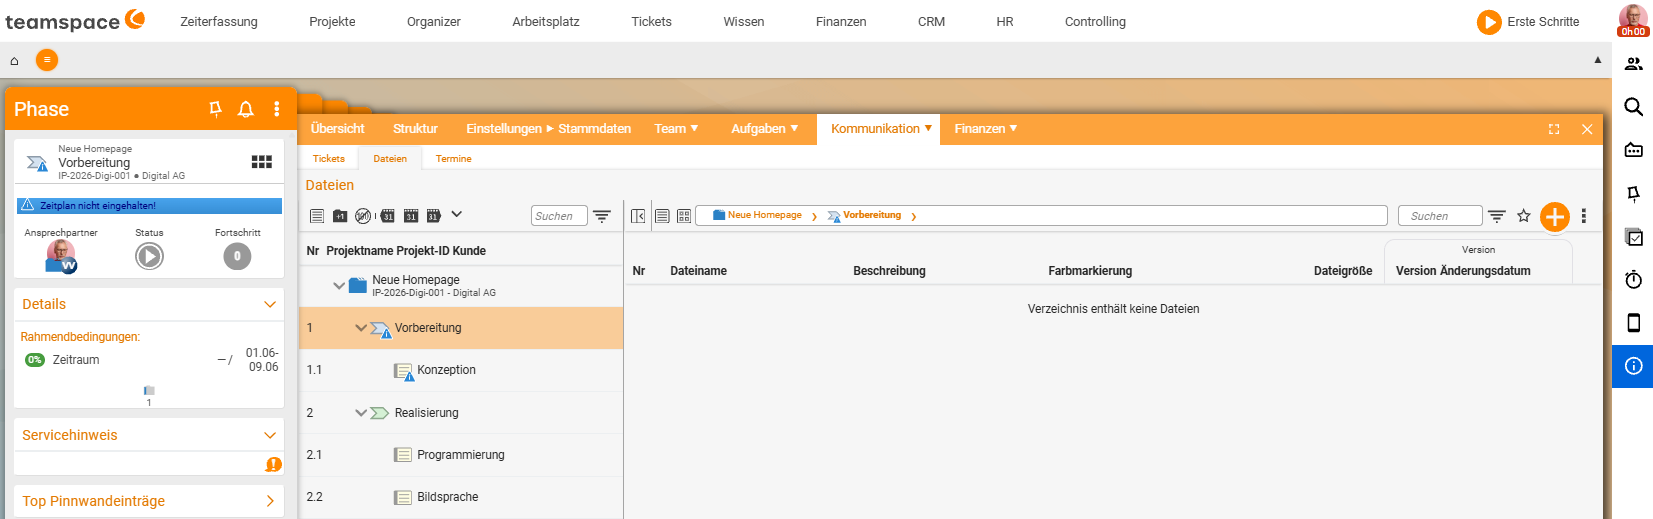
- Click the main project → you land in the detail manager → “Files” tab.
- Drop a file in by drag & drop with the mouse. The directory is created on demand (not in advance), as soon as you drop something in – that is the first version.
- Via the plus you create a subdirectory.
If you drop the same file in again, the version counts up (version control): you can access previous versions and see who worked on a document and when.
Synchronised vs. own directories
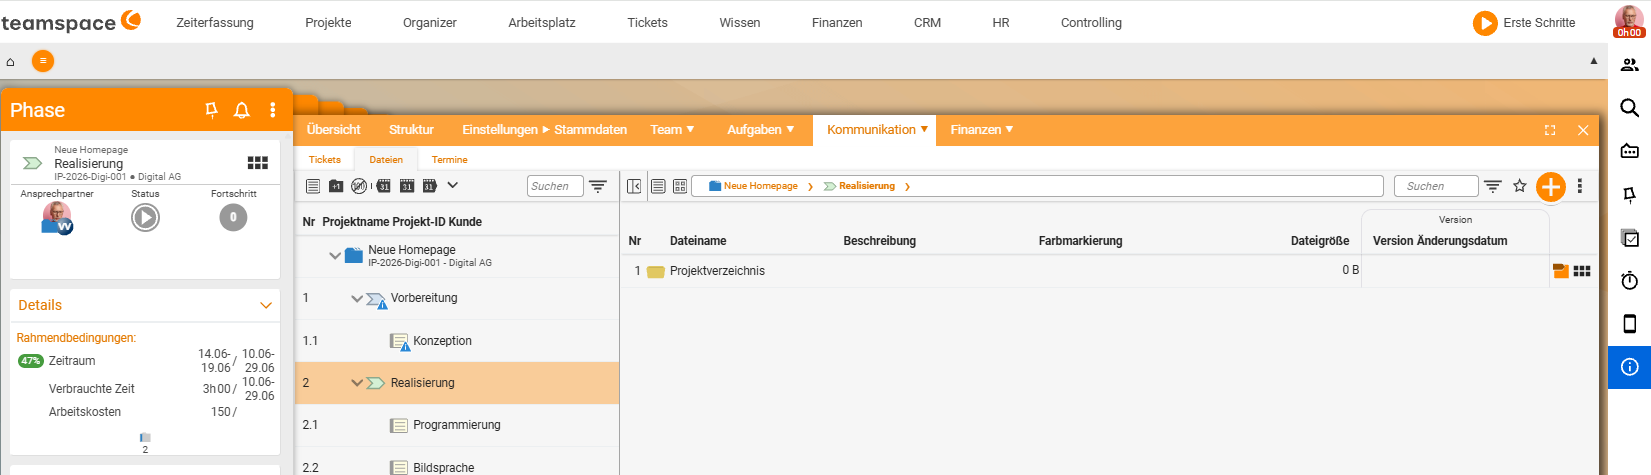
By default, main and subprojects share the same directory – the same files are visible everywhere. You switch between the levels via a small symbol.
If you need an own directory for a subproject:
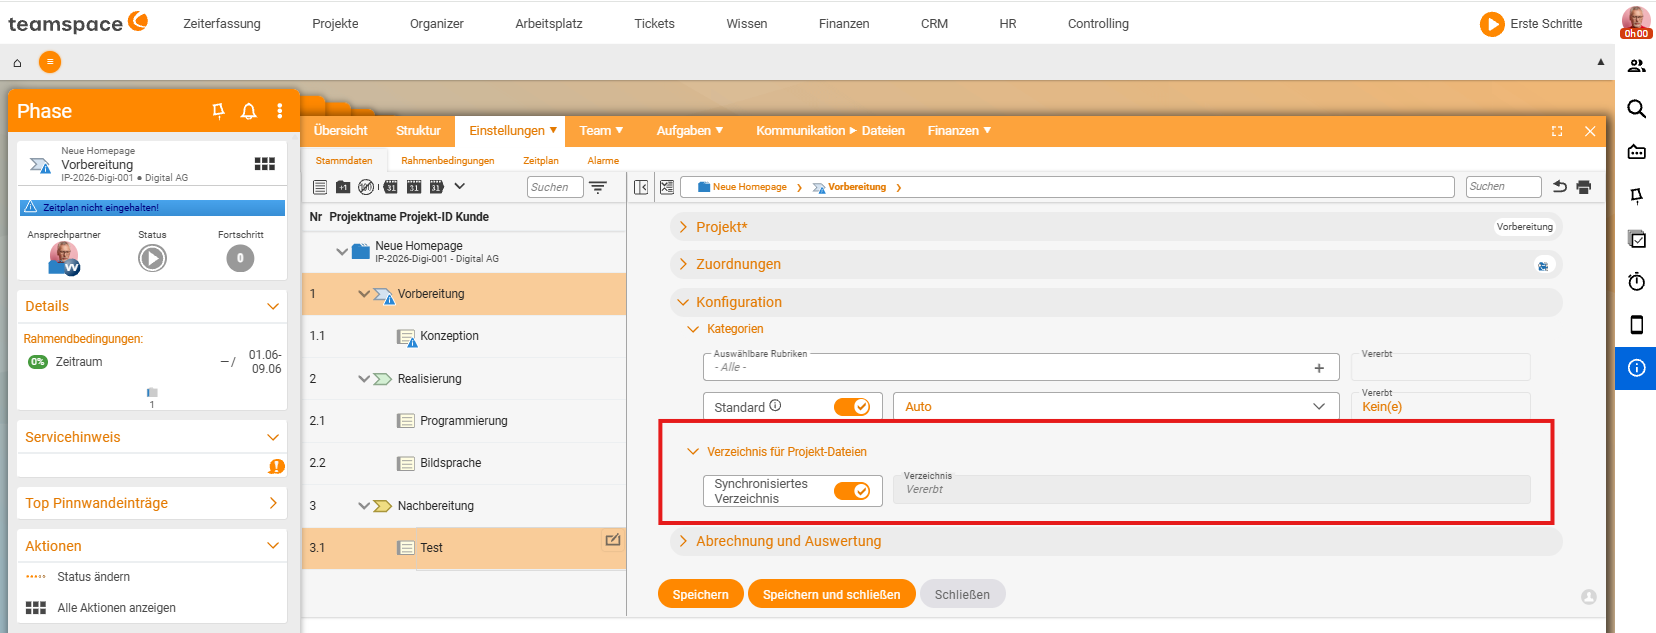
- Go into the subproject (e.g. “Consulting”) → master data → “Directory” field.
- Choose an explicit directory or “Synchronise directories” → Save.
teamspace then creates an own (initially empty) directory for exactly this subproject; in the main project it appears as a subdirectory.
Colour coding: A project directory is blue, a manually created directory yellow. You can create as many yellow ones as you like; the blue ones synchronise. This function is very specialised – most people do not need it.
In the “Structure” view you can show “Files” via a setting and see which element has its own directory and which only links to the main directory.
Edit Office in the browser
You edit files directly in teamspace when the format allows it – particularly well with Word and Excel:
- Push a Word or Excel file in → from there start Office → when you save in Office it is saved straight back to teamspace (no download/upload needed).
- Via “New document” you create files from stored templates. Templates can insert project content (e.g. the project name) automatically via replacement fields – “smart documents” with Word and Excel.
Permissions per file and directory
In addition to the project rights, you assign individual permissions per file and directory. By default they inherit the rights from the next higher element (the project); if you switch to “restricted”, you define exactly who may see a directory (e.g. a subdirectory “confidential documents” that only certain people can see).
Several files at once
Via the three dots → multiple selection you can move files, delete them, download them as a Zip file or mark them for sending (afterwards retrievable in the mail or in the ticket).
Notes
- Symbolic links (symlinks) point to an original file that exists only once (e.g. a link to the current manual).
- General file management – beyond projects – is in the topic File management.
Common questions & needs
| You want to … | How to |
|---|---|
| Store a file on the project | Main project → detail manager → “Files” tab → drag the file in by drag & drop (the directory is created on demand). |
| View older versions of a file | Drop the same file in again – the version counts up; you can access previous versions and see who worked on it and when. |
| An own directory for a subproject | Subproject → master data → “Directory” field → explicit directory or “Synchronise directories” → Save (blue = project directory, yellow = manual). |
| Edit Word/Excel directly in the browser | Push the file in → start Office; when saving it is saved straight back to teamspace (no download/upload). |
| Create documents from templates | Via “New document”, create from stored templates; replacement fields insert project content (e.g. the project name) automatically. |
| A directory only for certain people | Set the permission per directory to “restricted” and define who may see it. |
| Edit several files at once | Via three dots → multiple selection, move, delete, download as a Zip or mark for sending. |
Related topics
- Project views: structure and details Project management Reference
- Topic: File management File management
- Project documentation