

There are five ways to create a project. In practice, though, around 99% of projects arise from an order – that is the fastest way and the most convenient for later billing. After that, every route continues in the same way (enter budgets, schedule staff).
Way 1: Project from an order (the standard case)
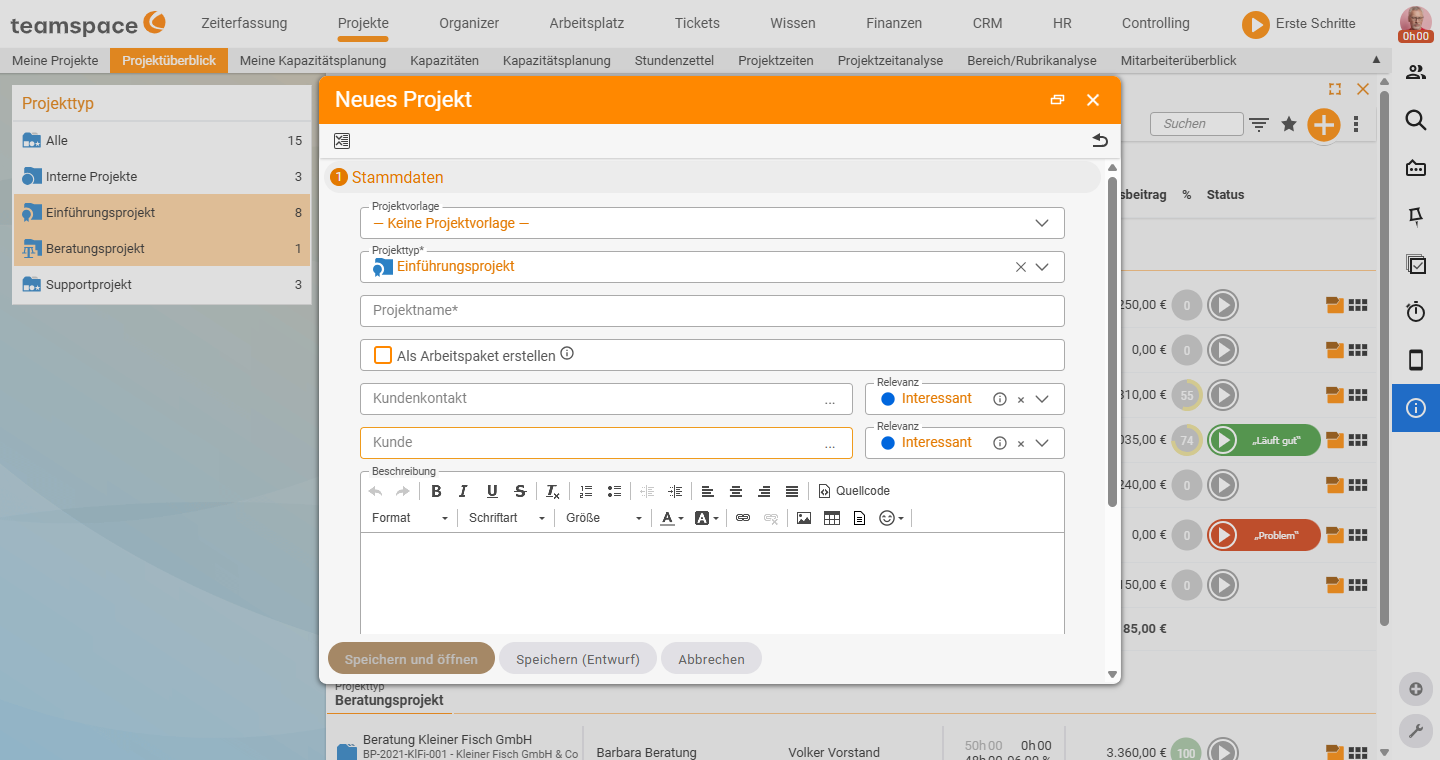
From an order you create a complete project at the push of a button: teamspace interprets the order items as work packages and the order sections as subprojects. Customer, budgets and the key schedule data are carried over.
The advantage: responsibility stays cleanly separated – commercially it sits with the order (back office), operationally with the project (assignees and project lead). And later billing runs without any media break.
- Open the order (e.g. under Invoicing → Orders).
- In the action box choose the action “Create project” – alternatively via the order’s context menu (the “chocolate bar”).
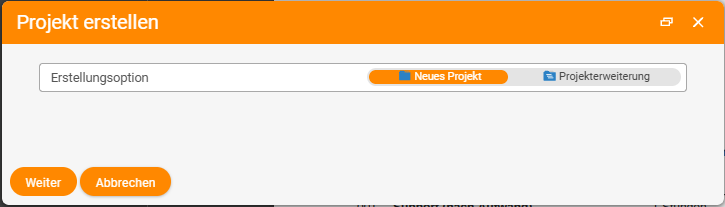
- teamspace asks for the creation option: “New project” or “Project extension” of an existing project. Choose “New project”, then the creation dialog opens – customer and contractor are already pre-filled from the order; above all, adjust the name.
The finished project contains the subprojects with their carried-over budgets. Items that trigger nothing operational (e.g. a pure licence item) can be set in the order so that no work package is created from them. All that remains open are the date (when) and the assignee (who).
Way 2: Project from a template
A template creates not only the structure but also brings along open items, files and further content. You create templates in the configuration or save an existing project as a template.
Create a template: Configuration → Projects → + → "New template". Choose the template type (e.g. “Main project template”), a project type (e.g. “internal project”) and a name. Especially useful is the reference date: if you activate it, teamspace asks for a date for an occasion when you create the project (e.g. “trade-fair start”) and calculates all dates relative to it.
Apply a template: Projects → "New project" → choose the template in the selection box → choose the customer → specify the reference date (the default is “today”). teamspace fills all fields relative to the date and copies the complete project including files.
Way 3: Copy a project
If you have already done something similar, copy it: in the project overview find the project → context menu → “Copy project” → give it a new name.
Way 4: Convert a subproject into a main project
Sometimes a subtree becomes a project in its own right. Here is how to turn a subproject into a main project:
- Open the subproject’s context menu → “Convert to main project”.
- Choose a project type / project ID – the generation of the unique project number depends on it.
- Give it a name and optionally a description → Save.
The new main project takes over all children (subprojects, milestones, booked time); in the original project the subtree is removed.
Note: Converting may require administrator mode. Activate it via the cog in the project structure manager – when the mode is active, the cog turns red.
Way 5: Empty project by hand
The most laborious variant, which occurs rarely in practice – acceptable above all for internal projects: Projects → "New project" without a template → give it a name → choose the customer → Save. You then create the structure, the order link and everything else manually.
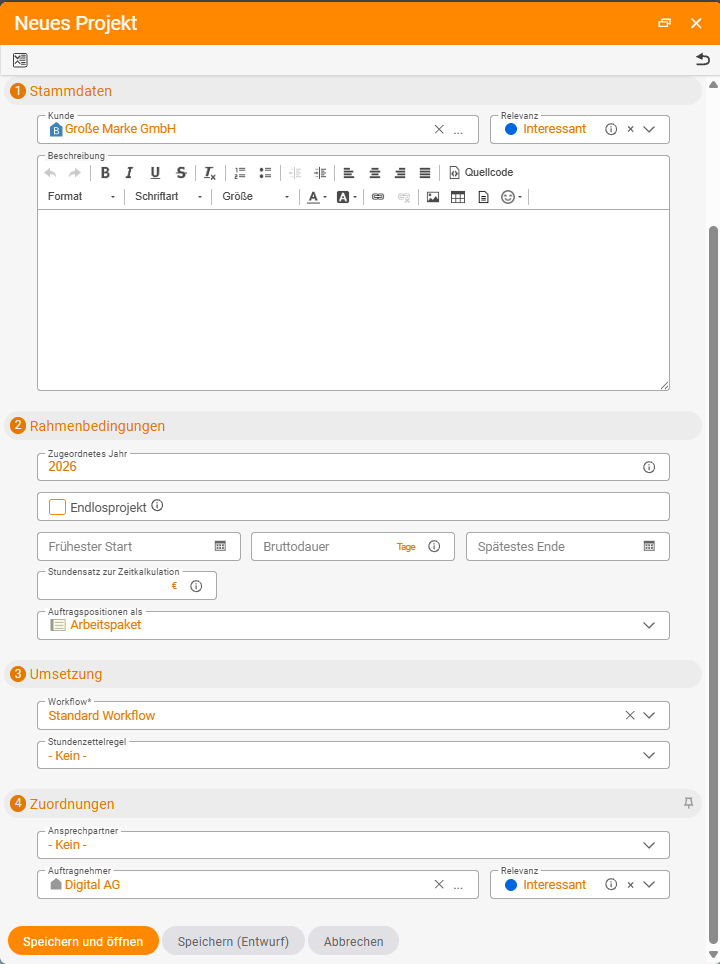
Fields in the creation dialog
Regardless of the route, you will find these fields:
- Project template – supplies the basic settings (structure, milestones, resources).
- Project type – mandatory field; determines workflow, approval rule and the project number (see Set up project types and directories).
- Name and directory (storage location).
- Contact / customer organisation for customer projects (better taken from the order, then pre-filled).
- Description and the schedule key data (changeable later).
- Continuous project for ongoing tasks without a fixed end.
- Save as a draft or via “Save and open” and set the status to “In progress”.
Adjust projects
“Adjusting” means: changing the basic data of a project, subproject or work package (name, description, customer, budget). Two ways:
- In the structure view you edit fields with a triangle directly (above all the parameters/planning data).
- In the detail view → master data you change all the data of a single element. Via the mini structure navigation in the detail manager you jump between elements without going back to the structure view.
Move projects
“Moving” means two things:
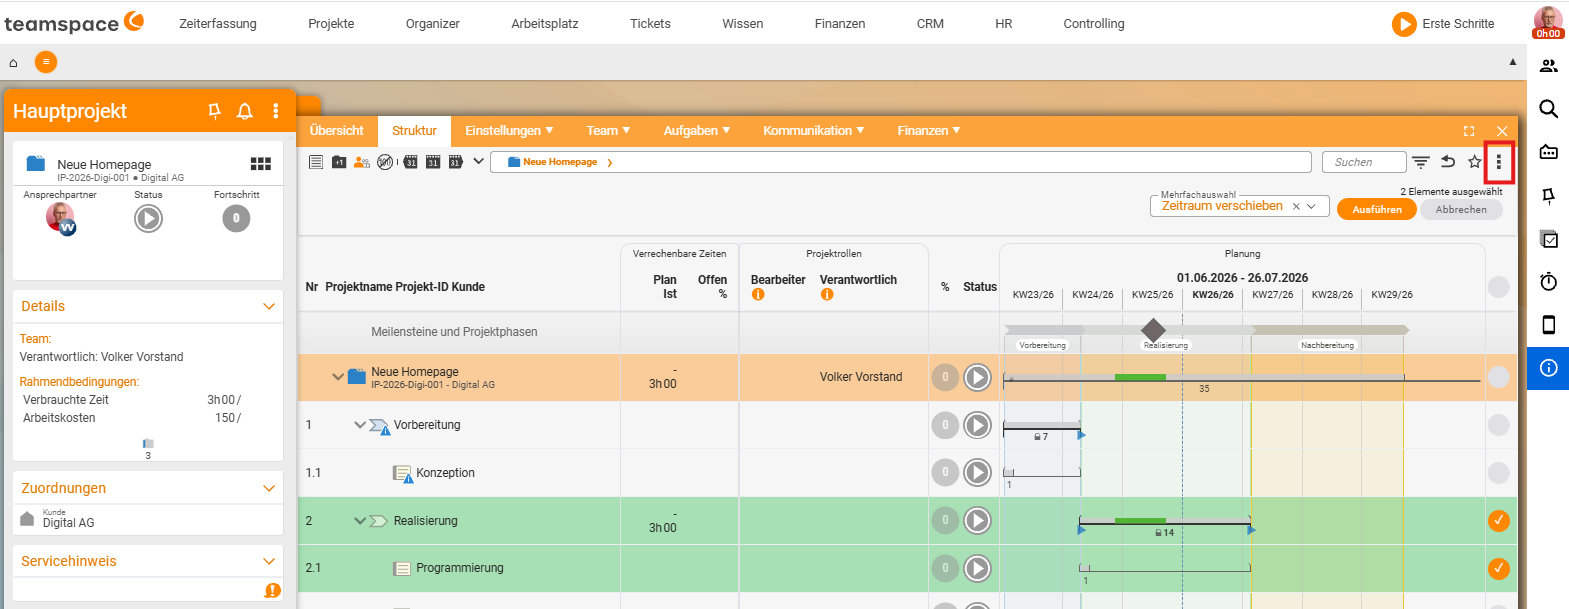
Move in time: choose the element → context menu → “Move time period” → specify the number of days (positive = later, negative = earlier). teamspace asks whether subprojects, resource planning and milestones should move along. This is especially valuable with complex trees.
Re-attach structurally (into another project): via the multiple selection (at the top) → “Move” → choose the element or subtree → “Execute” → choose the target (your own project appears in yellow, other projects are selectable too). If the target has a set date, teamspace slots the elements into the timeline accordingly.
Notes
- For later billing, enter an order on the project – it determines hourly rates, the invoice recipient and the billing date.
- Completely new to project management? The guided exercise walks you step by step through your first project.
Common questions & needs
| You want to … | How to |
|---|---|
| A project from an existing order | Open the order → in the action box choose “Create project” → choose the creation option “New project” and adjust only the name. |
| A project with a ready-made structure and content | Create it from a project template (Projects → "New project" → choose the template); the reference date, which calculates all dates relative to it, is useful. |
| To set up something similar again | In the project overview find the project → context menu → “Copy project” → give it a new name. |
| To make a subproject a project of its own | The subproject’s context menu → “Convert to main project” → choose project type/project ID, give it a name → Save (if necessary administrator mode via the cog). |
| An empty project by hand (e.g. internal) | Projects → "New project" without a template → name → customer → Save; build the structure manually afterwards. |
| To change a project’s basic data (name, budget, customer) | Edit fields with a triangle directly in the structure view, or in the detail view → master data. |
| To move a project later/earlier in time | Choose the element → context menu → “Move time period” → specify the number of days (positive = later, negative = earlier). |
| To re-attach a subtree into another project | Via the multiple selection → “Move” → choose the element/subtree → “Execute” → choose the target. |
| A pure licence item not to create a work package | In the order, set the item so that no work package is created from it. |