
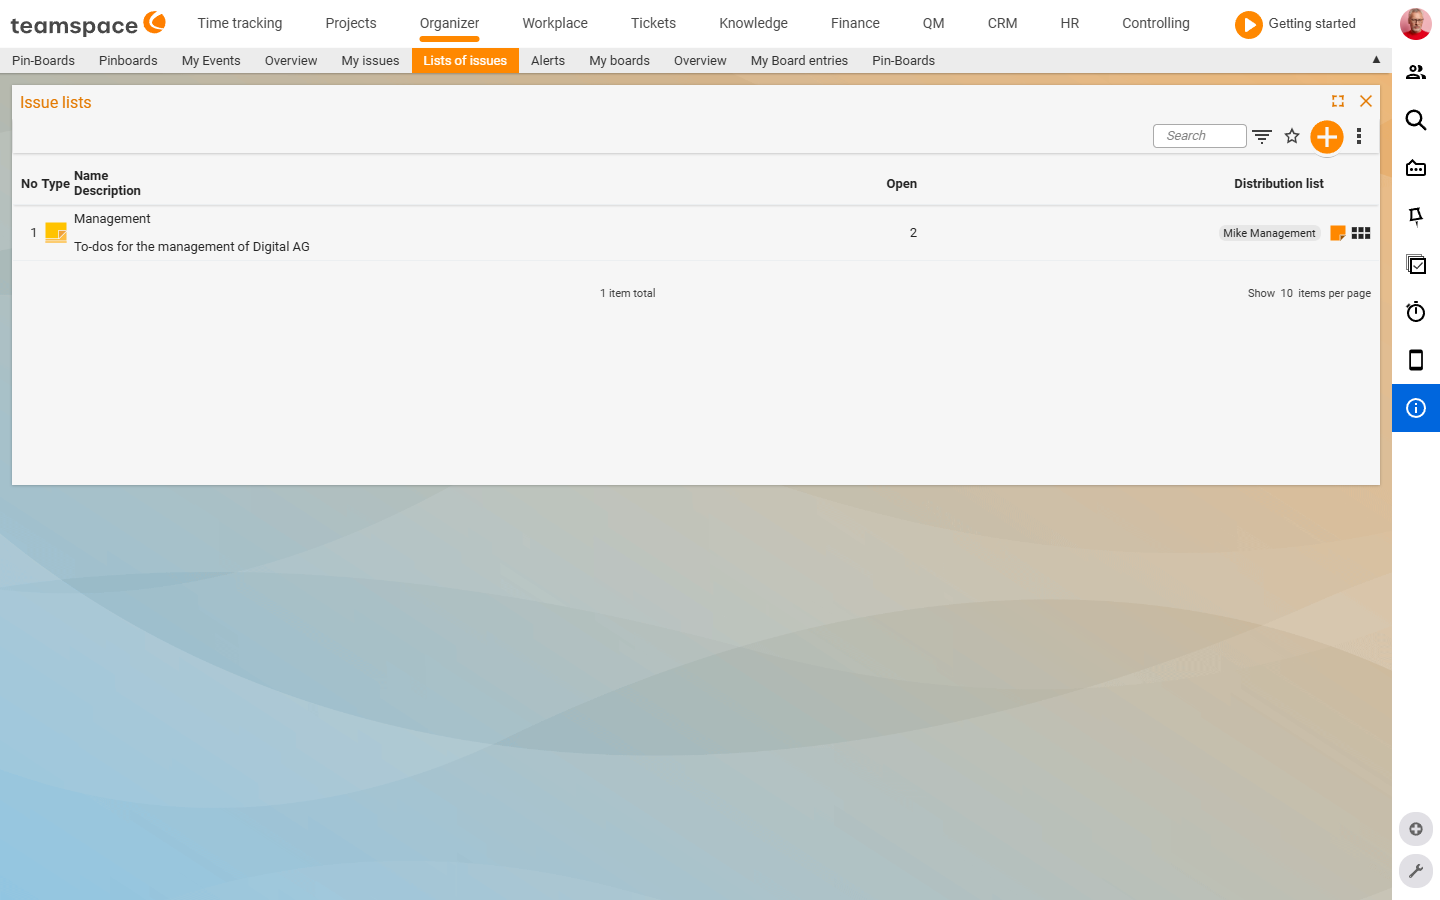
An open-items list bundles items around a topic and makes them accessible to a group of colleagues via a distribution list. The item itself stays independent – it can be in several lists at the same time and attached to a project, a work package or a ticket. If it is marked as done in one place, it is done in all lists. Under Organizer → Open-items lists you see every list whose Distribution list* you are part of.
What makes up a list
- As many as you like. You can create any number of lists.
- Multiple assignment per item. An open item may sit in several lists at once.
- The distribution list decides visibility. Only users in the
Distribution list*can see the list. - Assignee is independent. Whoever can see the list is not automatically the assignee of the items it contains.
- Done is global. An item marked as done is done in all lists – one row, one status.
- Archivable. A finished list disappears from the active overview but stays retrievable.
Create a new list
- Go via
Organizer → Open-items lists. - Choose the
New listaction (via the+button or the creation drop-down in the toolbar). - You are automatically entered as the first user in the
Distribution list*. You add further users via the plus icon in the distribution-list field. Name*andDistribution list*are mandatory, plus an optionalDescription.- Save and close creates the list – nothing more is needed to set it up.
Organizer → Open-items lists → New listAdd items to a list
Three ways to assign an item to a list:
- When creating it. In the
Open itemcreation dialog you open theAssignmentssection and select one or more lists in theListsfield via the+button. An item may sit in two or three lists at the same time. - From the item’s detail manager. The
Master datatab carries the sameListsfield – you add any number of lists afterwards. - Directly in the list. Open the list, switch to the
Open itemstab and create the item via the+button – it is automatically attached to this list.
The quickest way to gather existing items from several sources is via multiple selection: the three-dots menu carries the Assign list action, which assigns several lists to a selection at once.
Work through a list
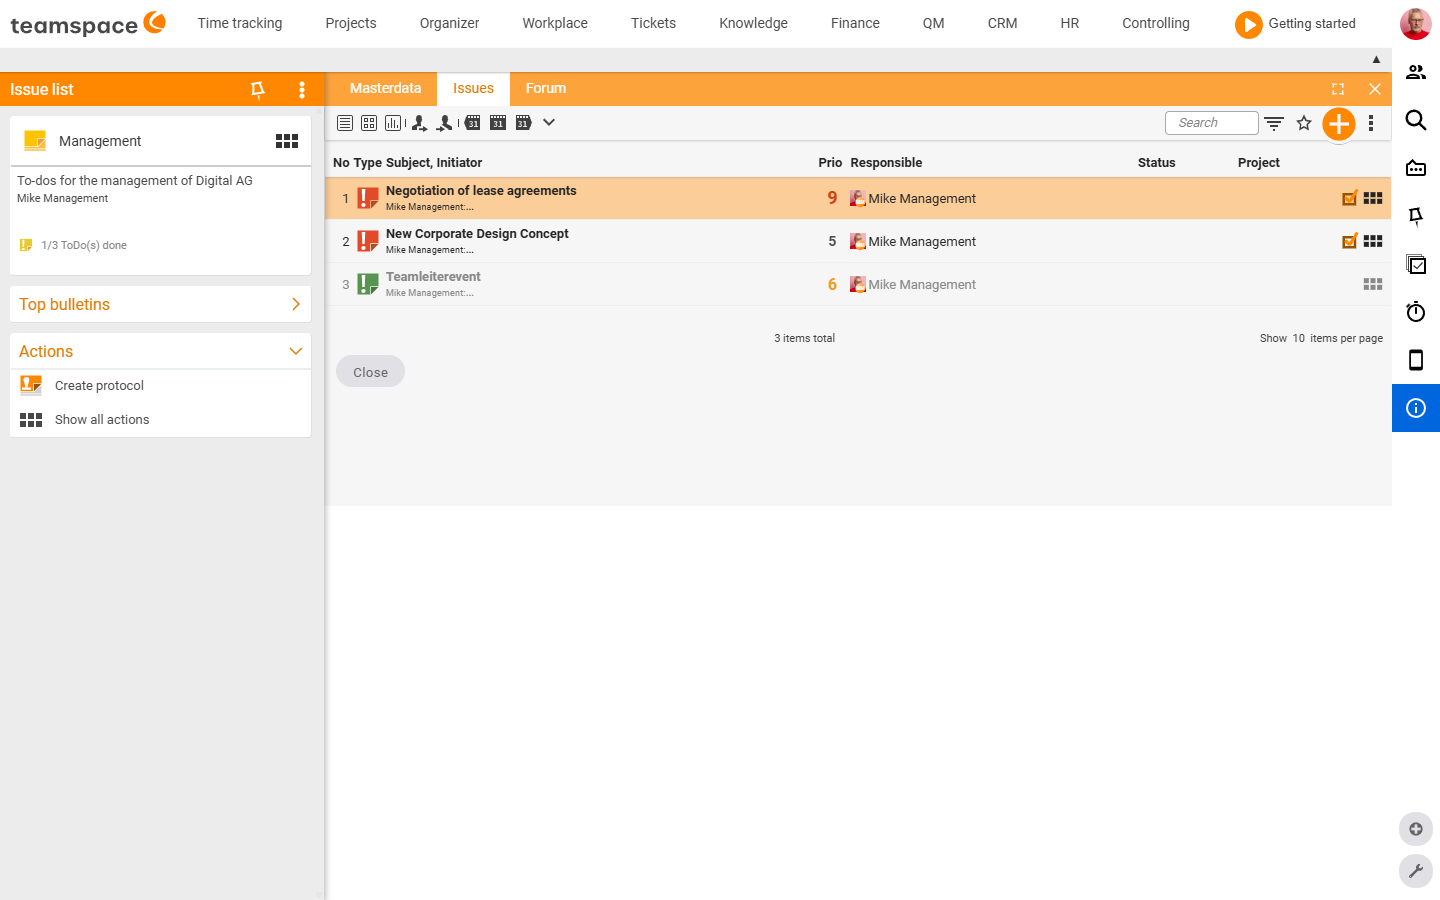
A click on the list name opens the list’s detail manager with three tabs: Master data, Open items, Forum. In the Open items tab you see all items in the list with the columns No, Type, Subject, Originator, Prio, Assignee, Status, Project. You set the tick directly from the row – the item is immediately done everywhere it is attached. In the left sidebar the status block shows progress as <x>/<y> ToDo(s) done.
Create minutes for a given date
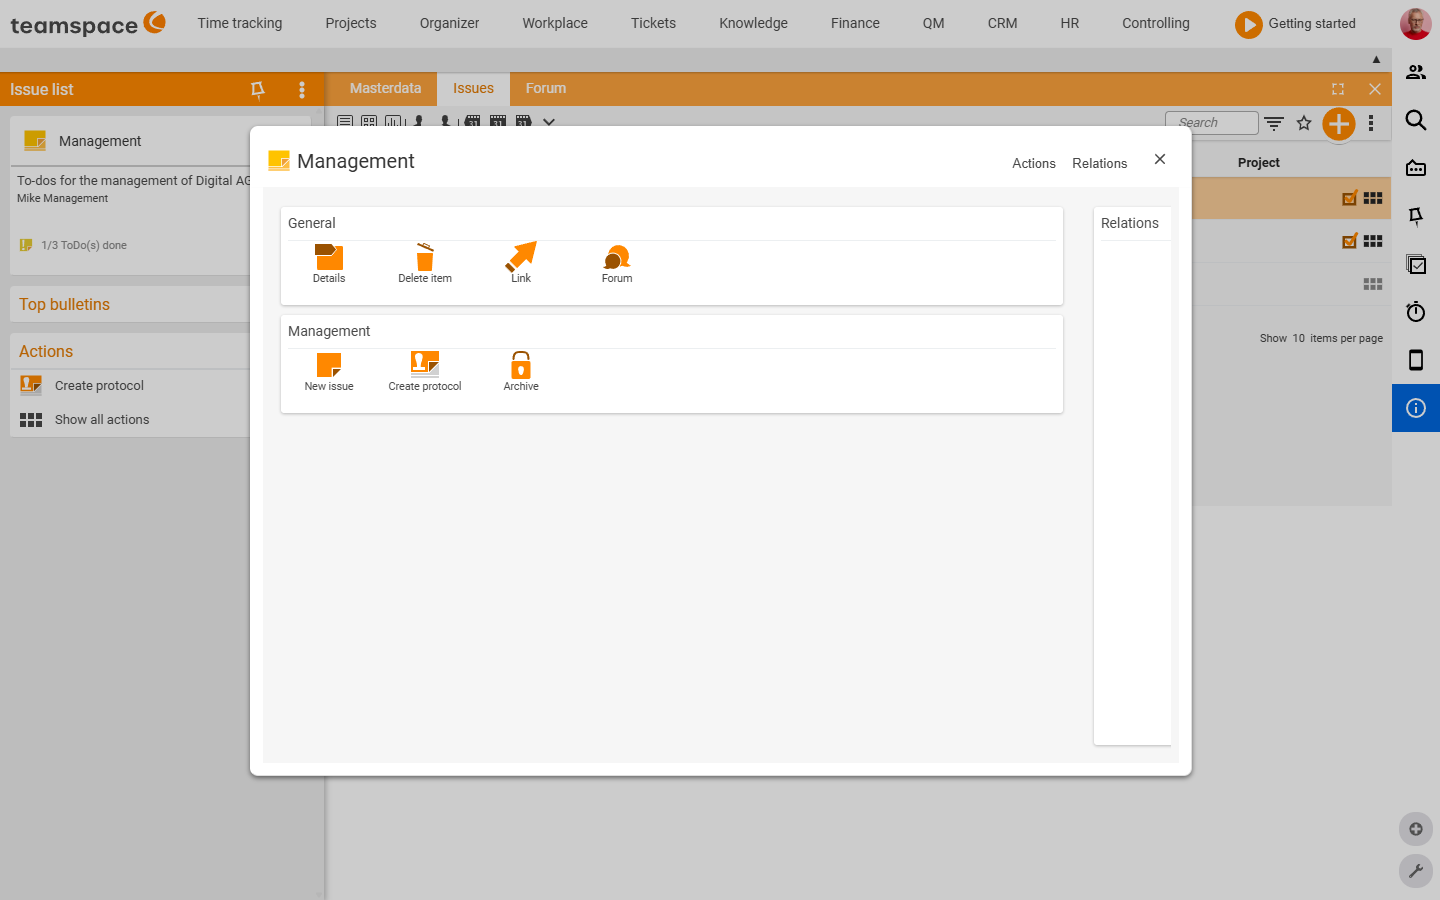
With minutes you freeze the state of the list at a given date. Via the three-dots menu Actions (the Management section) you trigger Create minutes. After that all completed items drop out of the running view – but they remain retrievable in the minutes.
Here is how it works in practice: you work through the list, create minutes, and then add new items afterwards. Which items were open or done at which point in time stays traceable – ideal for recurring meetings or fixed maintenance cycles.
Note: Completed items are still visible on the day the minutes are created (because the date is the same); from the next day on they only appear in the minutes. The running list stays uncluttered, the history complete.
Example: one list across several projects
Lists are the right tool when a stack of tasks does not gather around one project but around several. Example: every two weeks you go to the data centre and do various things there for various customers in various projects.
- Create a list Data centre.
- In each customer project you create an open item and attach it additionally to this list – e.g. Install server in the customer project Licht, Check backup in the maintenance project.
- At the data centre you work through the Data centre list. Every completion is immediately visible in the corresponding project too, because it is the same item.
- One set of minutes per visit documents what was ticked off that day.
Maintain the distribution list
In the list’s Master data tab you change the Distribution list*. You add user chips via the plus icon and remove existing ones via the × on the chip. Only users in the distribution list can see the list – whoever drops out loses access but keeps the assignee status on the individual items.
Multiple-selection actions
Via the list’s three-dots menu you reach actions that you apply to several items at once:
- Enable
Multiple selection– checkboxes appear per row. Mark as done/Mark as not done– closes a series of items together or reopens them.Assign assignee– gives the selection a common assignee.Assign list– attaches the selection to further lists.Assign project/Project relevance– connects the selection to a project.Create survey/Pin to pin board– routes the selection on to other tools.PDF– exports the selection as a PDF.
Archive a list
Once a list is finished, you trigger Archive in the Actions dialog (the Management section). The list disappears from the active overview but stays retrievable. The items it contains keep their status – whoever was the assignee stays the assignee.
Common questions & needs
| You want to … | How to |
|---|---|
| Collect tasks for a meeting | Create a list, distribution list = participants; tick off during the meeting, then Create minutes. |
| Share a list with colleagues | In the Master data tab add users to the Distribution list* – only distribution-list members can see it. |
| Keep the same item in several lists | In the Lists field choose several lists – completion applies everywhere at once. |
| Capture the state at a meeting | Create minutes freezes the current state at the date. |
| Work through tasks across several projects | Create a central list and attach project items to it as well (the data-centre example). |
| Get a finished list out of the way | Via Actions → Archive – it stays retrievable. |
Related topics
- My open items: create and work through (with video) Open items How-to
- Open items – introduction (with video) Open items Introduction
- Open items in projects & on the work package Open items How-to
- Task management tool