

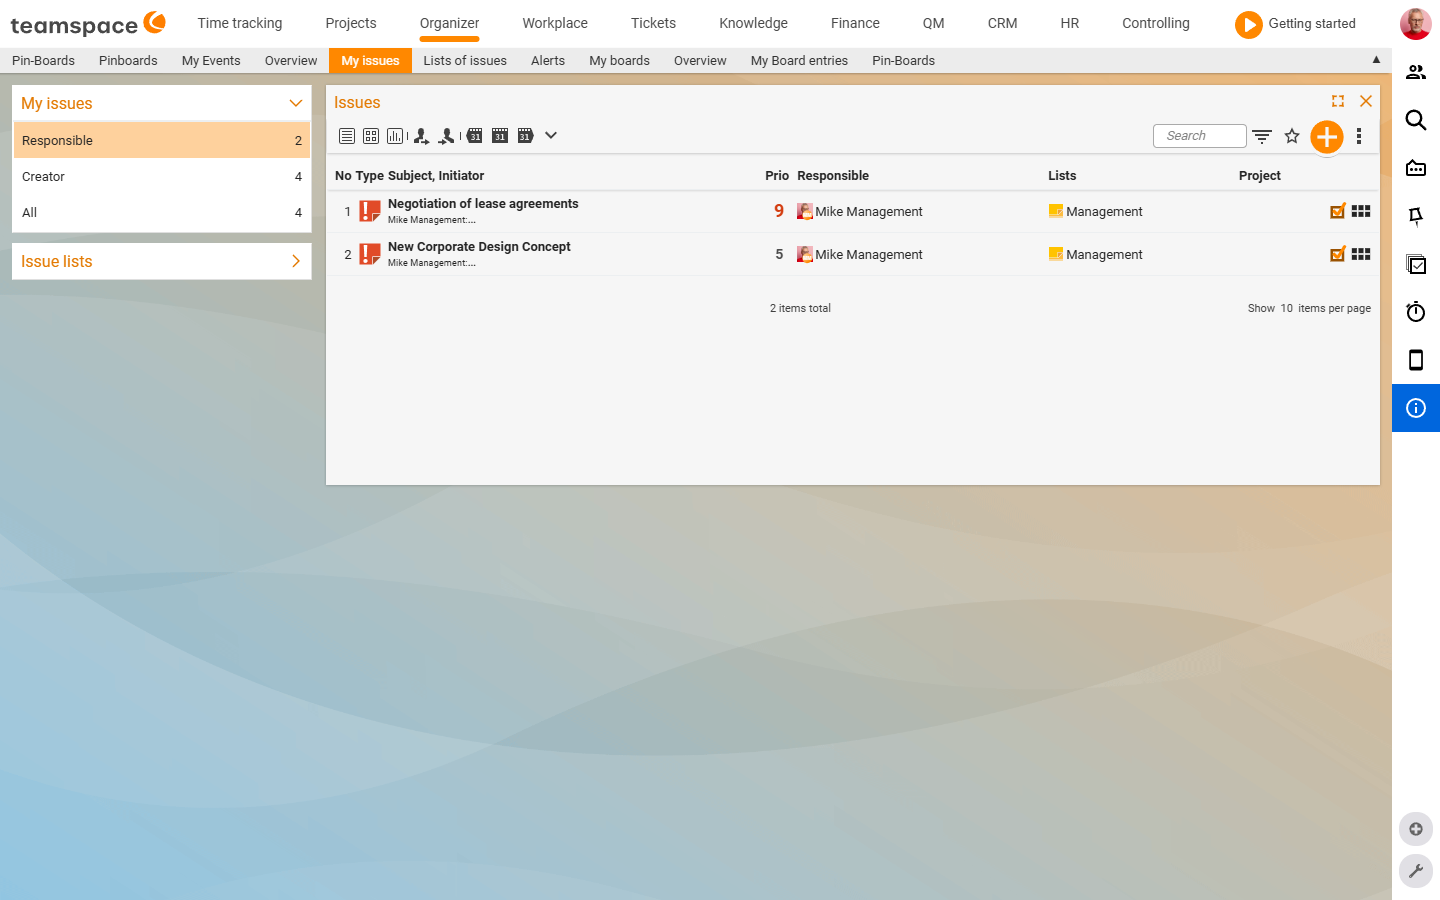
Under Organizer → My open items you see every open item you are attached to as an assignee or creator. The default sorting is by Due date. Items completed today stay visible – you see at a glance what is done and what is still to do. The row colour (red, yellow, green) tells you the status without having to open an item.
Create an item
- In the toolbar at the top right, click the
+button and chooseNew open item. TheOpen itemcreation dialog opens with theMaster data*section. - Enter the
Subject*(e.g. Record the open-items video). - Choose the
Type*– the default isToDo. Via the drop-down you switch toGoal,Problem,IdeaorNote. An idea, for example, immediately gets a light bulb, a problem an exclamation mark. Creatoris filled in with you and cannot be changed – after all, you created the item. You change theAssigneewhen someone else is to do the work (“You take care of this”).- Optional:
Priority(a scale of 1–9 according to the tooltip, 1 low, 9 very high) andDue date(a date, optionally with a time). - In the
Descriptionthe rich-text editor handles formatting, images, links and tables. - Save and close creates the item. If you still need status, recurrence or assignments, click Next – the
Status,RecurrenceandAssignmentssections open below.

Organizer → My open items → + → New open itemWhat the colour tells you
The colour of an entry depends solely on the Due date:
- Yellow – no due date set, or a due date in the future. (Items with no due date at all stay yellow forever.)
- Red – the due date is overdue, the deadline lies in the past.
- Green – the item is marked as done.
If you push an overdue (red) due date into the future, the item turns yellow again.
Done – only the date counts
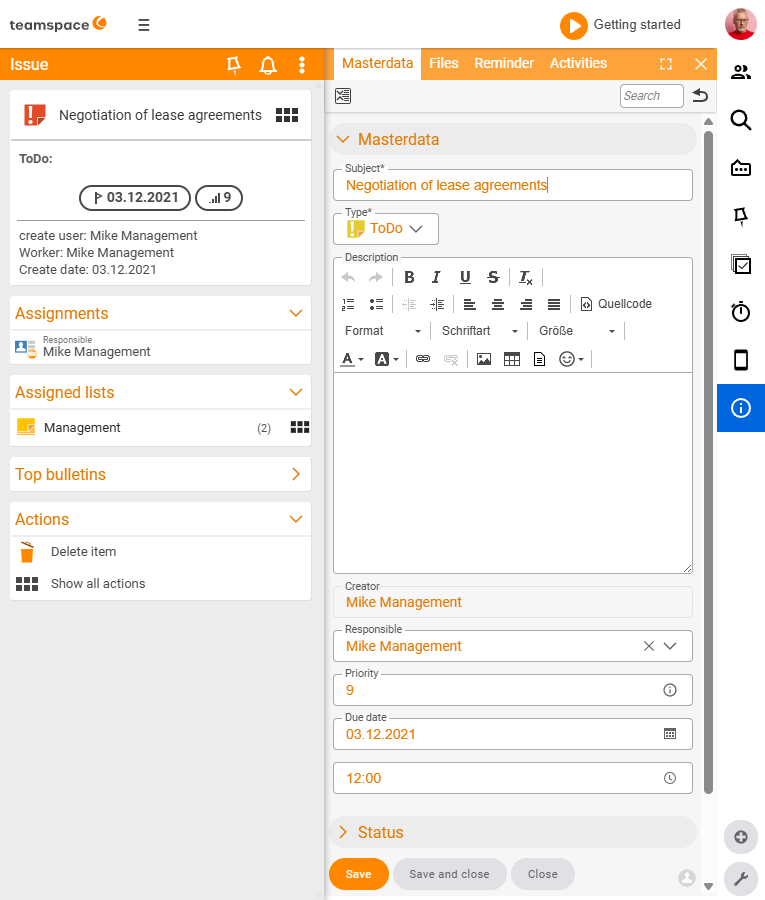
Clicking a list row opens the Open item detail manager. On the left the document-card block with the type icon, subject, due-date and priority chip; on the right the tabs Master data, Files, Alarms, Times. In the Master data tab you change everything from the creation dialog. The Status section below it carries four fields:
Progress– a percentage. It is not tied to the done status: an item at 70% can be done, one at 100% still open.Done– a date. Only this field determines whether the item is done.Time– the time of completion.Status(free text) – a keyword such as In progress, Tricky, Waiting for Anna.
You set the quick tick via the tick button in the Status section: it enters today’s date, the current time and 100%. After saving, the entry turns green. To make it open again, delete the Done date and save once more – progress and time play no part in this.
Tip: You can also assign your own
Colour marker– for this you first have to define the permitted colours. After that the marker appears on the item straight away.
Assignee, creator, all
The left sidebar shows three filters with counts:
Assignee– items where you are entered as the assignee. The default: what you have to do.Creator– items you created – even if someone else is now completing them.All– both together, with no duplicates.
The difference becomes important as soon as someone hands you an item: if your colleague Pia created an item for you, she is the Creator and you are the Assignee. The item appears in your Assignee list, and as soon as you switch to the Organizer, a notification appears at the top of the main menu. A click on the red number takes you straight to the item – where you can, for example, leave a comment, set a due date or tick the item off right away.
Quick filters and shortcuts
When the list gets long, filtering helps. Via the quick-filter links you filter by role (Assignee, Creator) and period (e.g. “entered as assignee up to 6 February”). The filter modal next to it offers a full period selection from 7 days back through This week and This month to Last year.
Filtering by priority is worthwhile when there is a lot on: show only items with a priority higher than 5, for example, and work through those first. The column order in the table: No, Type, Subject, Originator, Prio, Assignee, Lists, Project.
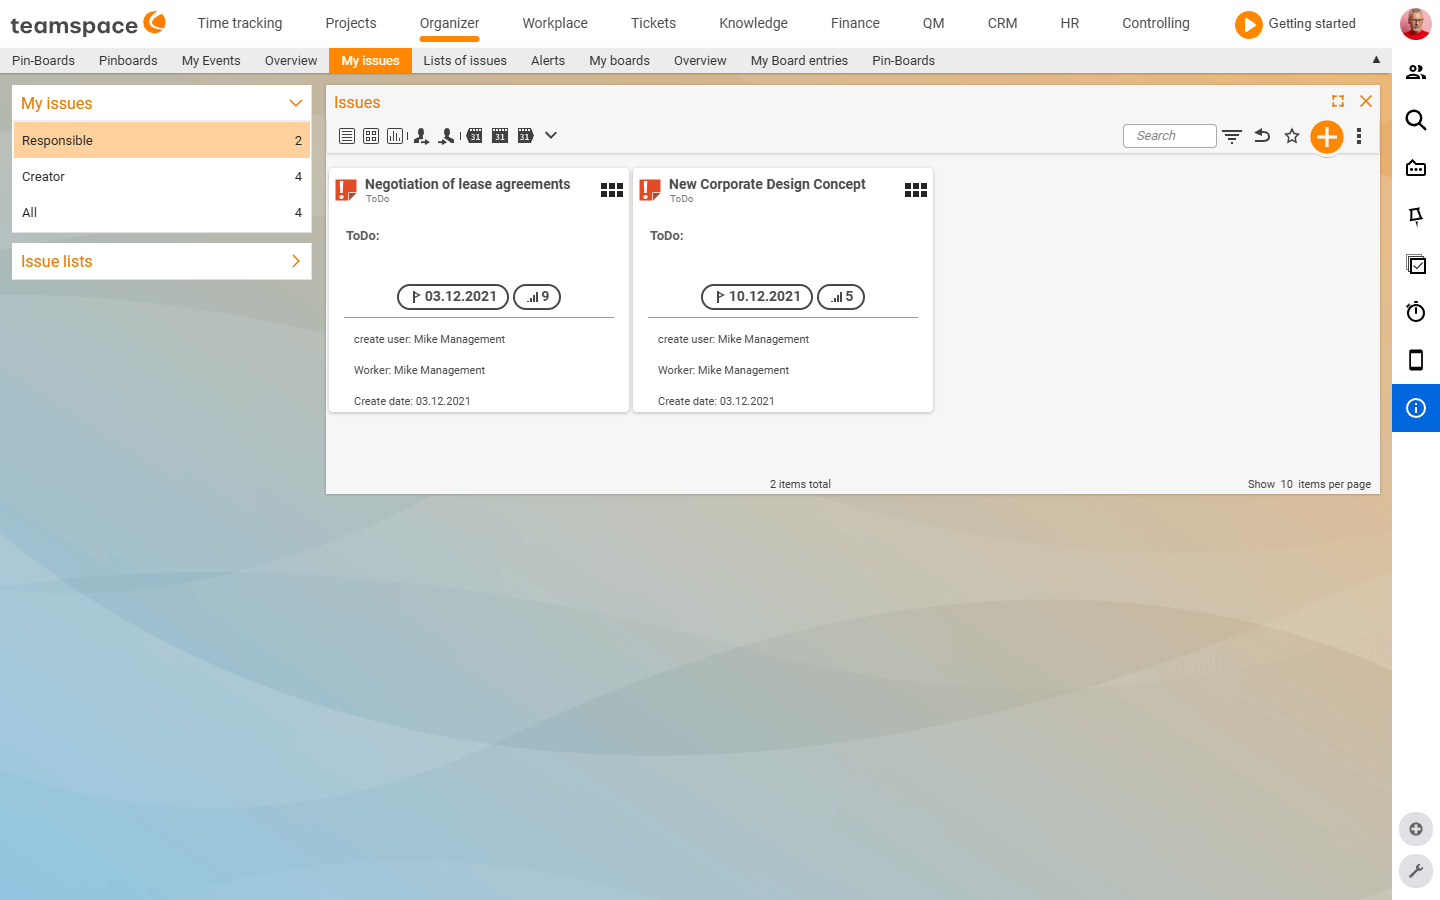
Views: Standard, Tile, Statistics
Above the list you switch between three views: Standard (table), Tile view (cards) and Statistics (analysis).
In the tile view you can split the items via the filter modal – by Type, Project, Priority or Due date. The cards then arrange themselves into columns by the chosen value. This saves time when re-typing and ticking off:
- If you drag a card from the Idea column into the ToDo column, the type changes directly.
- If you split by due date, you drag items into the done column – faster than opening each one individually.
Attach an item to a list or project
The Assignments section (in the creation dialog or in the detail manager tab) carries three fields:
Lists– multiple selection. Via the+button you attach the item to one or more lists. How this looks in practice is described in Open-items lists.Project– select a project. If the item is attached to the project, it appears in the project detail manager underOpen items– and you can book times against the project, provided you have the permission. See Open items in projects.Project relevance– set toLow priorityby default; it controls how prominently the item appears in project controlling.
Edit several items at once
Via the three-dots menu at the top right you reach Enable multiple selection, plus Edit cells for changes directly in the row, as well as export actions such as Open-items report (PDF), Print and Excel report. Multiple selection is the quick way to mark a series of items as done together or to assign them to a list.
Common questions & needs
| You want to … | How to |
|---|---|
| Create a task for a colleague | Create the item, enter the colleague in the Assignee field – she gets a notification in the Organizer. |
| Know what is urgent today | Watch the red entries – they are overdue (Due date in the past). |
| Tick an item off quickly | In the Master data tab press the tick button (sets date + time + 100%) and save. |
| Reopen a completed item | Delete the Done date and save – only the date counts. |
| See only important items | Filter by priority (e.g. > 5). |
| Turn several ideas into ToDos | In the tile view split by Type and drag the cards into the ToDo column. |
| Assign items to a list or project | In the Assignments section fill in the Lists or Project field. |
Related topics
- Open items – introduction (with video) Open items Introduction
- Open-items lists (with video) Open items How-to
- The task manager (with video) Open items How-to
- Configure open items Open items Configuration