
In this exercise you work through a concrete scenario: an ongoing project has 240 planned hours, which you distribute over four weeks across two employees (120 hours each). By the end you can create a capacity, staff the team, distribute the hours with the scheduling assistant and check the utilisation. It is best to follow the steps directly in teamspace as you go.
🎯 Goal. A fully scheduled capacity in which both employees are evenly utilised – without overbooking, with absences skipped automatically.
Step 1: Create the capacity
- In the main menu
Projects, open theCapacitiestile. - Via the action box, create a new capacity with
Newand name it, for example, Project Phoenix – delivery. - You land in the detail manager. Switch to the
Master datatab and enter:Manager(required): yourself or the project lead.StartandEnd: a period of four weeks.Time budget:240hours.Probability:100%(the order is already confirmed).
- In the
Target projectaccordion, set your project as the target project.
More detail on the fields: Create and set up a capacity.
Step 2: Staff the team
- Switch to the
Teamtab and add two employees viaNew team member. - Give each a
Time budgetof120hours. - Check the Σ row at the bottom: it must come to
240– matching the master-data budget.
💡 Plausibility. If the team sum and the master-data budget do not match, you have mistyped or forgotten a person. The Σ row is your quickest sanity check.
Step 3: Distribute the hours with the assistant
Instead of clicking 40 days individually, you use the scheduling assistant:
- Switch to the
Resource scheduletab and open theScheduling assistantin theActionssidebar. - Step
General: theCapacityis already pre-filled. - Step
Action: chooseNew. - Set the distribution:
Total number of hours=120per person, distributionEvenly distributed. - Activate
Limit to available capacityso that holidays, sick leave and public holidays are skipped automatically. - Step
Team: choose the two employees (notAll). - Step
Time: leaveAll daysas it is, but narrow it via theDaysfield to working days (Mon–Fri). - Click Save – the assistant distributes the hours evenly.
The whole mechanics of the assistant is covered in Work with the scheduling assistant.
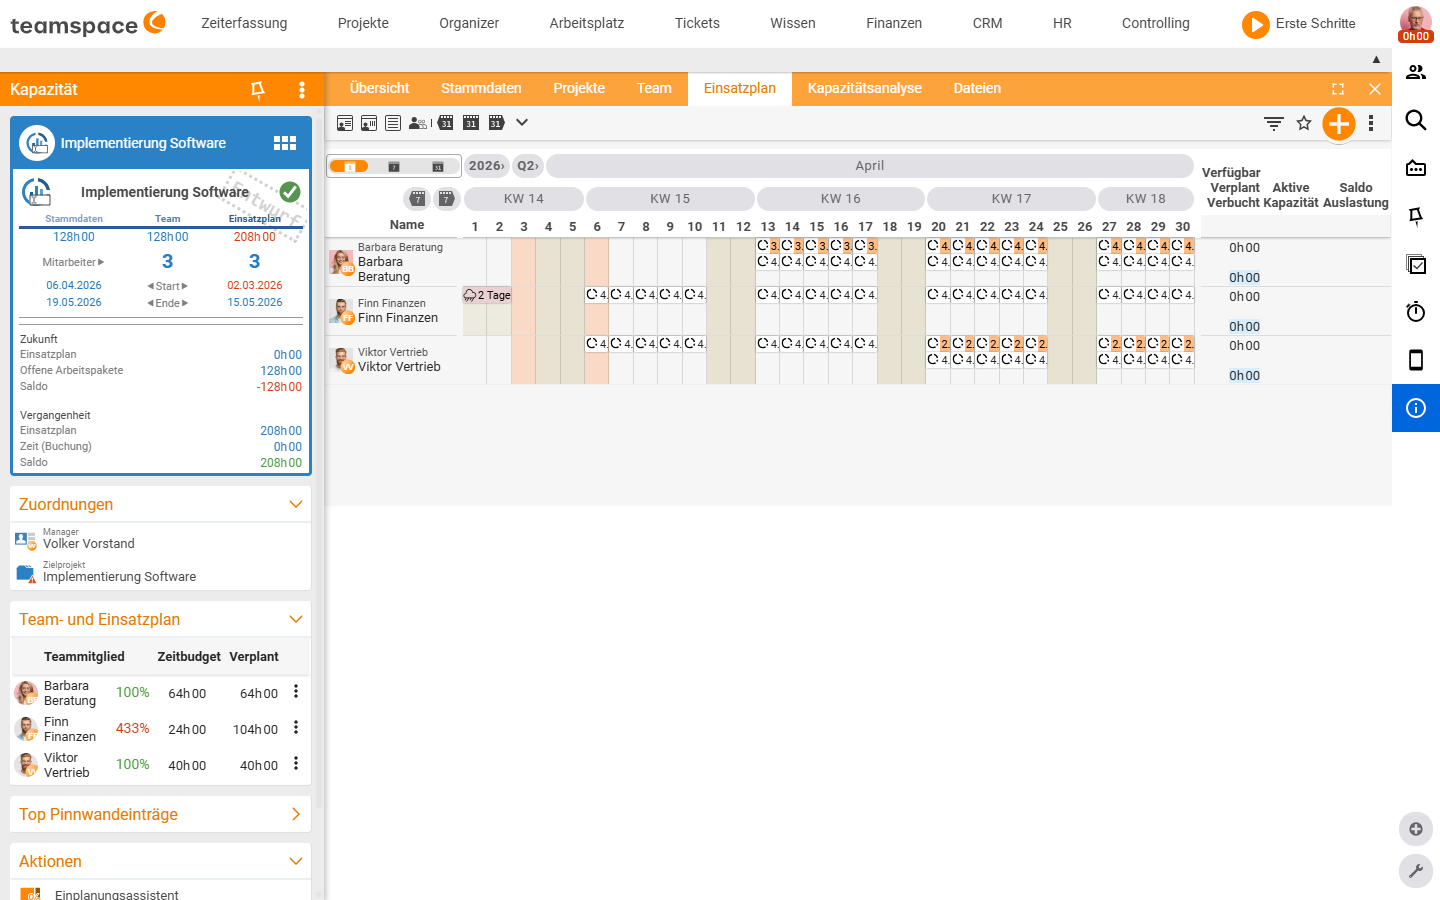
Step 4: Check the utilisation
- Look at the totals block on the right of the resource schedule:
Scheduledshould be120per person, theUtilisationat or below100%. - If a utilisation of over 100% shows on a day, the employee is overbooked (for example because they are in another capacity at the same time). Smooth it out with the assistant, action
Corrections→ even out overbookings. - Finally, take a look at the global
Capacity planningreport – there you see both employees in the context of all capacities (see Analyse capacities).
Done
You have created a capacity, budgeted the team, distributed 240 hours evenly and checked the utilisation. As soon as the employees book their time, you compare plan and actuals in the Capacity analysis tab – and with the warning system you are alerted to deviations automatically.
Related topics
- Create and set up a capacity Capacity How-to
- Work with the scheduling assistant Capacity How-to
- Analyse capacities Capacity How-to