
The resource schedule is the heart of the capacity – this is where it lands who works how much and when. You open it in the capacity detail manager via the Resource schedule tab. The view is a Gantt-style timeline: along the top year, quarter, month, calendar week and individual days; one row per employee with day cells.

Reading availability
Holidays, holiday requests and sick days flow into the view automatically. For each day the system shows how many hours are still free – and if the employee is already assigned to another capacity, how much of the day is left. So you never inadvertently plan against an absence or against someone who is already full.
On the right sits the totals block per employee:
Available– hours that could in theory be planned in the period.Scheduled– hours that are already in the resource schedule.Active booked capacity– what has actually been booked against the capacity.Balance– the difference between plan and booking.Utilisation– Scheduled against Available as a percentage.
Three ways to schedule hours
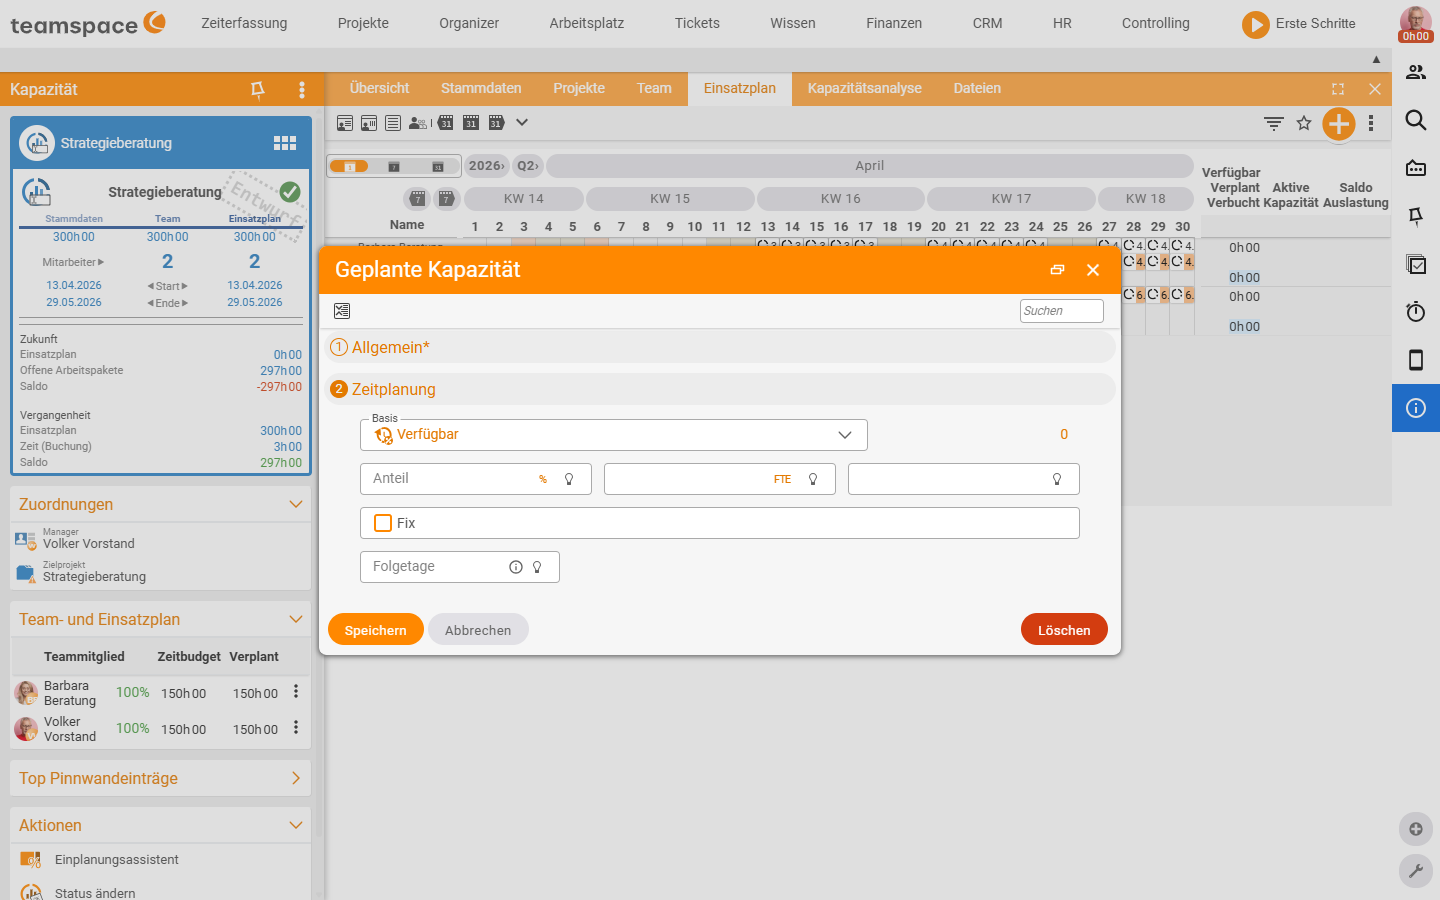
You create an entry in the resource schedule in three ways:
- Click directly on the day – the quickest way for a single entry. Click on the relevant day for the employee you want. A dialog opens in which you set the time budget for that day. This is also where you set the lock marker.
Create new record(action box/sidebar) – opens a dialog with a choice of employee, date and time budget. Here too only one entry is created per action.Scheduling assistant(action box/sidebar) – for the even distribution across many days and several people at once. The whole mechanics (creating, locking, moving, correcting) is covered in Work with the scheduling assistant.
💡 When to use what? For a single day the direct click is quickest. As soon as there is more than one or two entries to set – 80 hours spread evenly across four weeks and three people – the scheduling assistant pays off.
Moving and locking slots
You move existing slots by drag & drop directly on the timeline – simply drag them onto another day.
With the lock marker you protect a slot from being moved inadvertently. Locked slots carry a lock symbol in the overview. They can only be moved by employees with Permission for all = Edit all elements – everyone else sees the lock and can go no further. Where you set this permission is covered in Create and set up a capacity in the section on the team.
ℹ Locking ≠ blocking. A locked capacity stays visible and bookable – it only protects against someone with a restricted right moving the slot.
Keeping an eye on utilisation
The Utilisation column and the Balance show you continuously whether the distribution fits:
- Utilisation over 100% – the employee is overbooked on some days. Spread hours onto other days or people, or use the assistant’s correction mode.
- Negative balance – more has been booked than planned. Adjust the plan or check the bookings.
Anyone who needs the cross-comparison across several capacities (who is overbooked overall?) uses the global reports – see Analyse capacities.
Common questions & needs
| You want to … | How to |
|---|---|
| Schedule a person for exactly one day | Click directly on the day for the employee and enter the time budget. |
| Fill many days evenly | Via the scheduling assistant, action New with distribution Evenly distributed. |
| Move an entry to another day | Move the slot by drag & drop on the timeline. |
| Prevent a plan from being changed | Lock the slot (lock symbol); only full access (Edit all elements) can then move it. |
| See whether someone is overloaded | Read the Utilisation column and Balance in the totals block on the right. |
| Account for absences | Happens automatically – holidays, requests and sick leave flow into the daily availability. |
| Shift the whole plan by two weeks | Assistant, action Move (see Scheduling assistant). |
Related topics
- Work with the scheduling assistant Capacity How-to
- Create and set up a capacity Capacity How-to
- Analyse capacities Capacity How-to
- Topic: Time tracking Time tracking How-to