


If you want to share a file with external people without their needing a teamspace account, you create a public link in the detail manager under the External links tab. The link works for anyone who has it – optionally protected with a login requirement and an expiry date.
Create an external link
- Click the file’s
Detailsicon and switch to theExternal linkstab. - Create a new external link and set the options.
- Pass the link or QR code to the recipient.
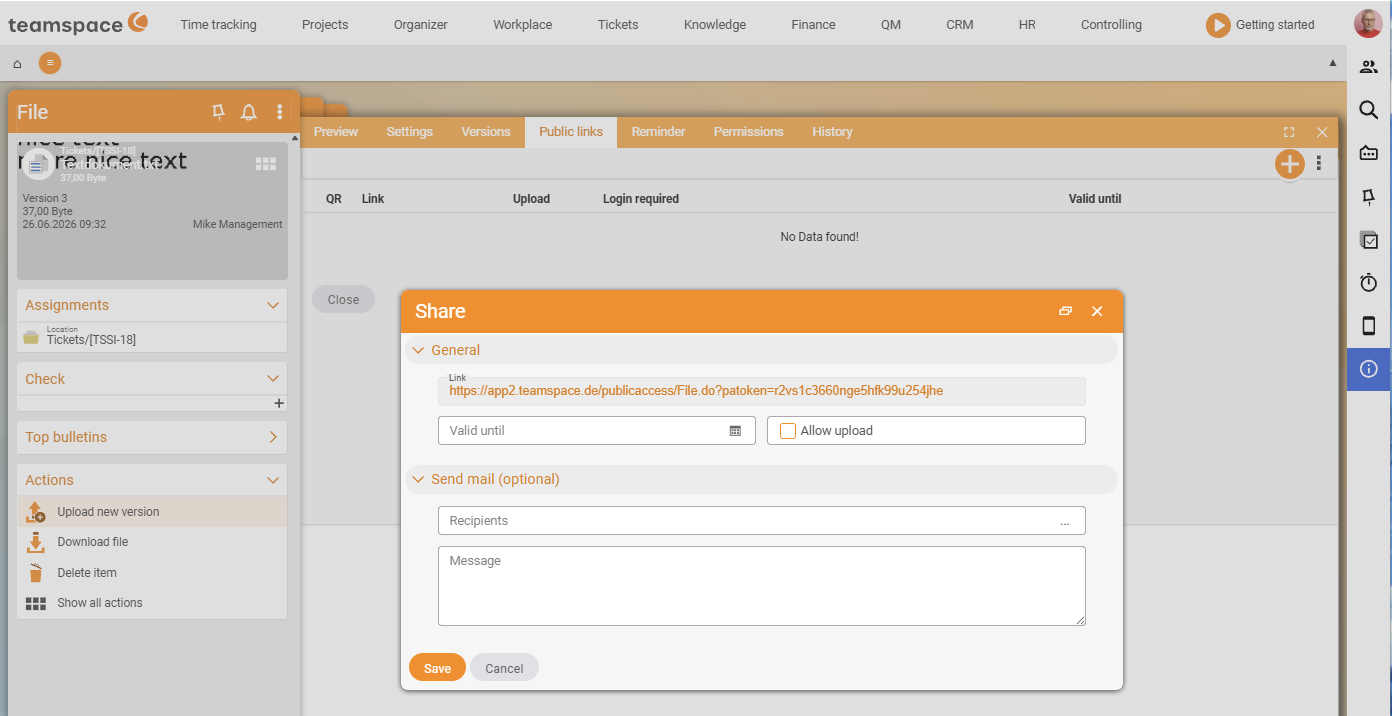
The options of an external link
The table shows five columns:
QR– renders a QR code for handover on mobile.Link– the public link to the file.Upload– lets the recipient upload a new version.Require login– forces the recipient to sign in before access.Valid until– sets an expiry date, after which the link no longer works.
⚠ Important. An external link without
Require loginworks for anyone who has it. For sensitive documents, set a login requirement and/or aValid untildate.
Larger collaboration: the self-service portal
For permanent, structured customer access – to tickets, invoices and shared files, for instance – there is the self-service portal. With it you selectively share parts of teamspace with customers and partners, who see only the content released to them. As a second option there are external accounts, which are set up in the configuration and stored on the CRM contact.
Common problems
Why does my external link work for anyone who has it?
That’s the default behaviour without Require login. For sensitive documents, enable Require login and/or set a Valid until date, after which the link no longer works.
How can the recipient send something back to me?
Enable the Upload option on the external link – then the recipient may upload a new version.
How do I collaborate with a customer permanently, instead of just sharing one file? Individual links are the wrong way for that. Use the self-service portal, through which customers see only the content released to them.
Common questions & needs
| You want to … | How to |
|---|---|
| Send a file to a customer without an account | Create a link in the External links tab and hand it over. |
| Limit access in time | Set a Valid until date on the external link. |
| Make sure only a particular person has access | Enable Require login. |
| Let the recipient send something back | Enable the Upload option – they may upload a new version. |
| Collaborate with customers permanently | Use the self-service portal instead of individual links. |