
If a device or service is to use the API without a specific person signing in with their personal access, you set up an API access authorisation. It serves as a neutral authorisation for the accesses: the operations do not happen on behalf of a particular user who would have to hand over their password, but via an account created specially for the purpose, with finely tuned rights.
What the access authorisation is technically
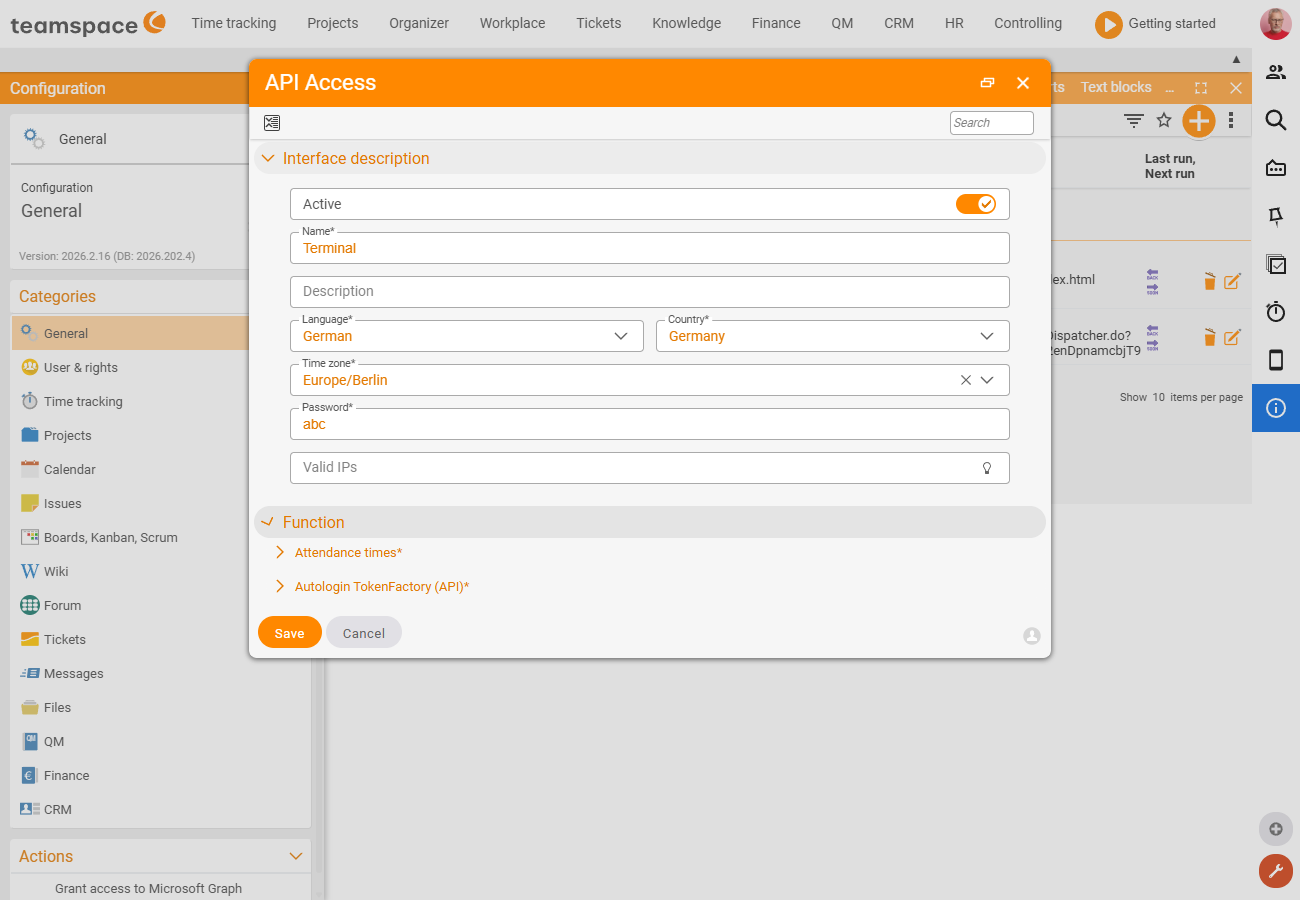
In API terminology, the API access authorisation is the interface authentication. The key difference from a personal device password:
- Sign-in is done via Basic Auth with an interface ID and interface password (instead of a device ID and token).
- The password is set in the teamspace configuration.
- There are no user rights – the permissions follow solely from the settings of this access authorisation.
- A restriction to specific IP addresses is possible.
This makes this type of access suitable for unattended devices and services that do not act on behalf of a person.
Typical use case: time-clocking terminal
A classic example is a time-clocking terminal (teamspace ships such a terminal with the product). A terminal checks employees in and out and displays time-tracking information – continuously and for many people. This is exactly what an API access authorisation is for, controlling the access rights to suit.
Granting rights
In the rights dialog you define what is possible via this access. The options currently revolve mainly around time tracking; new teamspace versions add further access options.
- “Attendance times” module – required so that check-in/out operations can be created via this access authorisation.
- “Employee” field – controls which employees can be read out and checked in via this access.
- “CheckIn/Out” option – allows checking in and out; this includes a default category for terminals that cannot send the category themselves.
- “Detailed” option – allows access to absence details such as sickness or leave. For a plain terminal you usually leave it off (fewer rights = safer).
- “CheckIn/Out without RFID” option – allows the terminal to check employees in and out without knowing the RFID. This is the right option for a purely touch-based terminal without RFID tokens.
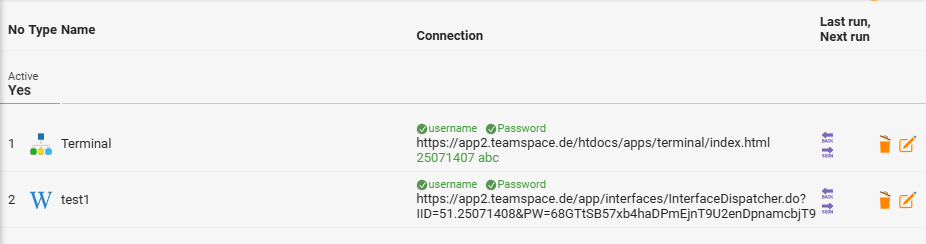
Receiving and using the credentials
After saving, you receive the credentials for the API access authorisation. The device – such as the teamspace time-clocking terminal – uses them to connect to teamspace.
Notes
Be sparing with rights: Always grant only as many permissions as the specific use case needs. A terminal that should only check in and out needs no access to absence details.
- IP address protection makes sense for stationary applications such as a time-clocking terminal – that way the access works only from the permitted network.
- If it is not about a device but the personal access of an individual via a script, a device password is the right way rather than an access authorisation.
- The principles for securing access are summarised in API security & permissions.
Related topics
- API security & permissions API Concept
- Create and use a device password (API token) API How-to
- Topic: Time tracking Time tracking
- Time tracking online