
To use the API, you authenticate with a device password (also called an API token). This is a separate set of credentials for applications and scripts – kept apart from your normal login. The advantage: you can revoke a device password individually at any time without changing your main password, and you can create several passwords for different applications.
1. Create a device password
You create a device password in your personal settings:
Personal settings → "Devices" tab → "New device password"- Open your Personal settings.
- Switch to the “Devices” tab.
- Click “New device password”.
- Give the device a name (for example “Accounting import script”).
- Click “Save”.
The system then shows the device ID and the password. Your application uses these two values to sign in to the API.
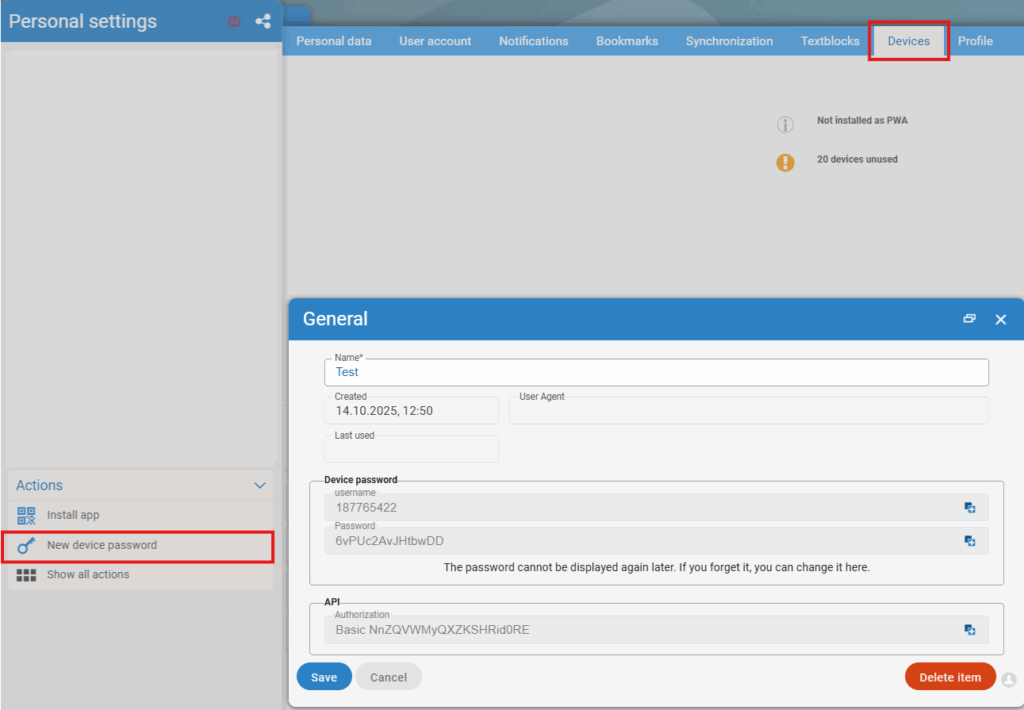
The password is shown only once. Note it down immediately in a safe place. If you lose it, you can regenerate it at any time via “Change password” – the old one then becomes invalid.
2. Sign in via Basic Auth (token authentication)
You authenticate every regular API request via HTTP Basic Authentication – using the device ID and token, not your email and your normal password. The device ID and token are Base64-encoded as id:token and written into the Authorization header:
// Device ID and token from the app's local storage
var credsB64 = window.btoa(device._id + ':' + device.token);

var xhr = new XMLHttpRequest();
xhr.open('GET', url, true);
xhr.setRequestHeader('Authorization', 'Basic ' + credsB64);
xhr.send();
Token instead of password: Store only the device ID and token in your application – never the original password. If a device is compromised, you delete exactly that device; all other accesses remain active.
3. Alternative: create a token directly via the API
You can also create a device directly via the API rather than through the interface. With your login credentials (email + password) you can reach the device resource only – it gives you the token you then use to sign in:
POST server/api/device{
"email": "test@5point.de",
"password": "password",
"deviceName": "test5p",
"deviceType": "de.fivepoint.other"
}If the email and password match, the server responds with the new device resource. It contains the device ID (_id) and the token (token) that you need for all further requests:
{
  "_id": "10001234",
  "token": "D1C2B3A4",
  "deviceName": "test5p",
  "deviceType": "unknown"
}
Not available with two-factor authentication: If 2FA is enabled for your account, this route is not available. In that case, create the device password via the web interface as described in step 1.
Tip: When your app starts up, first load its own
deviceresource. If that works, you immediately know the token is still valid.
Notes
- Permission missing? If you cannot see the “Devices” tab or the option to create a device password, you are missing the “Synchronisation” permission. Ask your administrator to grant it to you.
- Create a separate device password for each application – that way you can block individual accesses on purpose without affecting the others.
- For devices and services without a personal user (for example a time-clocking terminal), an API access authorisation is the right way rather than a device password.
- You will find further security recommendations in API security & permissions.
Related topics
- API access authorisation for terminals & services API Configuration
- API security & permissions API Concept
- API address structure (URLs) API Concept