
You create a sales opportunity through the plus button in the Sales opportunities list tab, assign it an organisation, contact, account manager and a target value, and then carry on in the detail manager. The creation dialog runs through three mandatory steps.
1. Open the creation dialog
In the Bookmarks area of the CRM module, open the Sales opportunities tab. On the right of the toolbar is the plus button New sales opportunity. A click opens the dialog.
Tip: You can also create an opportunity straight from the detail manager of an organisation or a contact – through the plus sign at
Recently edited elements. The organisation and contact are then already filled in.
2. The three steps of the dialog
Step 1 – Master data. The mandatory fields are the Name* of the opportunity and the Account manager*. For Account manager* the logged-in user is preselected – usually you yourself – and you can override it if you are creating the opportunity for someone else.
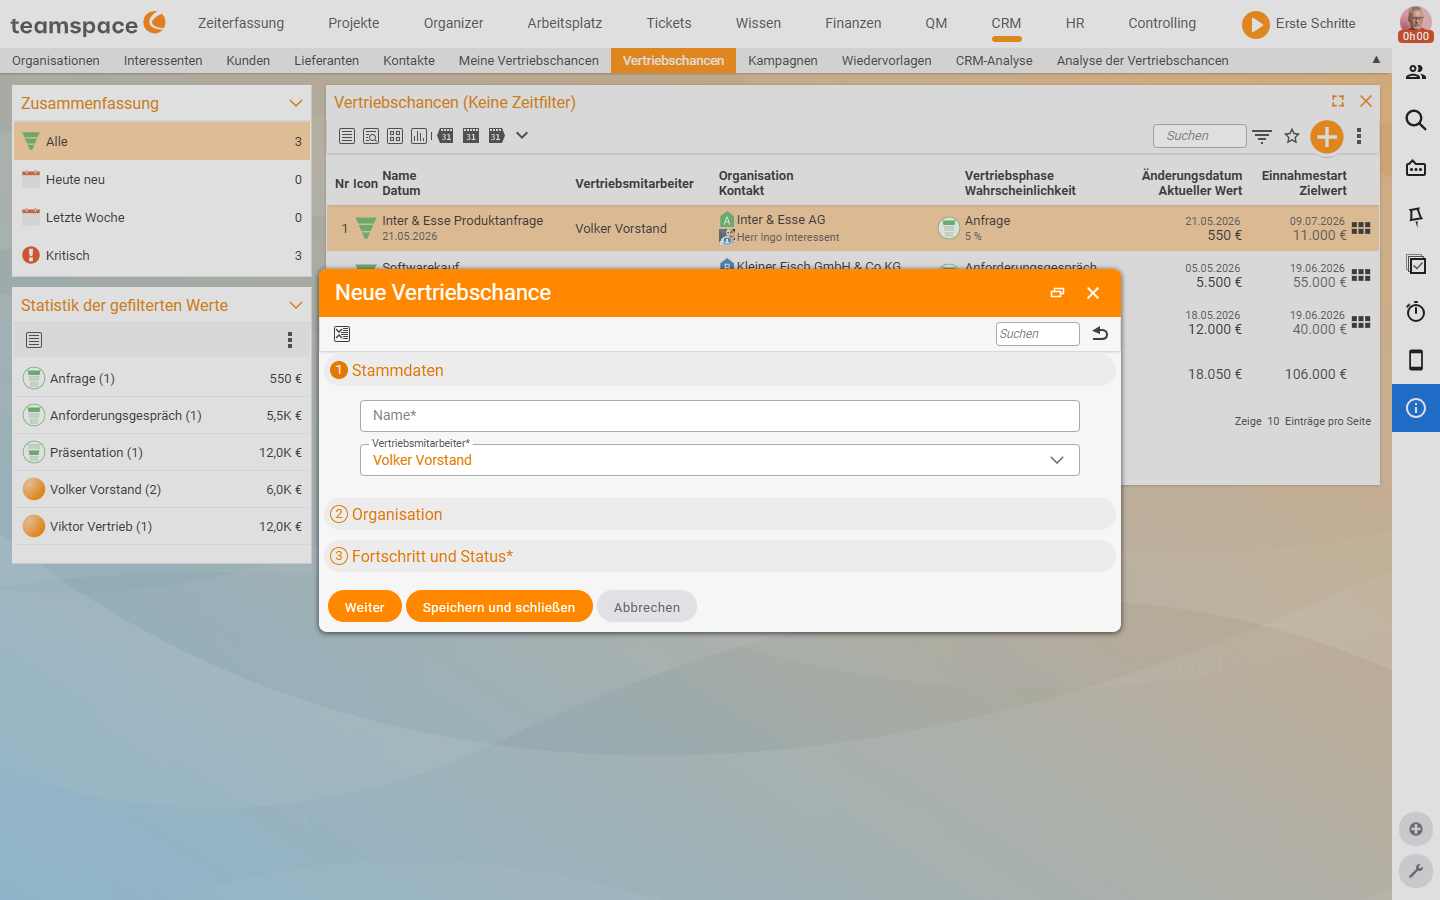
Step 2 – Organisation. Here you choose, from the CRM records, the Organisation and the Contact the opportunity is attached to. Without an organisation and contact the opportunity is not meaningful – otherwise it is not assigned to any customer.
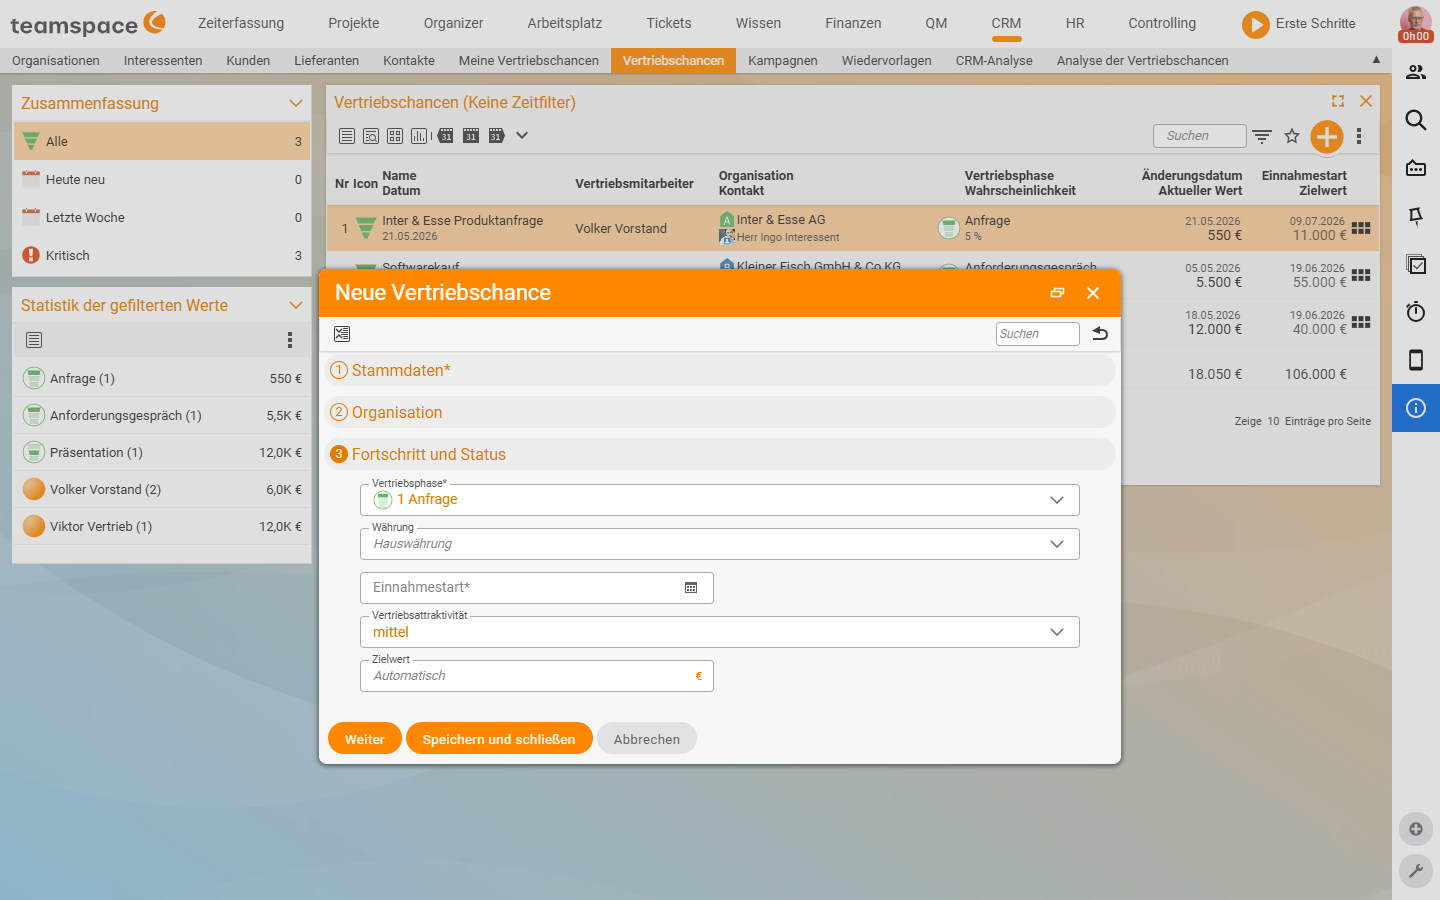
Step 3 – Progress and status*. Here you set the values that fill the funnel:
Sales stage*– preselected1 Enquiry. The probability is tied to the stage and is not asked for separately when creating –1 Enquiryautomatically brings 5% with it. You set a differing percentage later throughNew status(see Maintain a sales opportunity).Currency– preselectedBase currency; relevant if you run opportunities in a foreign currency.Revenue start*– from when you expect money.Sales priority– the strategic assessment of the opportunity, preselectedmedium(scalevery lowtovery high).Target value– optional; the expected order value. InAutomaticmode the current value works out astarget value × probability.
You recognise the mandatory fields by the * after the label – in step 3 these are Sales stage* and Revenue start*.
With Next you move forward between the steps without closing the dialog; with Save and close you create the opportunity.
ℹ Info: The
probabilityis tied to the stage –Enquiry5%,Requirements meeting10%,Presentation30%. The creation dialog does not ask for it but adopts the stage value automatically. You set a differing percentage after creating, throughNew status– see Maintain a sales opportunity. The model behind it is explained in Understanding the sales funnel, stage & CRM status.
3. The detail manager of the sales opportunity
A click on a row in the list opens the opportunity’s detail manager. Along the top runs the tab row with five tabs:
Overview– a quick look at stage, status, target value and timeline – the tab you see most often when maintaining.Master data– the editing tab forName, the active flag,Description, statistics values and the assignment to organisation and account manager.Activities– all CRM activities, times, appointments, tickets and documents attached to the opportunity.Files– attachments for the opportunity: quotes, presentations, correspondence.Alarms– reminders you set up on this opportunity.
In the left sidebar, at the top, is the document card header with the document type Standard funnel, the name of the opportunity and the assigned organisation. Directly below it you see the funnel graphically – the current stage as a stepping stone, with the probability as a percentage and the current value in euros next to it, and the target value with the revenue-start date on the right. Then come the Associations box (organisation, contact, account manager), the organisation’s Service note (such as Key Account Manager: <staff member>) and the Top pin board entries. Right at the bottom is the Actions section.
In the central area of the Overview tab you see four boxes – Progress and status, Associations, Description and Last change – and below them the timeline, listing each activity on the opportunity chronologically with date, keyword, stage and value. To the right of it, Recently edited elements lists the latest activities, times, appointments, tickets, documents and files, each with a counter in brackets. Through the plus sign you create new elements there directly.
How to guide the opportunity through the stages from here is described in Maintain a sales opportunity: change stage & status.
Common questions & needs
| You want to … | How to |
|---|---|
| Create an opportunity for a colleague | In step 1 change the Account manager field from your own preset name to your colleague’s. |
| Start an opportunity without a target value | Leave the Target value in step 3 empty – it is optional; you can add it later through New status. |
| Rate the probability differently | Not in the creation dialog – after creating, override the stage’s suggestion at Probability through New status. |
| Create an opportunity straight from the customer | In the detail manager of the organisation/contact, through the plus sign at Recently edited elements – the associations are then prefilled. |
| Have the current value calculated automatically | Leave the Automatic mode in place – teamspace works out target value × probability. |