
Anyone who still receives customer emails in Outlook and wants to move them into the ticketing system uses the Outlook add-in. In a few clicks you turn an email into a ticket, choose channel, status and owner — and then carry on working in the ticket as usual. Follow-up emails land automatically on the right ticket, because the ticket ID is in the subject and teamspace matches them by it.
TODO-OPEN · TICKETS-T06 · CLAUDE
TICKETS-15 (add-in dialog “Create ticket” in the new Outlook) and TICKETS-16 (preview card with ticket ID, handler, channel/status, elapsed time) were captured and embedded on 2026-06-24. Still open: the manual matching of a follow-up email and the installation/configuration path — that still requires a real Outlook environment with the add-in installed.
When the add-in helps
The add-in is for the transitional case — you use teamspace as your ticketing system, but your customers still write directly to your personal email address instead of to the central support address. Instead of forwarding emails by hand, you move them into a ticket via the add-in. As soon as the email is in the ticketing system, everything runs as usual:
- The email gets a ticket ID.
- Follow-up emails are matched to the ticket automatically by the ID.
- Owner, workflow, escalations, SLA display — everything is available.
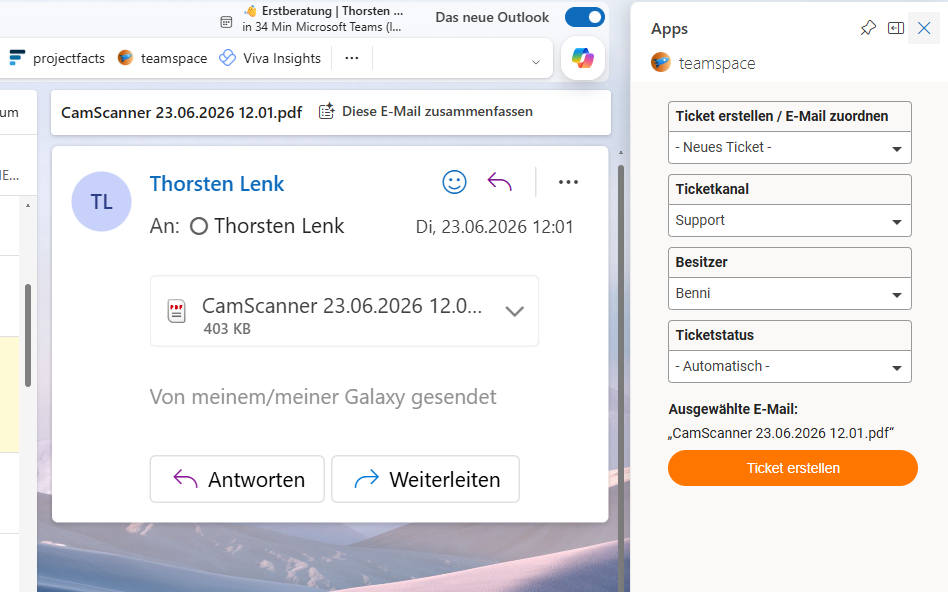
Turning an email into a ticket
You select the email in Outlook, open the add-in and fill in three fields:
- Ticket channel: which channel the ticket should be routed into (Support, Sales, Recruitment, your own channels).
- Ticket status: which status the ticket should start with — typically
Newfor new matters,In progresswhen you take it on directly yourself,Successfully closedfor emails that are only to be documented. - Owner: who is responsible for the ticket — you yourself or a colleague.
With a click on the confirmation button, teamspace creates the ticket. The email is entered as the first activity in the history, the contact matched with the CRM by the sender address. You can carry on working straight away in the ticketing system — or stay in Outlook for now and track the status.
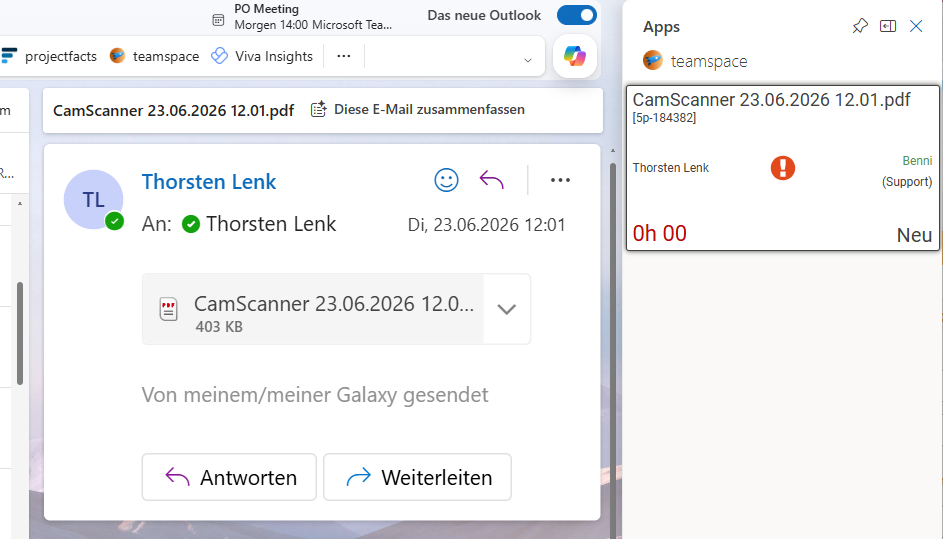
Tracking the ticket status from Outlook
After the move, the add-in shows a preview card on the email in Outlook with the most important values:
- Ticket ID: the unique number of the ticket.
- Owner: the employee currently entered as the owner.
- Channel and status: where the ticket sits and which workflow stage it is in.
- Elapsed time: since the ticket came in.
You also see the latest ticket activity — for example “handed over to Tom Kraus” or “successfully closed” — directly in Outlook, without having to switch to the ticketing system.
When the same email comes in again
If the customer replies later and the ticket ID is in the subject, the follow-up email is matched automatically to the existing ticket — even if it lands in Outlook again. If the follow-up email reaches you without a ticket ID in the subject, you can match it manually to the existing ticket via the add-in, instead of creating a new one.
Installation
The add-in is installed once per Outlook profile. The exact steps depend on your Outlook version and mail server — with Microsoft 365 the installation runs through the Microsoft Admin Center, with local Outlook installations usually via a dedicated installation file.
⚙ Prerequisite: For the add-in to make contact with the teamspace installation, an API access must be set up in the configuration area. If you need help with the installation, get in touch with support.
When the add-in is not used
For most teams the clean alternative is to route all customer emails directly to a central address (e.g. support@yourcompany.com) that is connected to a mail account of type Ticket. Then all tickets come about automatically, without anyone having to do anything in Outlook. When the pure email-ticket route works is covered in Create tickets; the configuration of the mail account in Ticketing system basic configuration.
Related topics
- Create tickets Ticketing How-to
- Ticketing system basic configuration Ticketing Configuration
- Outlook add-in