
The ticket module follows a simple scheme: three lists on the module home page, a plus button for new tickets, and when you click a row the detail manager opens with tabs for master data, activities, times, watchers, files and alarms. In the history you create activities — that is the single step that moves a ticket forward — and notifications hang on four roles on the ticket.
Three lists on the module home page
A click on Tickets in the top bar opens the module home page with three main tiles plus the controlling area.
- My tickets: all tickets you are involved in — as creator, owner, watcher, or because you are listed as a standard subscriber in the channel. The tile continuously shows how many tickets are
Newand how many are already assigned to you. - Ticket overview: all tickets from all channels you have visibility into — including those a colleague is currently working on. The tile shows
Open tickets,Handled today,Handled yesterday. - Drafts: tickets you interrupted while writing and saved as a draft.
Alongside tickets there are ticket elements — comparable to the individual messages in Outlook, that is, single activities without the bracket of the ticket, in case you want to find a particular message quickly.
The two tiles in the controlling area — Ticket report and Ticket analysis — are reports across all tickets; more on that in the topic Controlling.
On the left of each list sits a sidebar with pre-filters and channel distribution. It shows the sub-lists you need most often, plus the number of tickets per filter — the whole mechanism is described in Ticket lists & views.
Creating new tickets
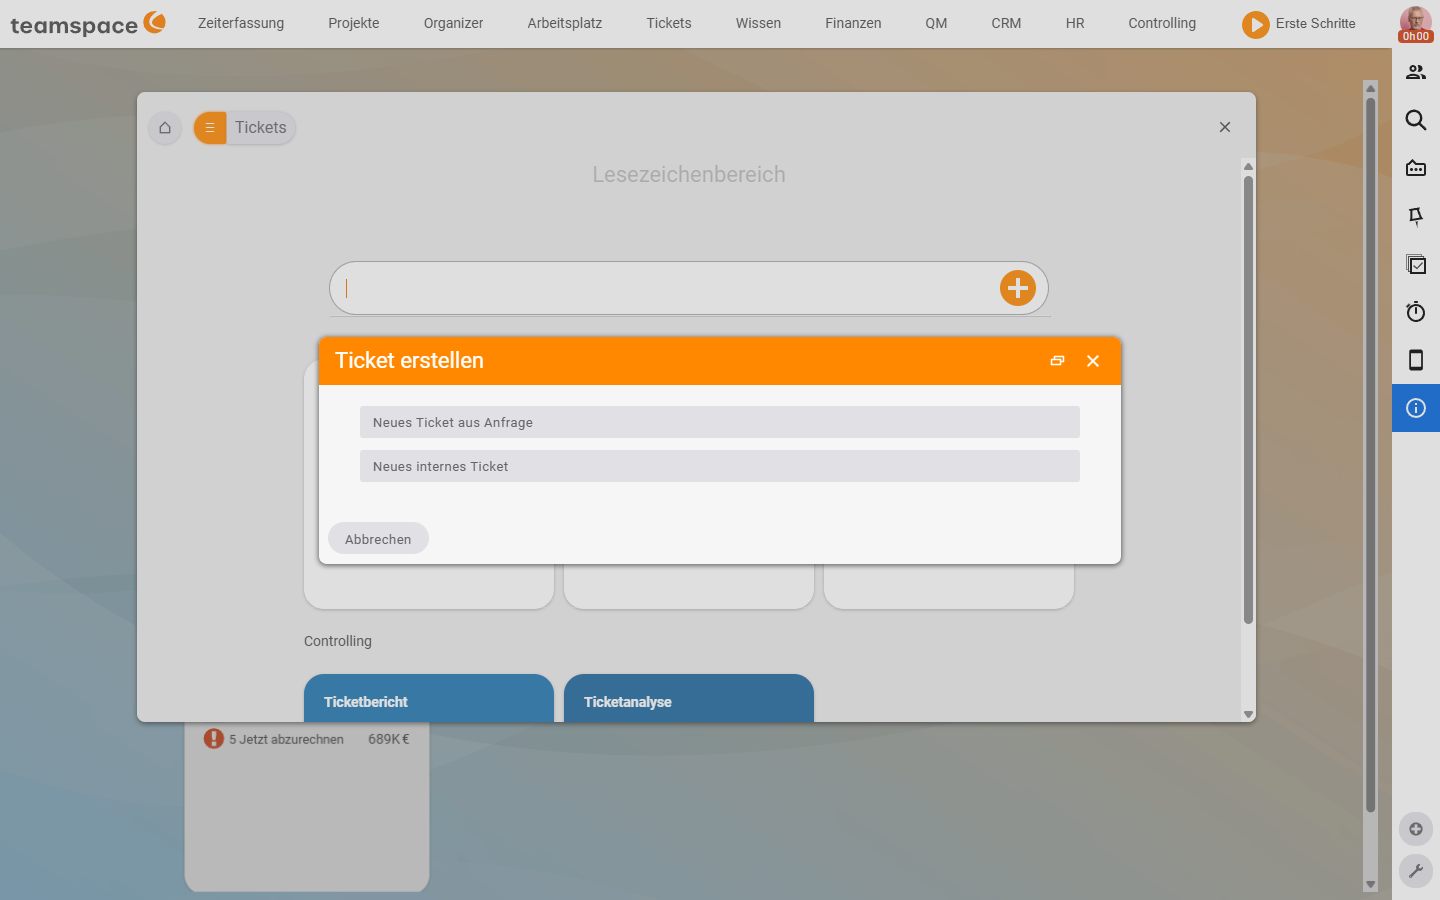
In the search field of the module home page sits a blue plus button. A click opens the dialog Create ticket with two options:
- New ticket from enquiry: for when a customer has called you and you create the ticket on their behalf.
- New internal ticket: for requests that do not run over email — bugs, internal clarifications, tasks between colleagues.
A third option — New ticket for the classic email dispatch — you start from the list My tickets (or directly on the CRM contact; there the plus menu Create ticket offers all three options New ticket, New ticket from enquiry and New internal ticket). If you cannot find the New ticket entry anywhere, you have not yet connected a mail account — you set this up under Tickets → Mail accounts in the configuration (see Ticketing system basic configuration).
Which fields the creation dialogs carry and when each way fits is explained in Create tickets.
The ticket detail manager
A click on a row in a list opens the detail manager of the ticket. It is built the same way for internal and email tickets — a tab row at the top, with its own block in each tab.
The tabs (in order):
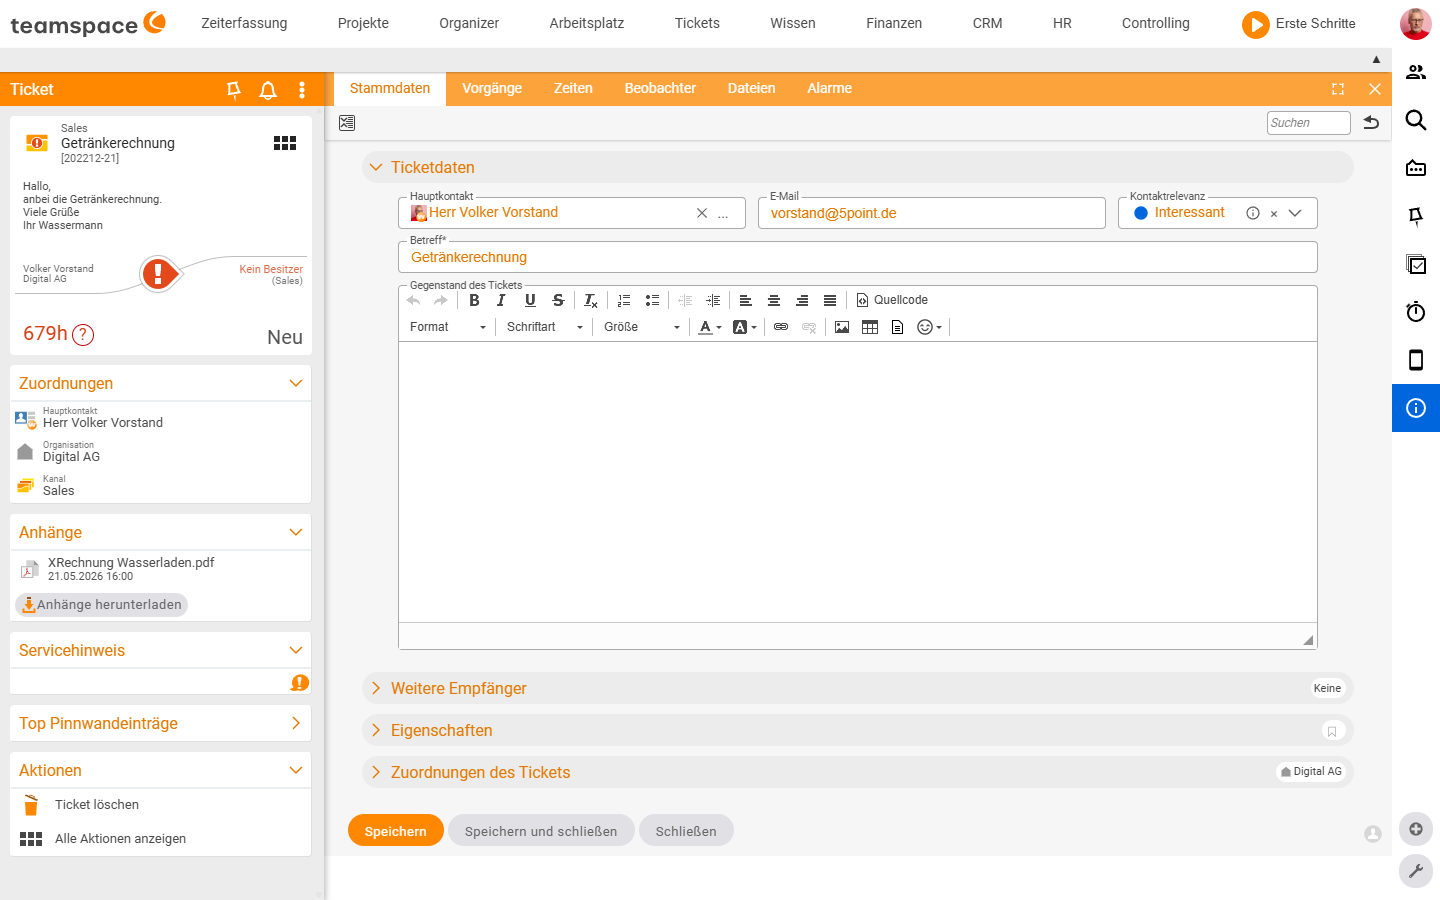
Master data: the ticket’s basic data — main contact, subject, the matter of the ticket as an HTML editor, properties such as priority and colour marker, assignments to organisation, project and sales opportunity.Activities: the history of the ticket. Every email, every note, every status change appears as its own activity in the left column; on the right the selected activity is shown in detail.Times: all times logged to the ticket — you narrow them down with the filters, and with the toolbar action you log a new time or download an Excel report.Watchers: people or user groups who receive a notification about each new activity.Files: all files attached to the ticket — attachments from emails land here just like files uploaded separately.Alarms: reminders you can set for yourself or a colleague on this ticket.
ℹ Info: What you see in each tab applies the same to all ticket types — internal as well as email tickets. The only difference lies in how they come about and in whether an email goes out at the end.
The matter of the ticket
The matter of the ticket is the short description of the problem or the request. It appears both in the Master data and in the history and can be adjusted in both places. As soon as a first message is created in the ticket, it replaces the original matter and is always shown above the individual activities — so the handler has a clear overview of the original request. For classification you also assign categories and colour markers to filter by topic or urgency.
How an activity comes about
In the Activities tab you create activities. At the top of the history toolbar sits a blue plus button — a click opens a small selection menu with New activity and Take ownership.
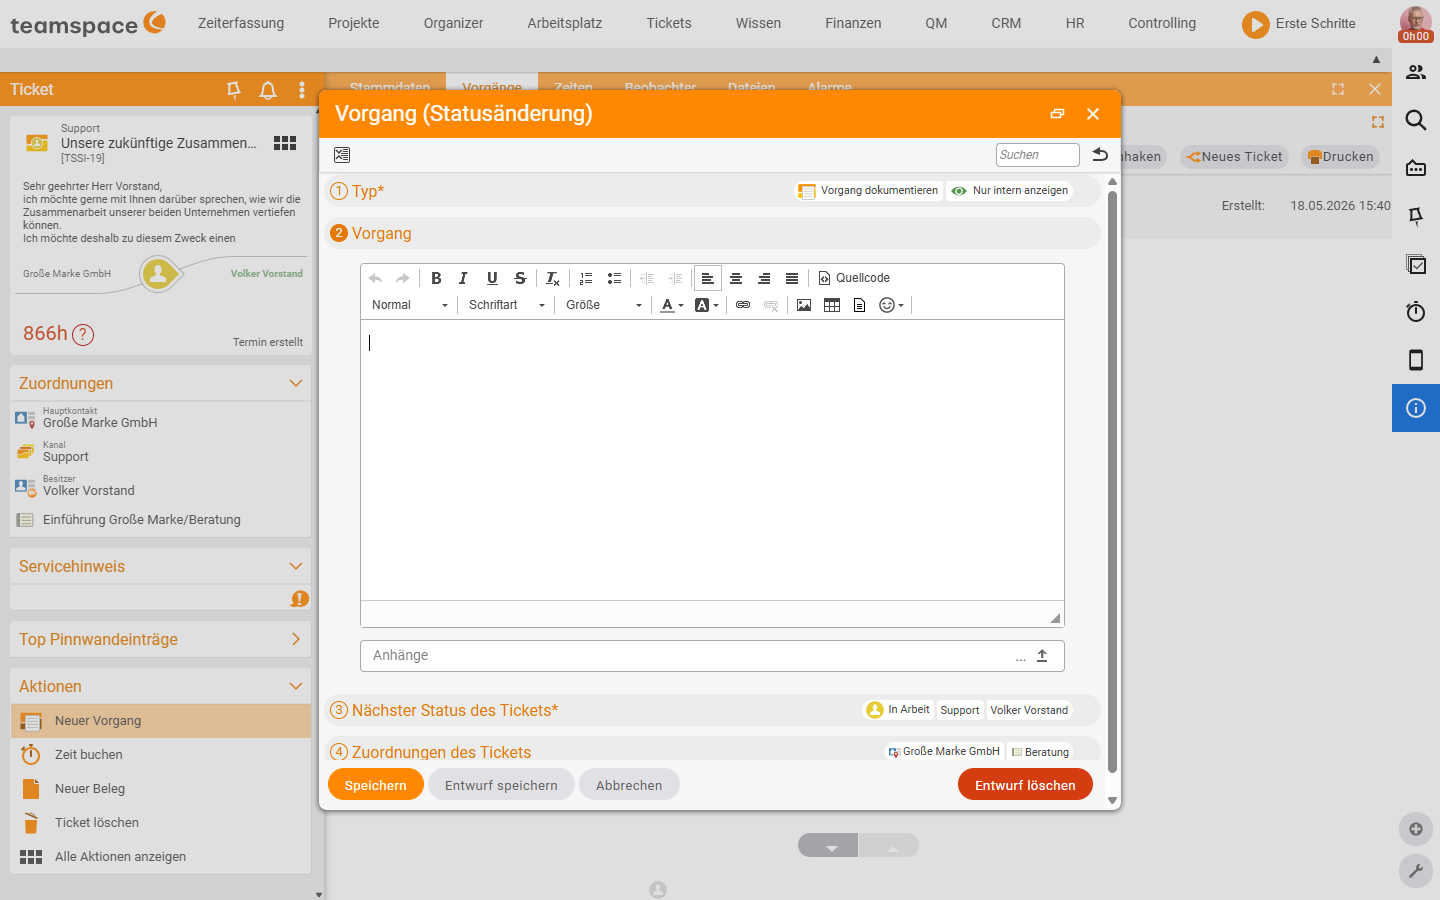
New activity opens a dialog with four sections:
① Type*: the activity type —Incoming,Outgoing,Status change,Note. ViaNew activitythe dialog opens as aStatus change; incoming and outgoing activities come about viaReply/Follow up. In addition there is a toggle pair for visibility — for aStatus changeDocument activity/Show internally only, for outgoing emailsSend email/Show in external access.Activity: the actual content — an HTML editor plus a field for attachments.Next status of the ticket*: chips show the current status, channel and owner. A click on a chip changes the respective value for this activity.Assignments of the ticket: chips for main contact, organisation, channel — in case an assignment should be switched along with the activity.
The footer buttons are Save, Save draft, Cancel plus, on the right, a red Delete draft.
For an email ticket the Activities tab additionally shows four actions at the top right: Follow up, Reply, New ticket, Print. When you need which is covered in Work with tickets.
Four roles that receive notifications
teamspace notifies you about tickets in which you hold one of four roles:
- Subscriber: you are
Standardin the channel of a new ticket — you receive the notification that a ticket has come in. - Owner: you are entered as the handler — notifications when something happens on the ticket.
- Responsible person: you watch from a little further away — notifications about each new activity.
- Watcher: you were entered manually or automatically in the
Watcherstab — notifications about each new activity.
The creator and owner of a ticket are automatically entered as watchers. When which role is assigned automatically and how you control it via the channel is described in Visibility & access. In your personal settings under Notifications you switch off, per role, which notifications you really want.
How it all comes together
A ticket has a channel that controls visibility. It has a status that shows the workflow stage. It has an owner who works on it, and a responsible person who watches from further away. Activities document what happened. Time, documents and project links hang on the ticket. You set reminders via alarms or the ticket reminder.
Related topics
- Ticketing – introduction (with video) Ticketing Introduction
- Create tickets Ticketing How-to
- Work with tickets Ticketing How-to
- Visibility & access (with video) Ticketing Concept
- Ticketing software