
Appointments, tasks and contacts from teamspace can be synchronised with your smartphone and your PC or Mac (referred to below as the device). Setting this up takes three steps:
- Create synchronisation profiles in teamspace – here you decide which appointments and contacts should be visible on your device.
- Create an app password – because your teamspace account is protected by modern security measures such as two-factor authentication or Microsoft single sign-on, your device needs its own login.
- Establish the connection from your device.
Synchronisation profiles
For synchronisation you need at least one synchronisation profile. Each profile is later shown on your device as a separate calendar or address book – so you can, for example, display your leave in its own colour.
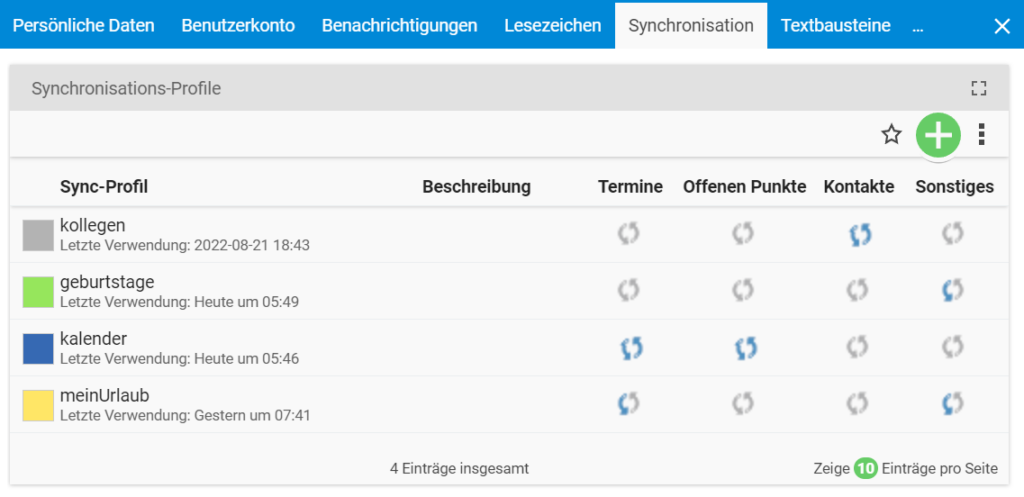
In the synchronisation profile you also define:
- Name and colour – they appear on the device as the calendar or address book label.
- Protocol – for Android and Apple devices you need the CalDAV protocol, for Outlook (Windows) the teamsync protocol.
- Calendar file – optionally, the profile can additionally be offered as a calendar file. This is useful for apps and devices that do not support CalDAV but can “subscribe to external calendars” (e.g. Outlook Web).
The profile also shows the server URL that you later enter on your device.
Signing in with an app password
Your teamspace user account is probably protected by two-factor authentication (2FA), or you use single sign-on via your Microsoft account. These methods are not supported by CalDAV and teamsync. So that you can still sign in, you need an app password.
In your personal settings, you add a new app password under “Personal settings → Devices”. Choose a meaningful name, such as “iPhone sync”, so that you know later what the password is for.
After you save it for the first time, the username/password combination is shown once. For security reasons, the password is not stored in teamspace and cannot be replaced with a simpler one. Keep it somewhere safe.
How to manage device and app passwords is described in the article Manage device passwords.
Establishing the connection
To establish the connection, you need the server URL from the synchronisation profile as well as the username and password of the app password you created.
If your device (calendar app, CalDAV app, …) does not let you enter a server address, look for an “advanced” or “manual” configuration. The procedure varies from one manufacturer to another.
- Apple devices: As the server address, the domain of your teamspace server is enough, e.g. “mycompany.teamspace.de”.
- Thunderbird: Here the full calendar URL is required, e.g. “mycompany.teamspace.de/users/1234/calendar/my-appointments”.
For synchronising Outlook (Windows) via the teamSync client, you will find the setup in the teamSync topic.
Common questions & needs
| You want to … | How to |
|---|---|
| Know which protocol you need | Android and Apple: CalDAV. Outlook (Windows): teamsync. Devices without CalDAV: offer the profile as a calendar file. |
| Understand why your normal teamspace password does not work | CalDAV and teamsync do not support 2FA or Microsoft SSO. You need an app password for this. |
| Recover a lost app password | The password is shown only once and is not stored. If you lose it, simply create a new one. |
| Keep different calendars separate | Create a separate synchronisation profile for each calendar or address book, with its own name and colour. |
| Know which server URL to enter | The server URL shown in the respective synchronisation profile; for Apple, the plain domain is enough. |
Related topics
- Manage device passwords Configuration How-to
- teamSync – Introduction teamSync Introduction