
With the online banking interface you bring your bank account’s transactions straight into your system: teamspace or projectfacts imports the transactions as account transactions and reconciles them – manually or automatically – with your invoices. This feature is only included in the teamspace Enterprise version and in projectfacts.
The sign-in runs via the service provider finAPI. Your system merely brokers the sign-in between your tenant and finAPI and has no access to your bank data itself.
1. Have the access activated
You cannot perform this step yourself – it is carried out by teamspace support:
- The online banking access must be activated for your tenant and the Online banking module must be enabled.
- The changeover can take up to 24 hours.
- To arrange this, contact our support in advance.
Note for self-hosters: If the system runs on your own server, an additional document must be signed. For this, please also get in touch with our support.
2. Settings in the system
Main menu
So that you can access account transactions and payments outside the configuration too, you enable the two menu tiles “Account transactions” and “Payments”. You will find them in the “Finance” group.
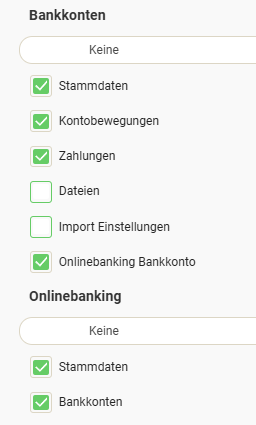
Detail manager
For the bank account, the permissions activated in the image are required, as well as all permissions for online banking.
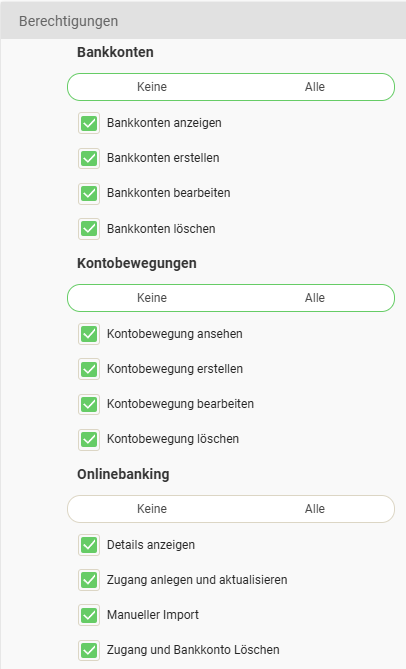
Permissions
Permissions must be granted for the groups “Bank accounts”, “Account transactions” and “Online banking”.
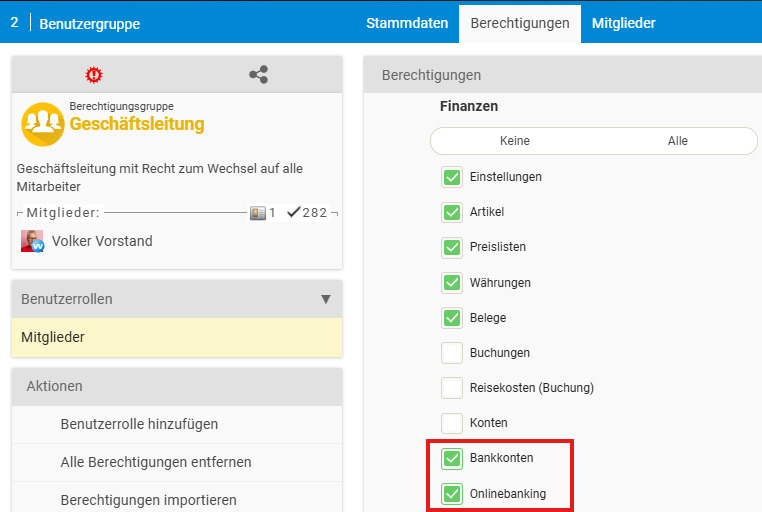
Configuration rights
- The user needs configuration rights in the Finance area.
- Access to the tiles “Bank accounts” and “Online banking access” is required.
3. Set up online banking
Add an online banking access
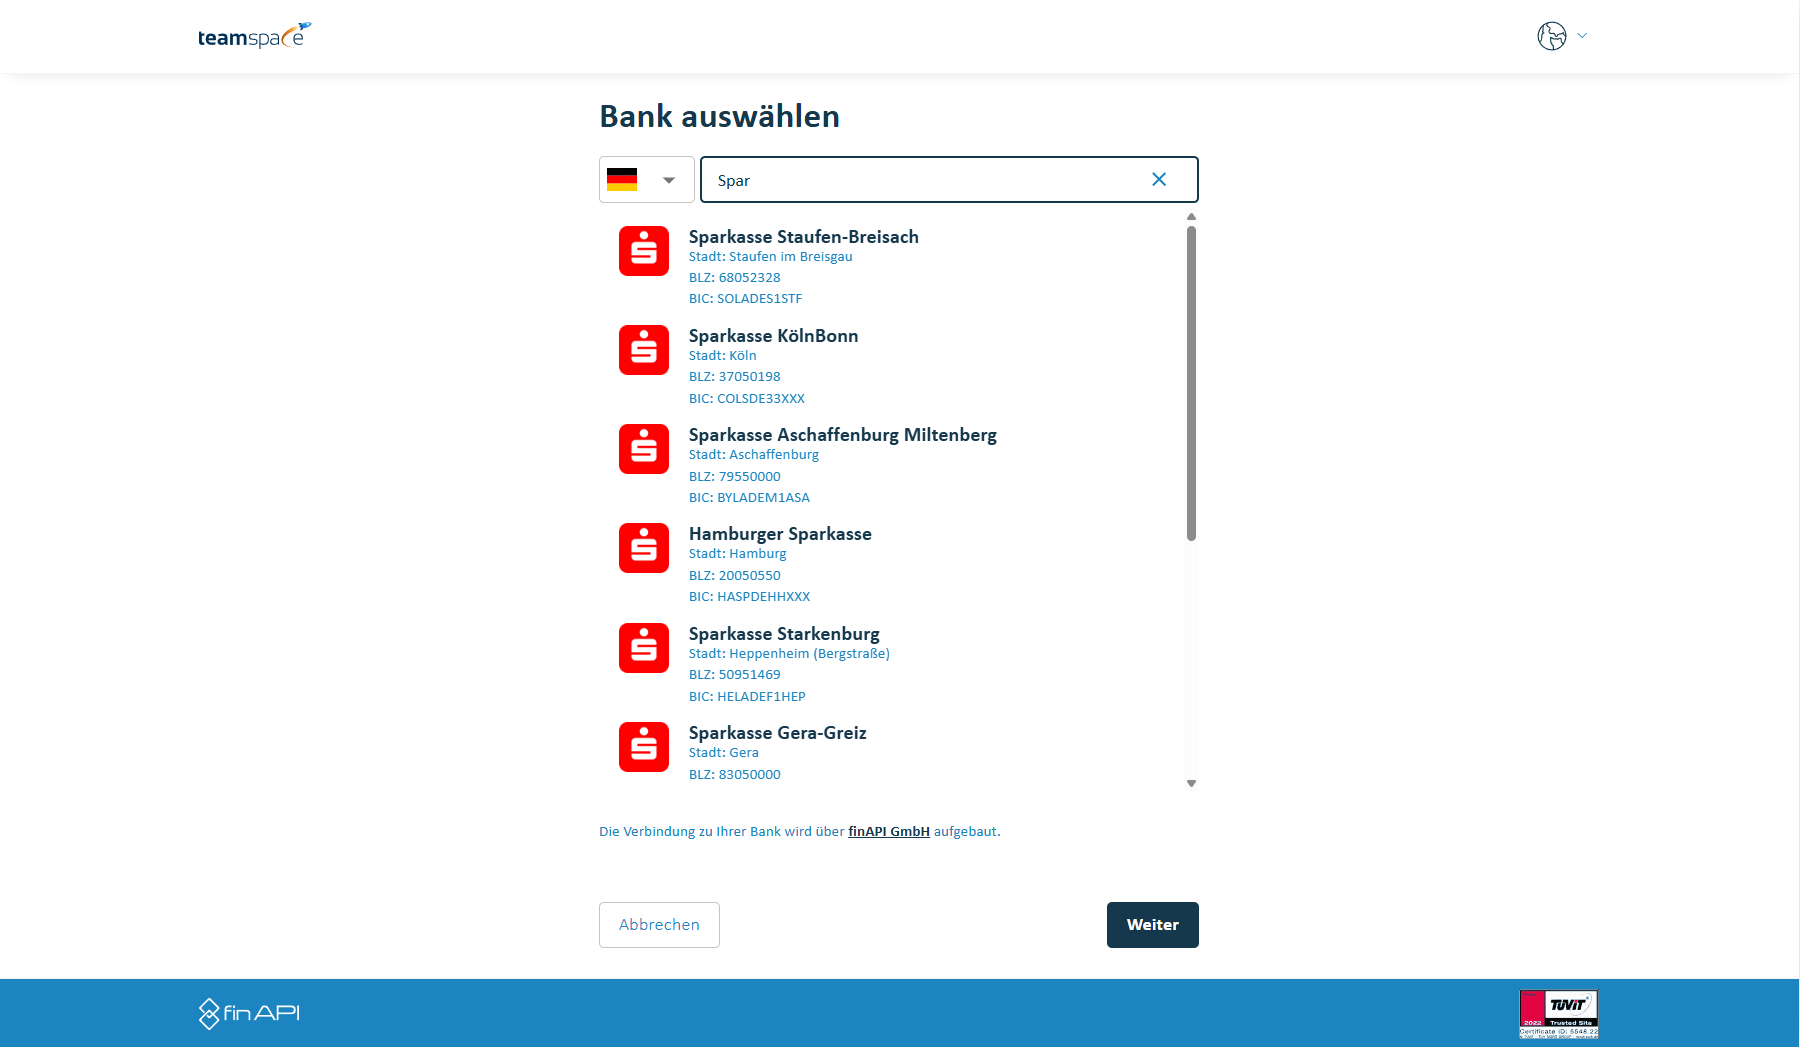
In the configuration under Finance > Online banking access, click “Create new access”. A window then appears in which you log in to your bank account.
If you want to use the automatic import, you must enable the storage of the PIN and TAN procedure.
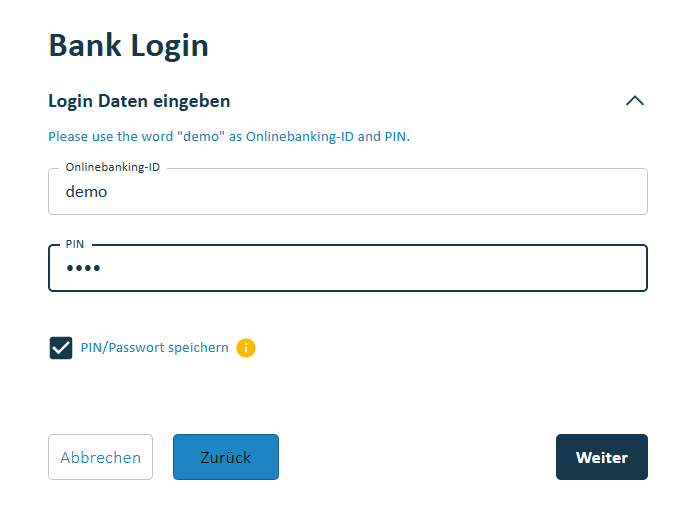
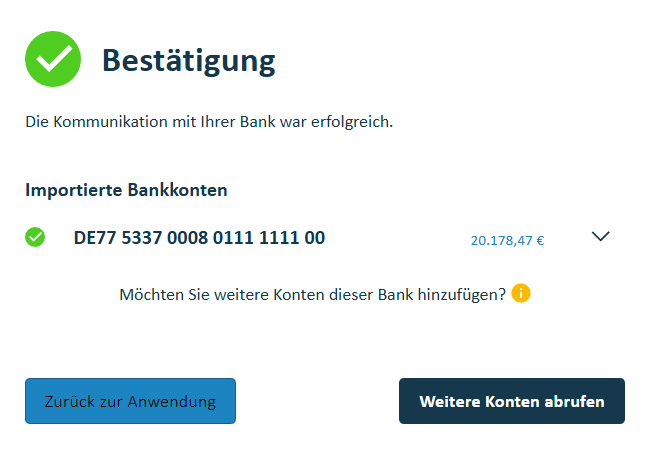
Once you have selected your bank accounts, you click “Next” and then “Back to the application”.
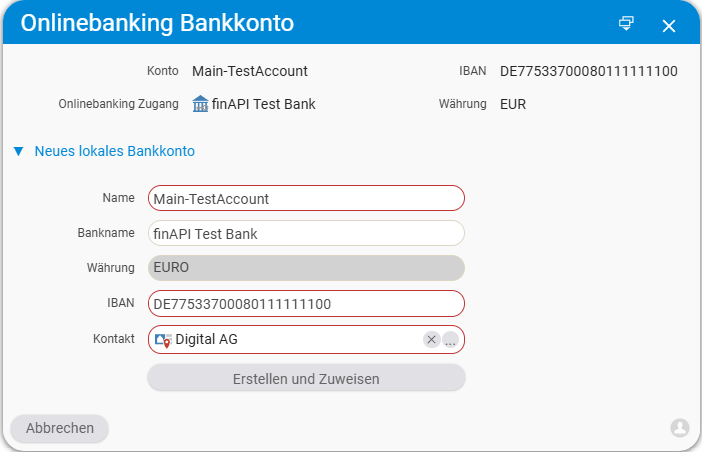
Link the online banking bank account with a local bank account
Now, in teamspace or projectfacts, navigate within your newly created online banking access to the “Online banking bank account” tab. Clicking on your online banking bank account opens the corresponding dialog.
If you already have a local bank account, you can simply select it. If your bank account is not listed, you must set the local bank account as a transaction account via the toggle in the master data.
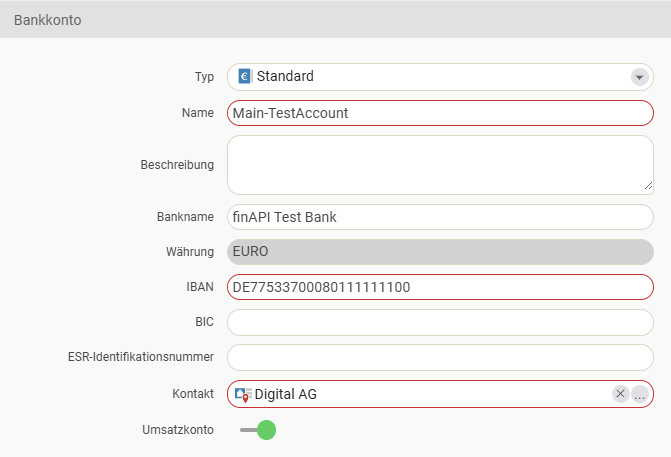
Otherwise, you create a new local bank account using the information from online banking. To do so, click “New local bank account”. Once you have completed the details, you finish the creation with “Create and assign”.
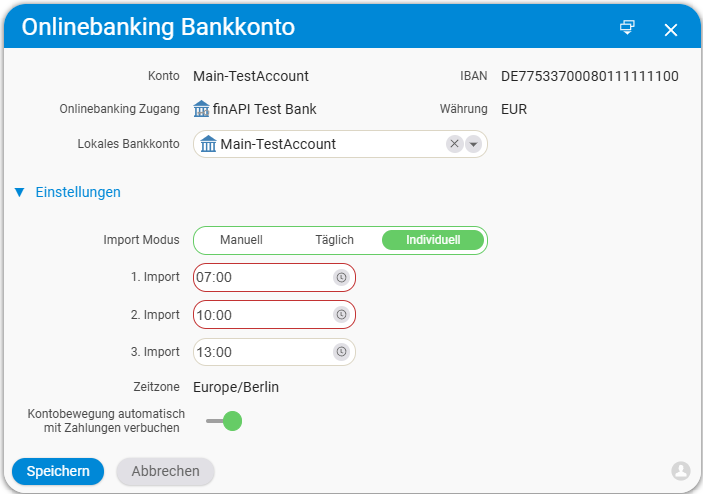
Configure the online banking bank account
You now have a choice between three import modes:
- Manual – every import must be started manually.
- Daily – the import runs automatically after the server restart (around 5 a.m.).
- Custom – you can specify up to three different times of day.
In addition, you can use the automatic payment reconciliation. To do so, enable the switch “Automatically post account transactions against payments”.
4. Use payment reconciliation
With the interface active, your bank account’s transactions are – depending on the setting – added to the system as account transactions. The “Account transactions” list gives you an overview of the imported transactions. In addition, each local bank account provides its own admin list with the account transactions that concern only that account.
Each account transaction has a status, some of which is set automatically by the system. An icon on the account transaction shows it; in the list you can also filter by it:
- New: account transactions that have not yet been assigned or have just been imported.
- Assigned: account transactions that were assigned automatically or manually – so that a visual check can be carried out.
- Reviewed: reviewed account transactions.
- Action required: there was an error during assignment, or the account turnover does not match the total of the payments.
- Ignored: you have marked this account transaction as not business-relevant.
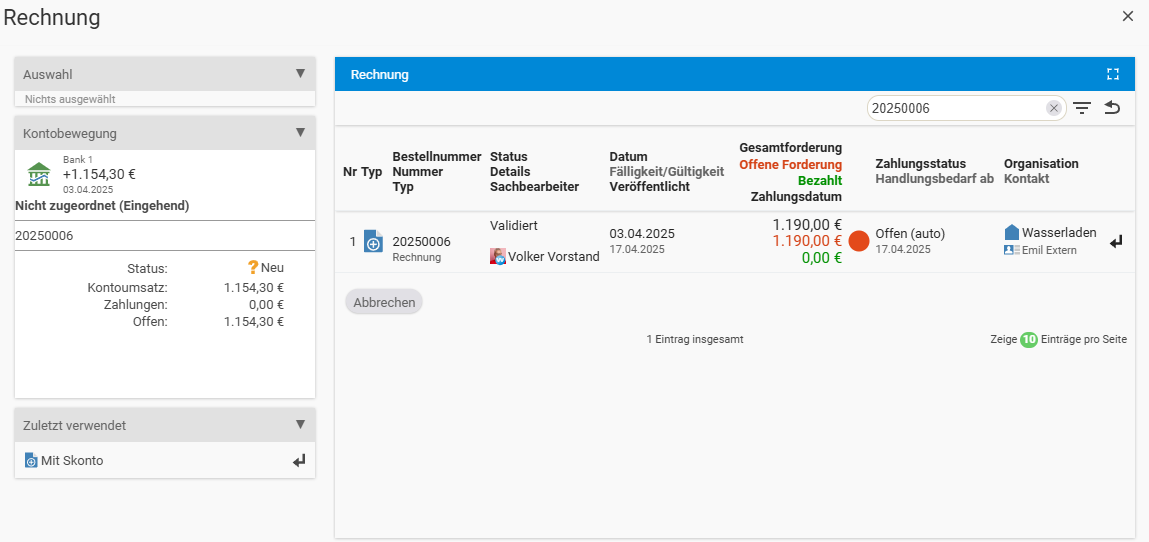
Manual assignment
If automatic assignment is disabled or not possible based on the payment reference, you assign the account transactions to your invoices manually. To do so, click the double arrow at the end of the row for an account transaction. At the top you can then select an invoice.
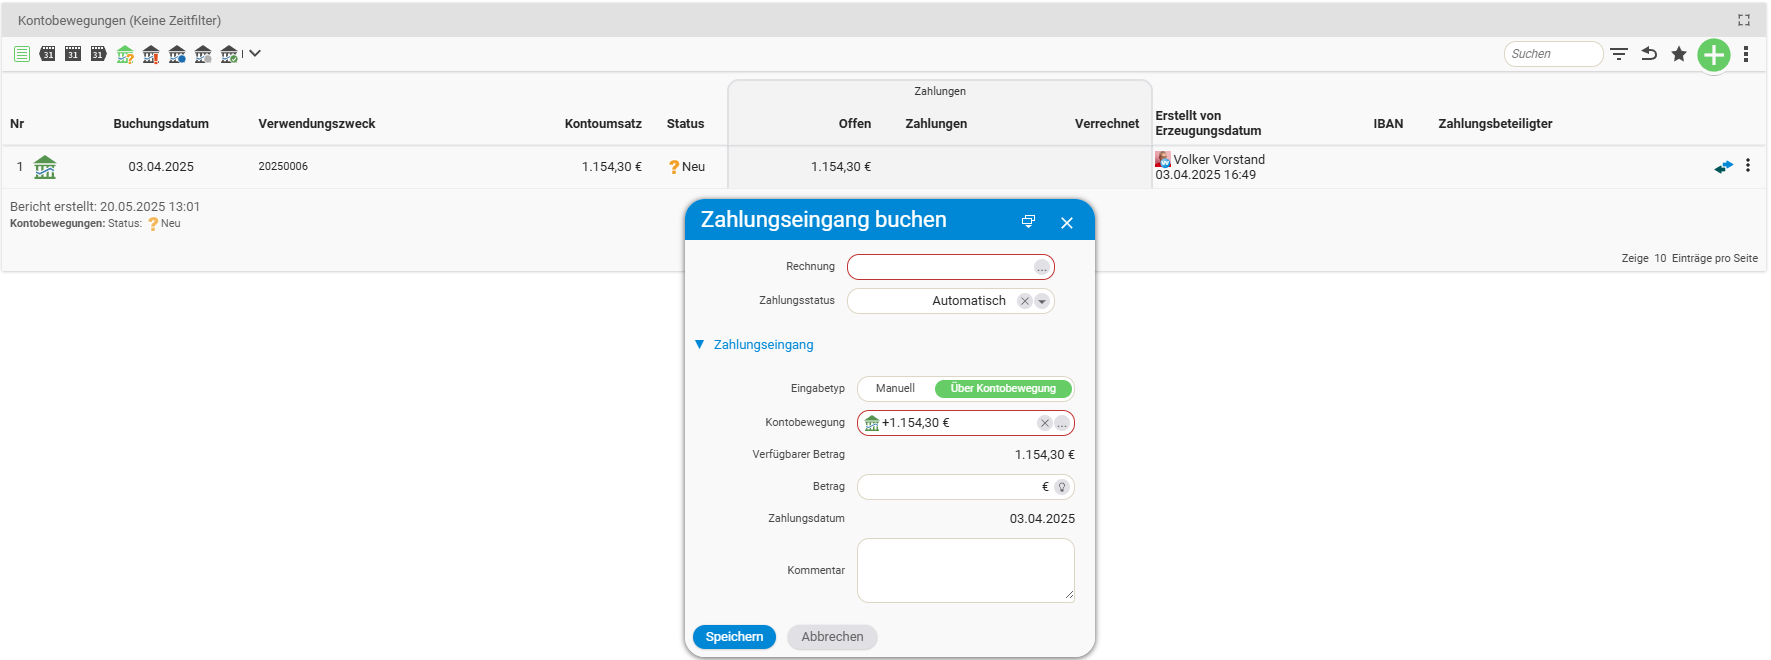
Clicking the three-dots field opens a selection list with further filters – for example by amount or by the payment parties.
You will then find assigned account transactions in the “Payments” tile or in the “Payments” tab within the invoice.
Ignore account transactions
So that you do not have to delete recurring transactions that are irrelevant to you after every import, you can ignore them. Via the action menu of an account transaction, you click “Ignored”. This action affects only the respective account transaction and has no effect on similar ones.
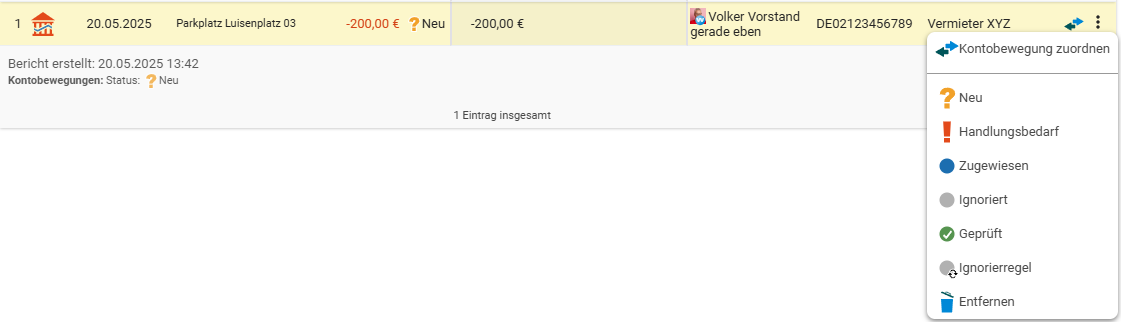
If, for example, you want to hide monthly parking fees permanently, you use an ignore rule. To do so, click “Ignore rule” in the action menu.
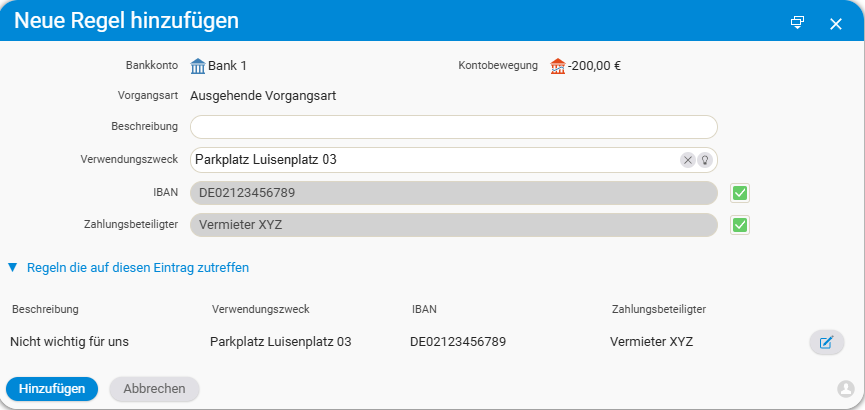
Structure of the fields:
- Description: a reason for ignoring.
- Payment reference: a contiguous part of the payment reference that is to be ignored in each case.
- IBAN: the IBAN of the payment party.
- Payment party: the name of the payment party.
The specified dependencies must all be met (AND logic). If the IBAN and payment party match but the payment reference does not, it is not ignored. If you leave the payment reference empty, all new account transactions with the same IBAN and the same payment party are ignored.
An ignore rule always belongs to one bank account and is only applied within that bank account. You can change or delete it via the Edit button under “Rules that apply to this entry”. Alternatively, you manage your rules in the “Import settings” tab.

Notes
- The interface is only available in teamspace Enterprise and in projectfacts.
- The module and tenant must be activated by support – the changeover can take up to 24 hours.
- For the automatic import, storing the PIN and TAN procedure is mandatory.
- In “Daily” mode, the import runs after the server restart, usually around 5 a.m.
- teamspace/projectfacts only brokers the sign-in between the tenant and finAPI and has no access of its own to your bank data.
Common questions & needs
| You want to … | How to |
|---|---|
| Use the interface at all | Have the “Online banking” module and tenant activated by support in advance (up to 24 hrs). |
| Import account transactions automatically | When creating the access, enable the storage of the PIN and TAN and choose an import mode of “Daily” or “Custom”. |
| Import at fixed times | Choose the “Custom” import mode and specify up to three times of day. |
| Post account transactions automatically | Enable the switch “Automatically post account transactions against payments”. |
| Link a bank account that is not in the list | Set the local bank account as a transaction account via the toggle in the master data – or create a new one via “New local bank account”. |
| Manually assign an account transaction to an invoice | Click the double arrow of the row and select the invoice at the top; filter by amount or payment parties via the three-dots field. |
| Permanently hide recurring transactions | Create an “Ignore rule” in the action menu; the fields use AND logic and apply per bank account. |
| Change or delete an ignore rule | Via the Edit button under “Rules that apply to this entry” or in the “Import settings” tab. |
Related topics
- DATEV Buchungsdatenservice Configuration Configuration
- Configuration – introduction Configuration Introduction