
Customers who host teamspace themselves or use the standard hosting can use their own app registration for the Microsoft connection. The greatest advantage of this is the ability to use the client credentials grant flow. When connecting Microsoft 365 mailboxes in teamspace, an OAuth 2.0 login is normally required, which must be carried out by an authorised user. With the client credentials grant flow, teamspace can access the mailboxes without a user login and thus makes managing several mail accounts easier.
The following steps are required for the setup:
- Create an app registration in the Microsoft Entra Admin Center
- Register a service principal in Exchange via PowerShell
- Adjust the teamspace
web.xml - Set up the interface in teamspace
Note: Before the interface can be set up in teamspace, it must first be enabled by one of our support staff.
Create the app registration
- Sign in with an administrative user in the Microsoft Entra Admin Center.
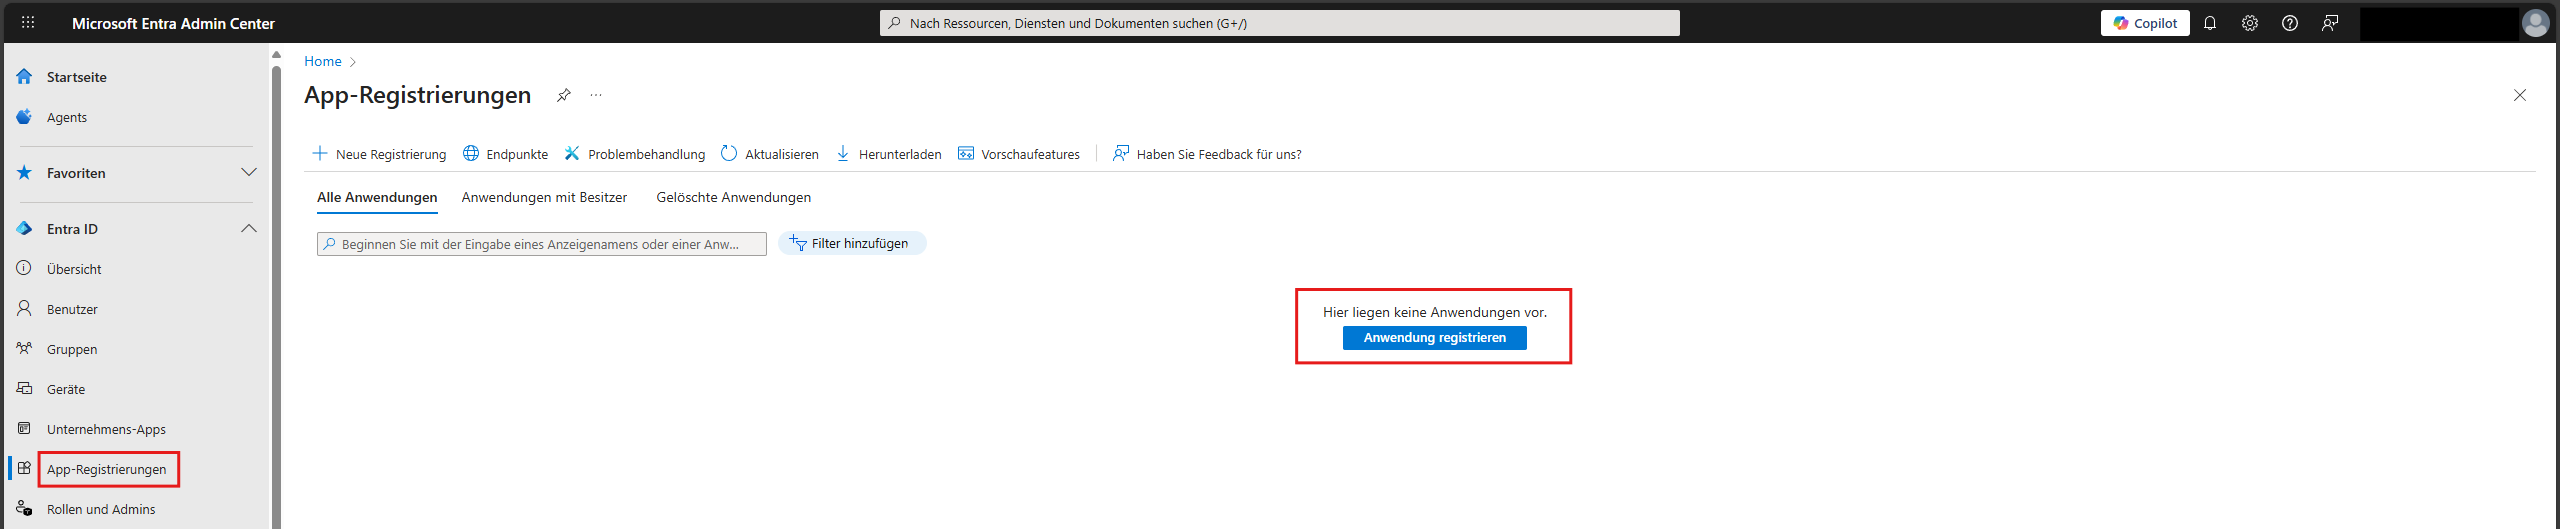
- Navigate to the menu item “Entra ID” ► “App registrations” and click “New registration”.
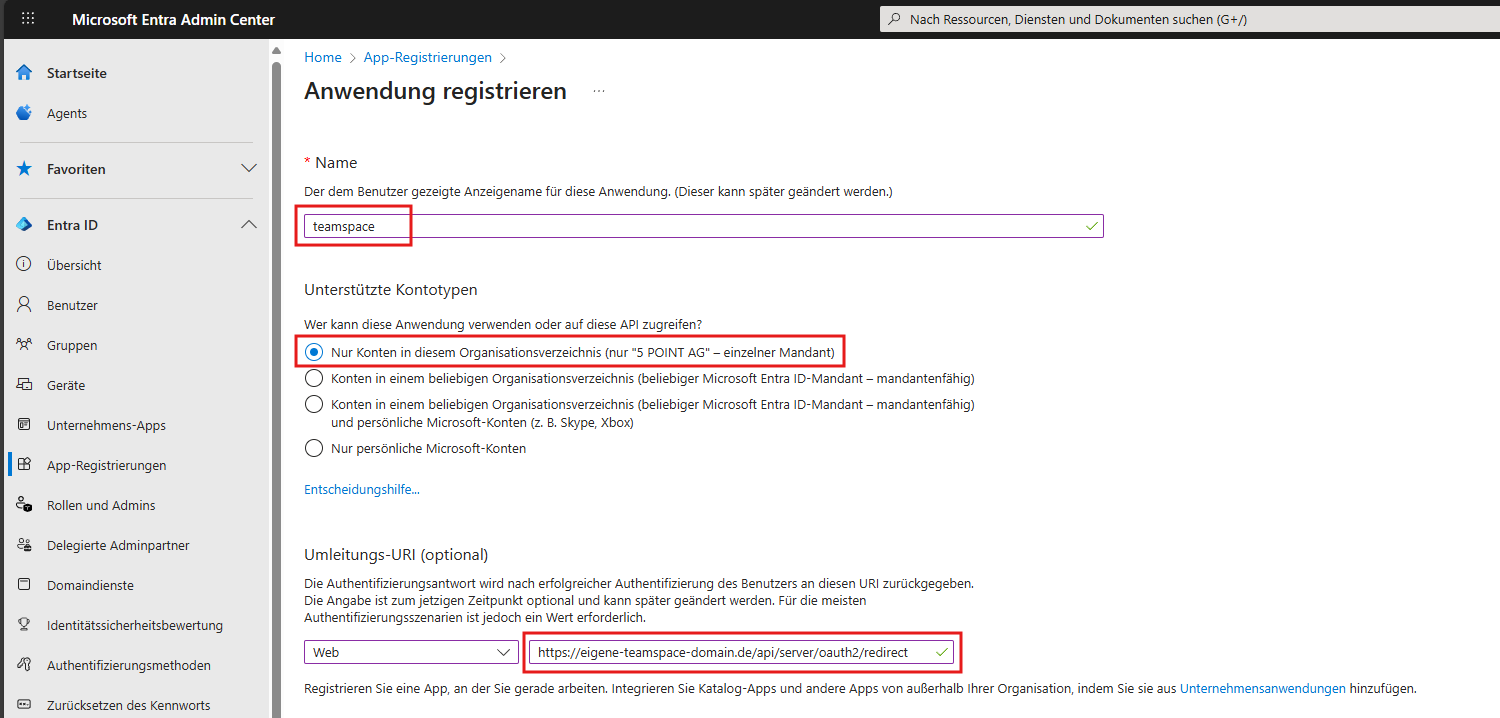
- Enter any name by which you can recognise the app.
- As the account type, you must select “Accounts in this organisational directory only”.
- The redirect URI is made up of the URL of your teamspace installation and the path
/api/server/oauth2/redirect. Example:https://xyc.teamspace.de/api/server/oauth2/redirect
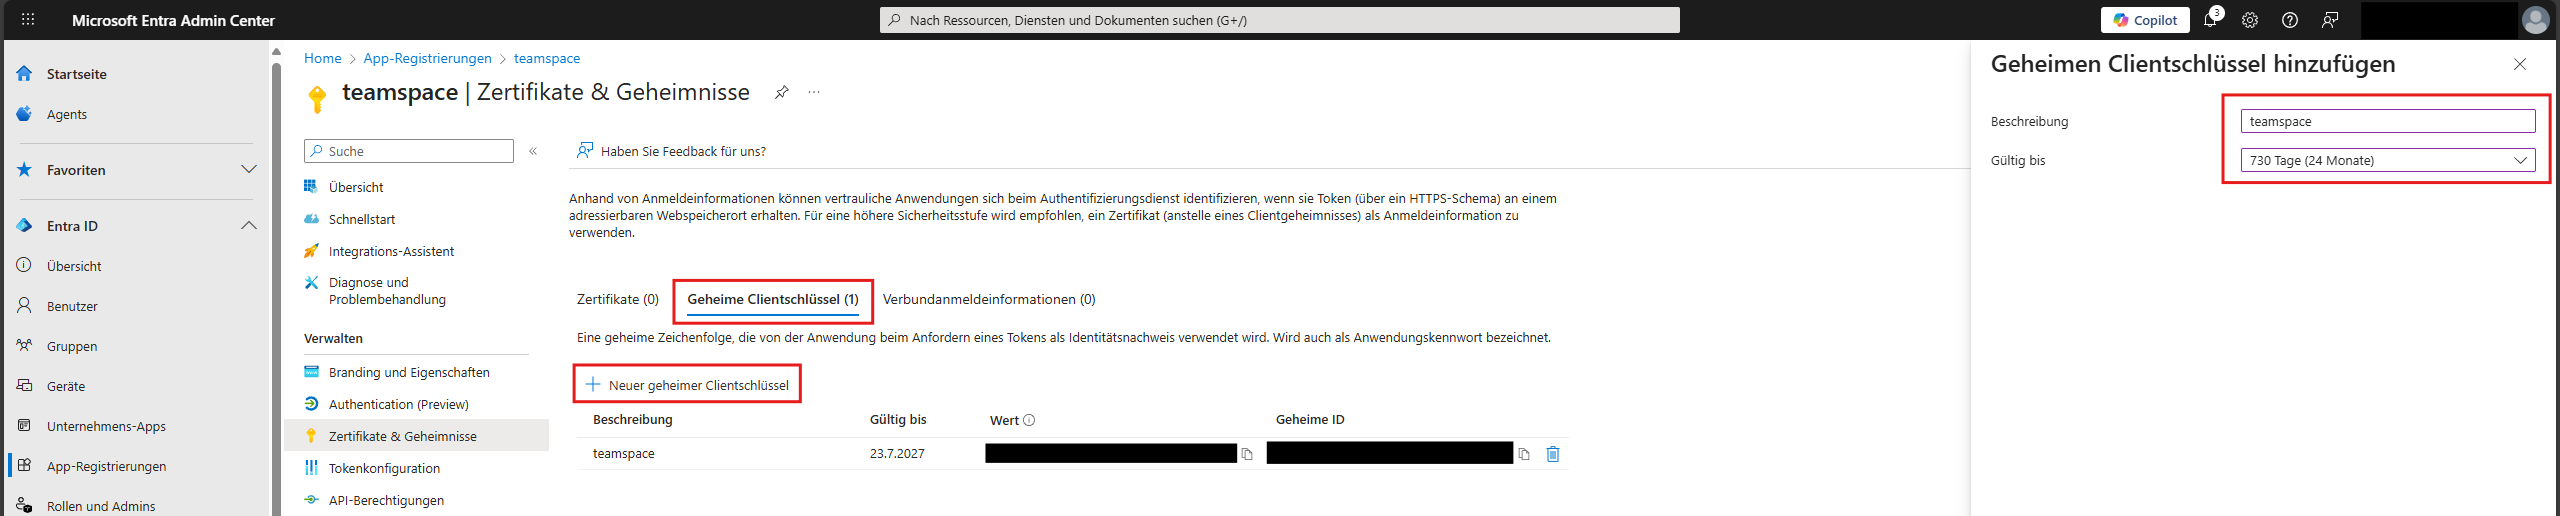
- Next, you must create a client secret under “Certificates & secrets”. Enter a description and choose how long the secret should be valid. A new secret must be created again each time after the expiry period.
- Make a note of the “Value”, as it will be needed later in teamspace and is not shown again in Entra ID.
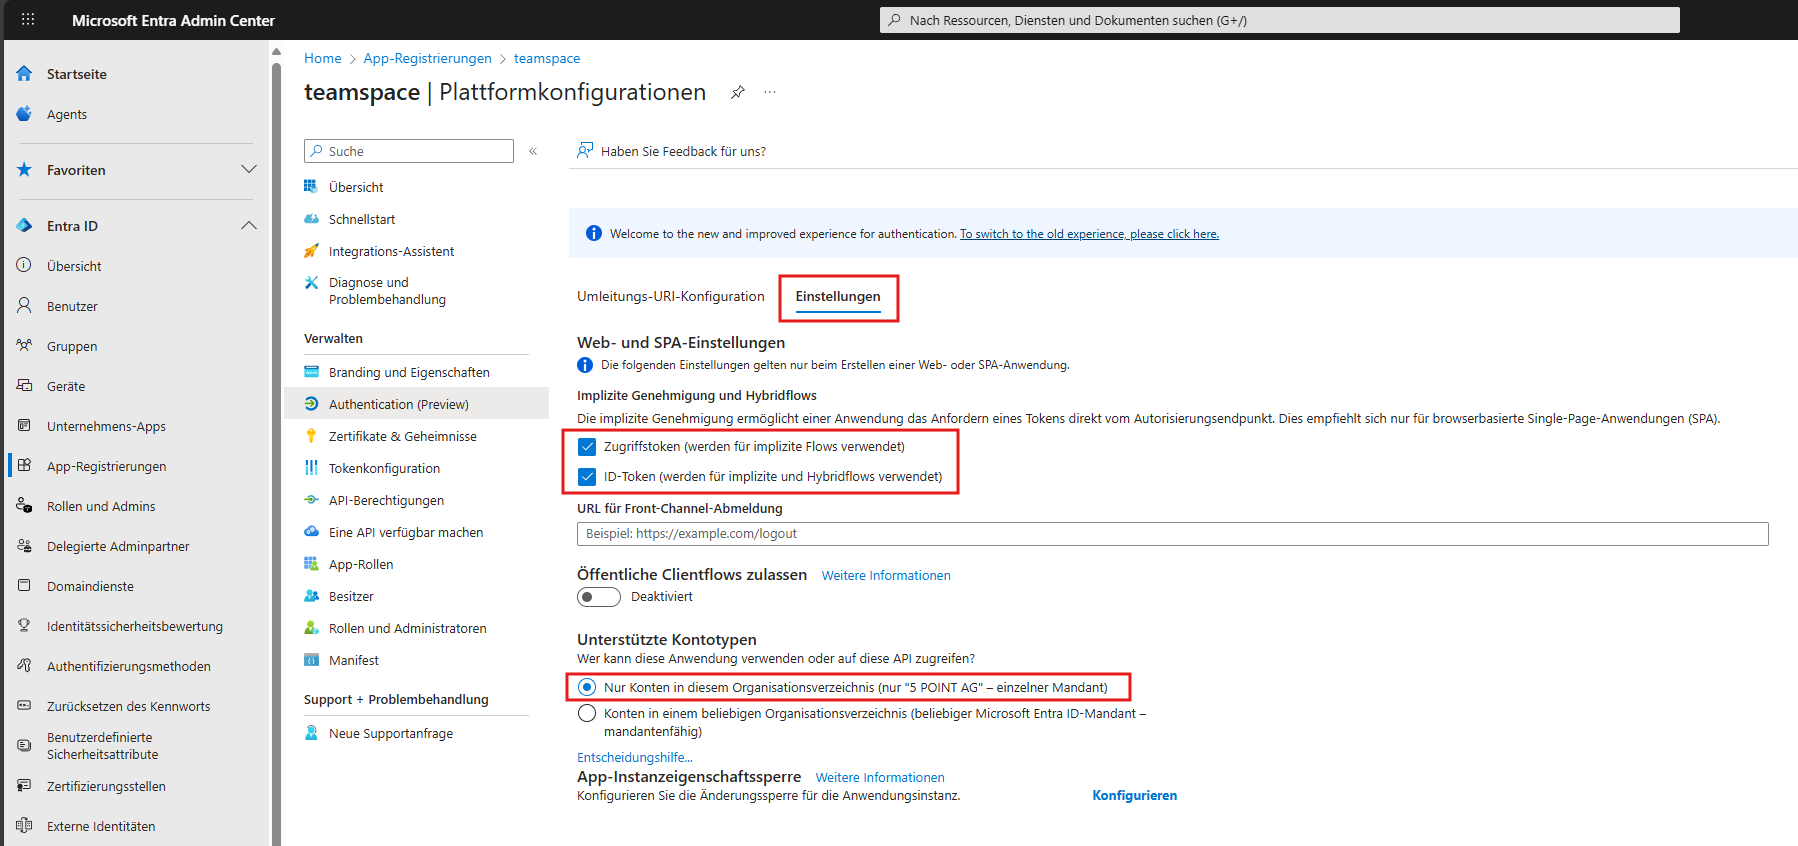
- Now go to “Authentication” ► “Settings” and enable the “Access tokens” and “ID tokens” options.
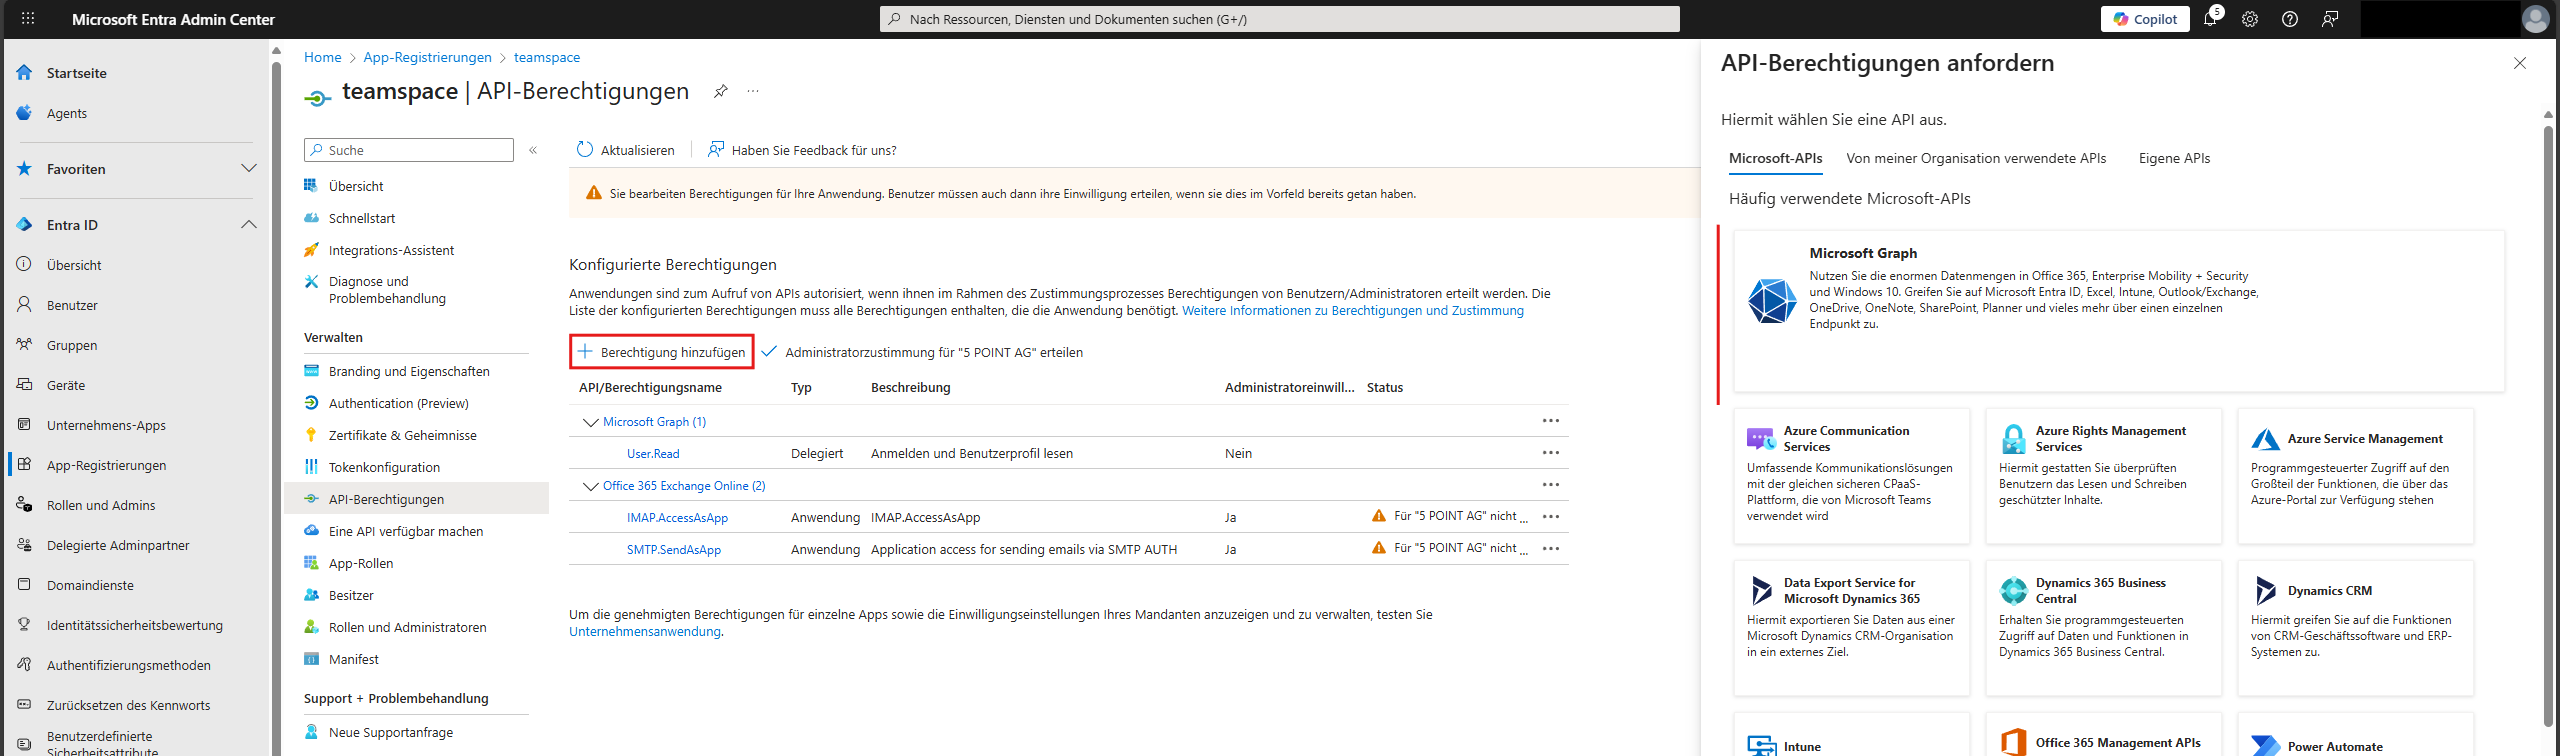
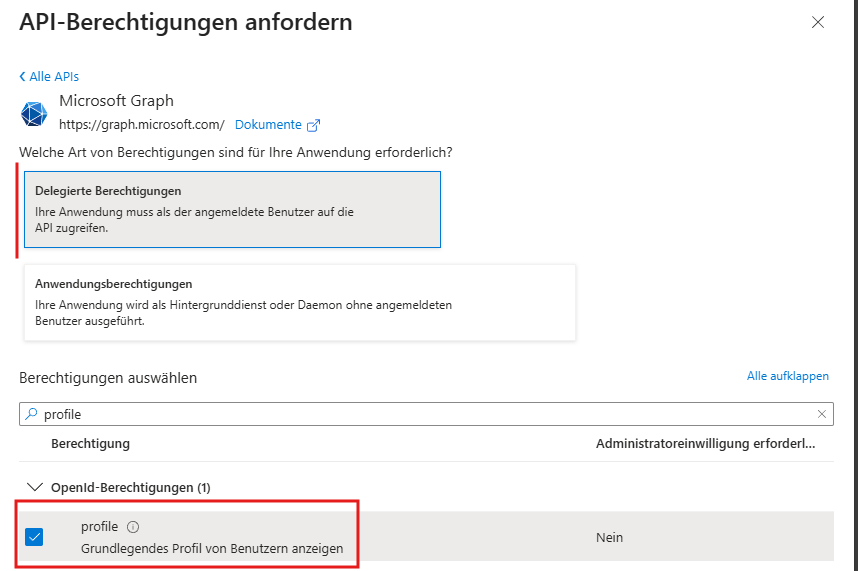
Next, several permissions must be added for the app:
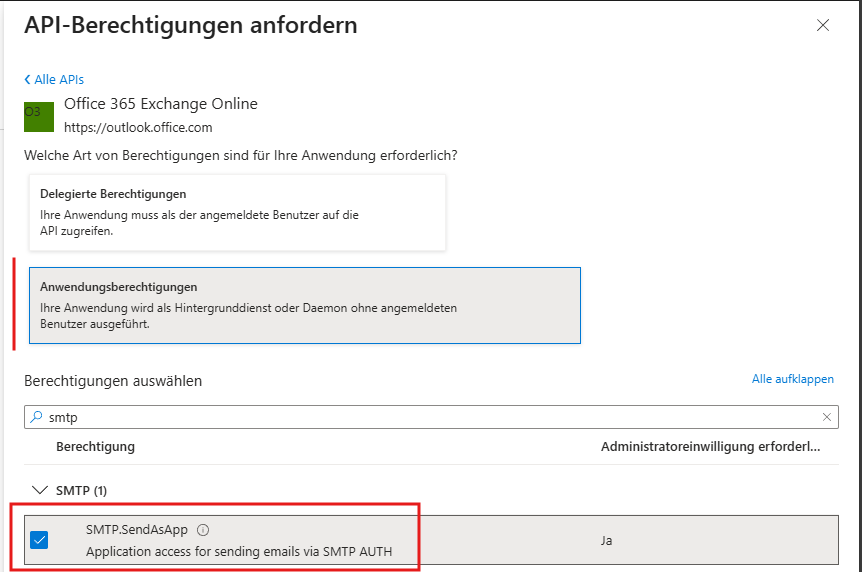
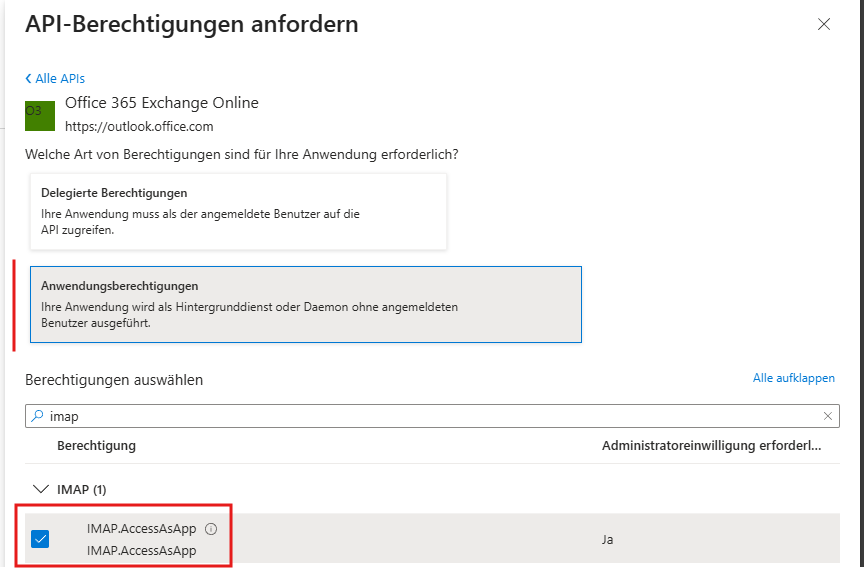
- Office 365 Exchange Online:
IMAP.AccessAsApp– required for receiving email via IMAP. - Office 365 Exchange Online:
SMTP.SendAsApp– required for sending email. - Microsoft Graph:
Calendars.ReadWrite– so that Teams appointments can be created via the teamspace calendar. - Microsoft Graph:
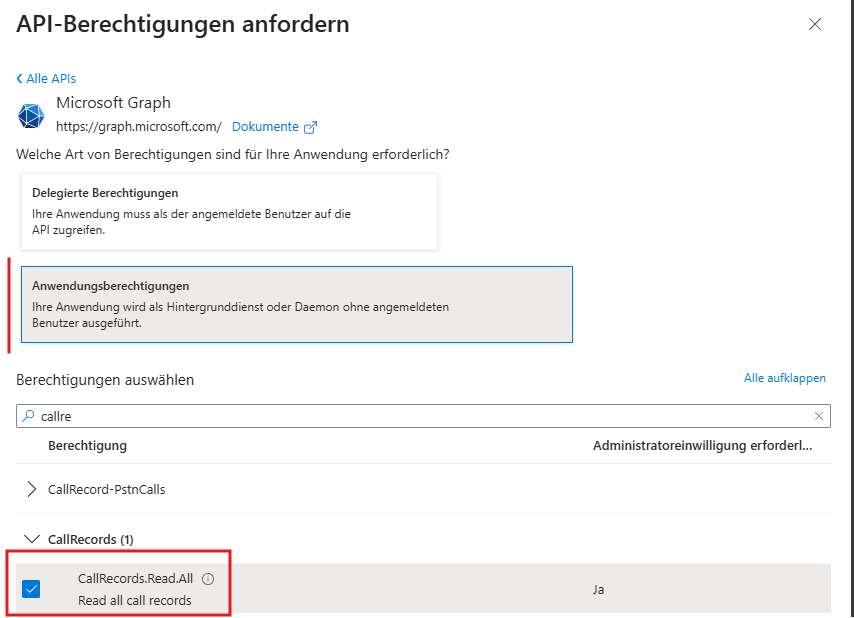
CallRecords.ReadAll– allows teamspace to retrieve the call history from Teams. - Microsoft Graph:
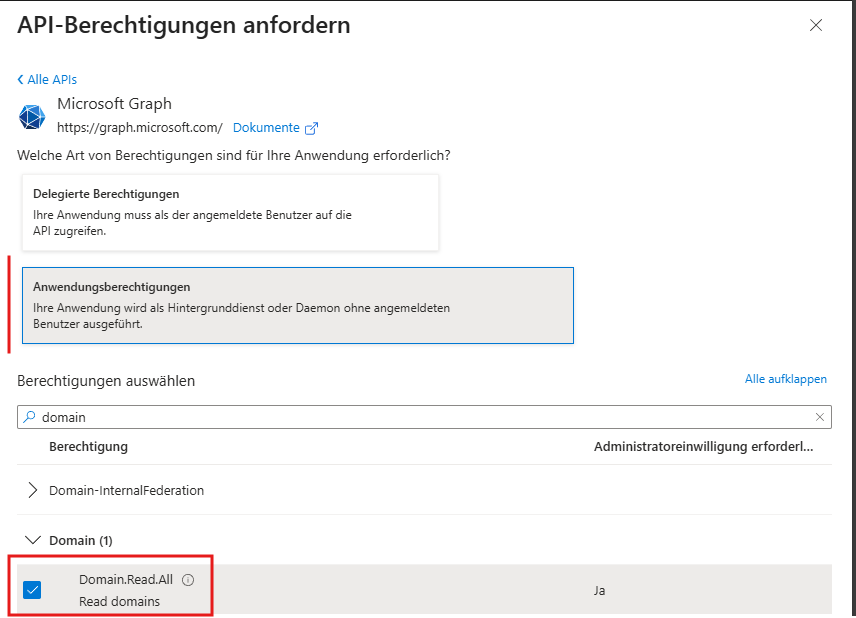
Domain.ReadAll– so that the call history, the creation of Teams appointments and SSO work, the teamspace users must be linked to the Microsoft users. With this permission, teamspace can filter the Microsoft users more effectively. - Microsoft Graph:
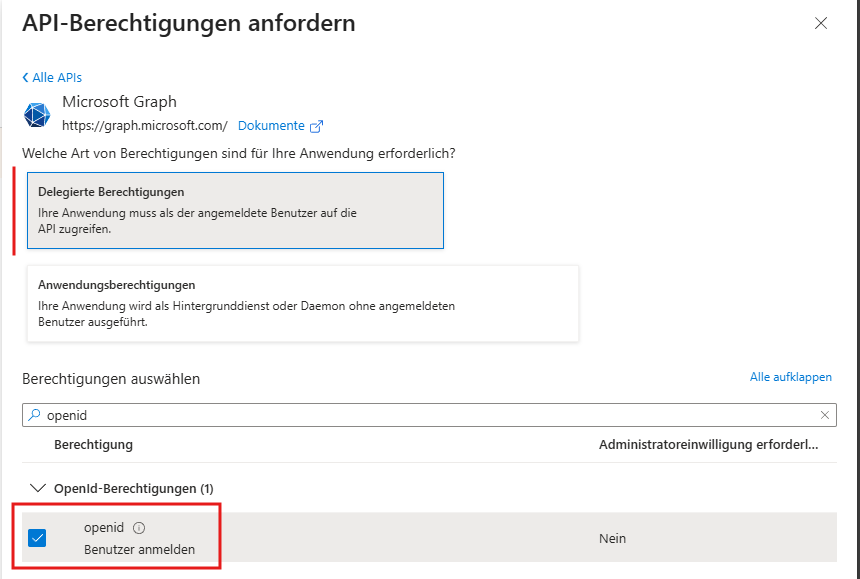
openid– required for Microsoft single sign-on. - Microsoft Graph:
profile– required for Microsoft single sign-on. - Microsoft Graph:
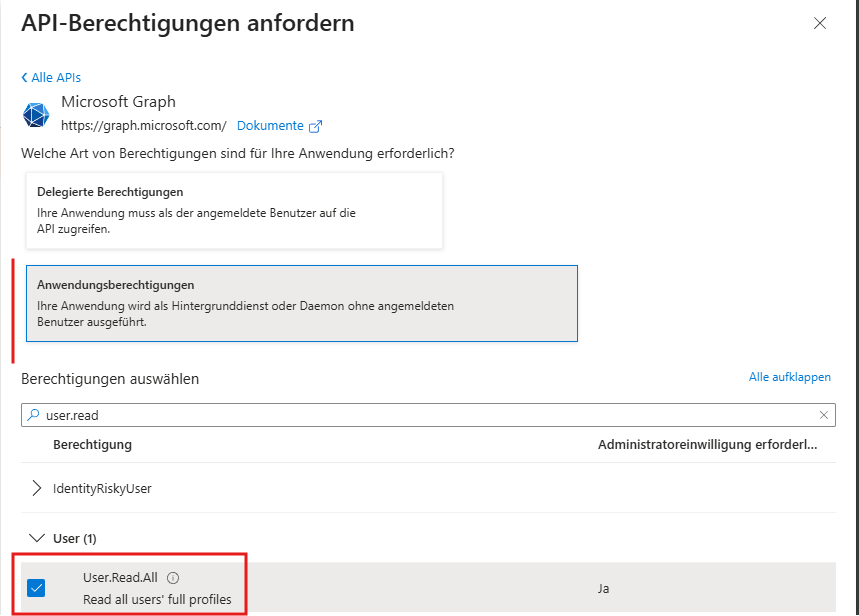
User.ReadAll– required for Microsoft single sign-on and the Teams integration.
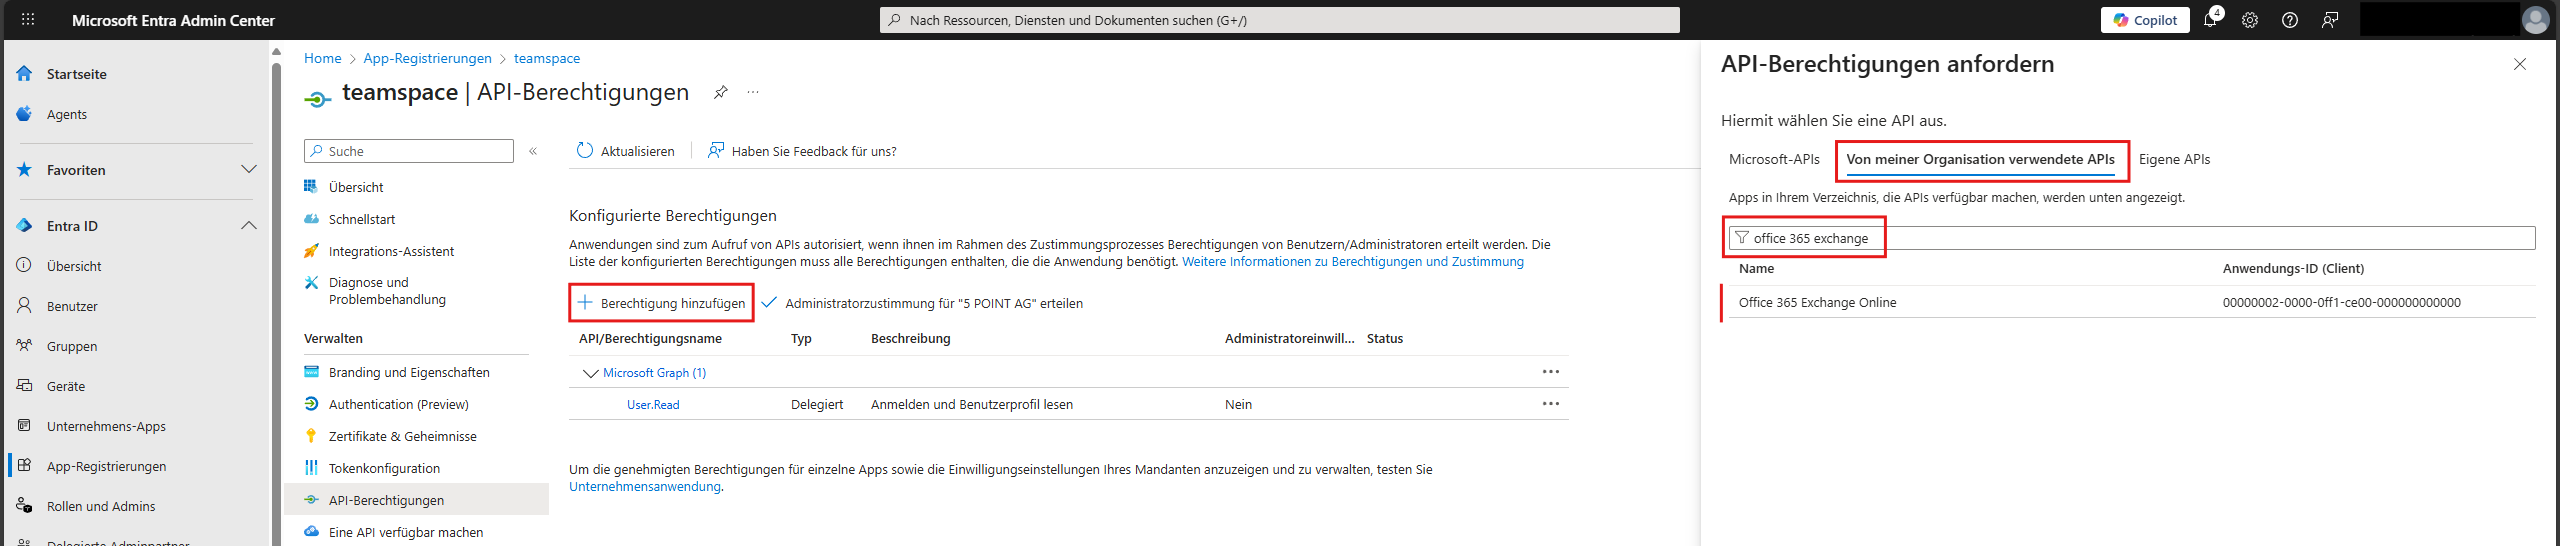
You add the permissions for Office 365 Exchange Online as follows:
- Office 365 Exchange Online:
SMTP.SendAsApp
- Office 365 Exchange Online:
IMAP.AccessAsApp
The permissions for Microsoft Graph are located under a different menu item:
- Microsoft Graph:
Calendars.ReadWrite

- Microsoft Graph:
CallRecords.ReadAll
- Microsoft Graph:
Domain.ReadAll
- Microsoft Graph:
User.ReadAll
- Microsoft Graph:
openid
- Microsoft Graph:
profile
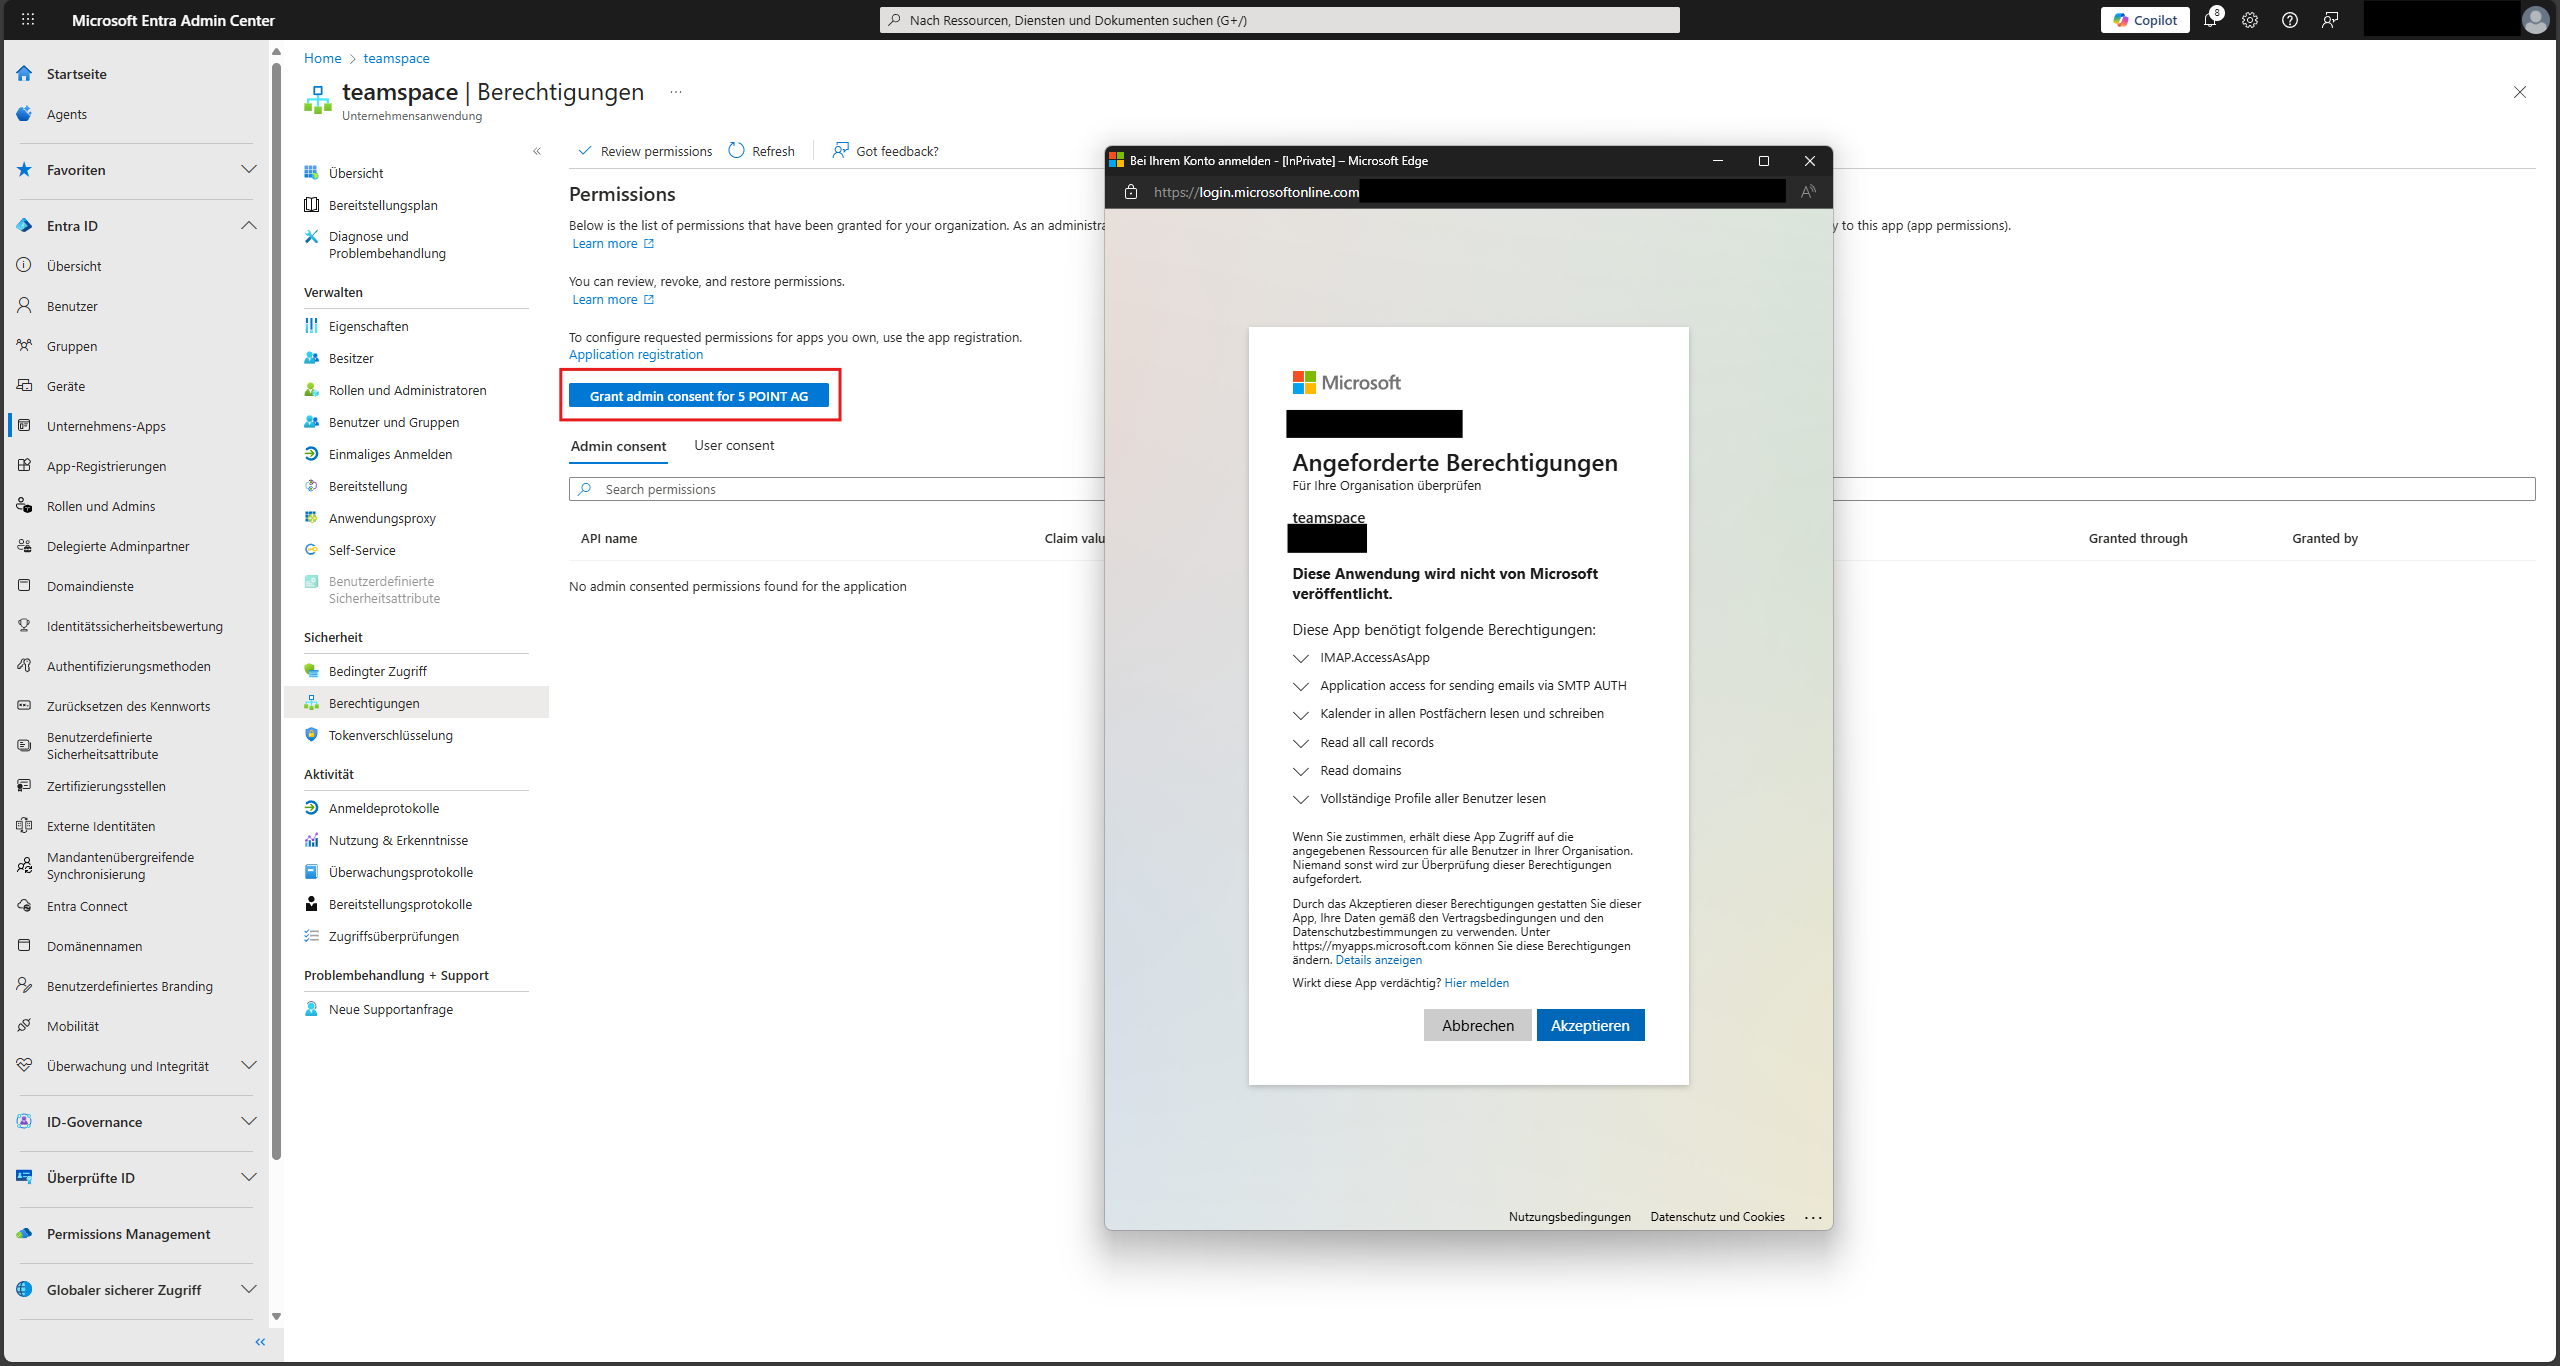
- Finally, click “Enterprise application” at the bottom. This takes you to the enterprise app for your app registration.
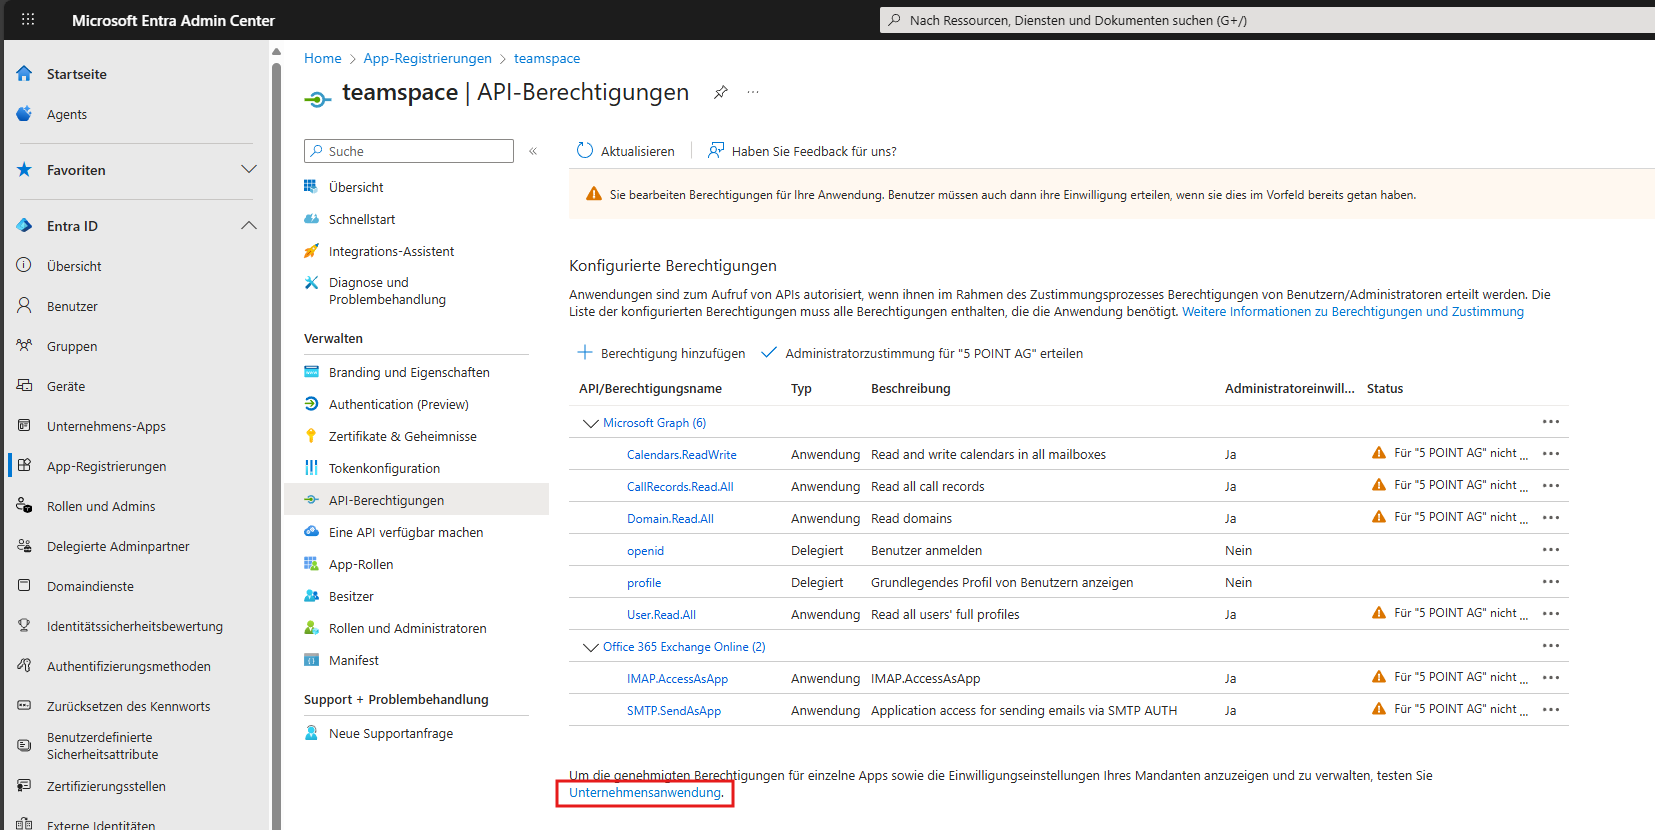
- Here you must click “Grant admin consent” and confirm the subsequent Microsoft dialog.
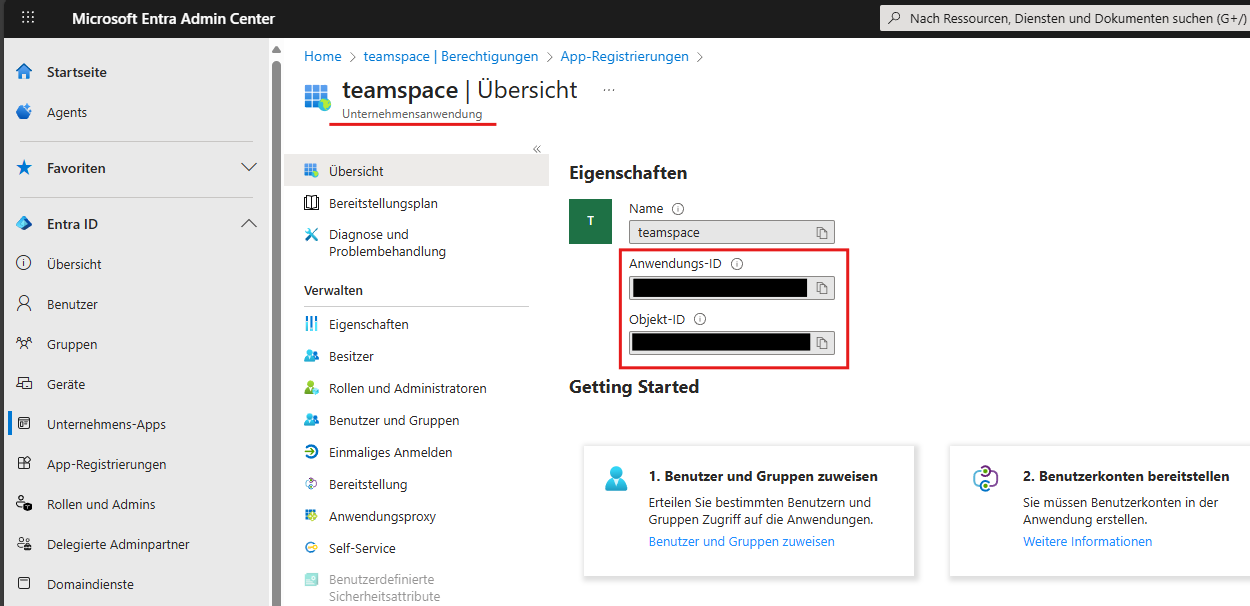
- Lastly, go to the “Overview” (still under Enterprise application) and make a note of the Application ID and the Object ID.
Register the service principal
So that the enterprise application created earlier can access the desired mailboxes, a service principal must be registered that is granted access to the mailboxes. To do this, you must run a few commands via PowerShell with a Microsoft user who has administrative rights in the Exchange area. The rough steps are listed here; you will find details in the Microsoft documentation.
- The following three commands install the ExchangeOnlineManagement module and connect your Microsoft tenant.
<tenantId>must be replaced with your directory ID. You will find this, for example, in the previous app registration in the summary on the overview page: Directory (tenant) ID.
Install-Module -Name ExchangeOnlineManagement
Import-module ExchangeOnlineManagement
Connect-ExchangeOnline -Organization <tenantId>- Create the service principal (replace
<APPLICATION_ID>and<OBJECT_ID>with the values from the last step of the app registration):
New-ServicePrincipal -AppId <APPLICATION_ID> -ObjectId <OBJECT_ID>- For the next step you need the ID of the service principal you have just created:
Get-ServicePrincipal | fl- Now the relevant mailboxes still have to be assigned to the service principal. To do so, enter the relevant email address for
Identityand replace<SERVICE_PRINCIPAL_ID>with the ID determined earlier.
Add-MailboxPermission -Identity "john.smith@contoso.com" -User <SERVICE_PRINCIPAL_ID> -AccessRights FullAccess- Under certain circumstances it may also be necessary for you to allow SMTP AUTH for the mailboxes:
Set-CASMailbox -Identity "john.smith@contoso.com" -SmtpClientAuthenticationDisabled $falseAdjust the teamspace web.xml
Note: This step can be skipped if you do not intend to use Microsoft single sign-on in teamspace.
- Use a text editor to edit the
webapp/WEB-INF/web.xml(in the installation directory). - Search for the value
oauth2Gateway.urland replace the value below it betweenparam-valuewith the URL of your server (usually identical toserver.url). - Restart the Tomcat service.
If the context-param for oauth2Gateway.url does not appear in your web.xml, you can add it in the middle, after another context-param:
<context-param>
  <param-name>oauth2Gateway.url</param-name>
  <param-value>https://www.mein-teamspace.de</param-value>
</context-param>
Add the interface in teamspace
- Under “Configuration ► General ► Interfaces”, click the ”+” button to create a new interface.
- Select “Your own Microsoft app registration” as the type.

- Now enter the data noted earlier:
- Application ID of the enterprise application (identical to the ID from the app registration)
- Directory ID, which can be found in the overview of the app registration
- Application key is the “Value” that was shown after the client secret was created
After you save the dialog, a green message appears if access to the Microsoft endpoint was successful.
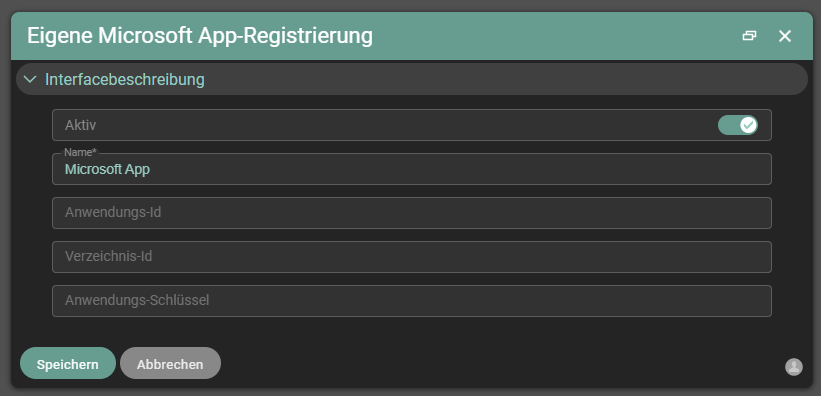
If everything worked, you can now select “Microsoft 365 as app” as the authentication in the mail accounts of teamspace.
Notes
- The interface must be enabled in advance by a member of support before you can set it up in teamspace.
- The client secret has an expiry period. After it expires, a new secret must be created and stored in teamspace.
- The “Value” of the client secret is shown only once in Entra ID – make a note of it immediately after creating it.
- Adjusting the
web.xmlis only required if you want to use Microsoft single sign-on.
Common questions & needs
| You want to … | How to |
|---|---|
| Access several mailboxes without a user login | Use your own app registration with the client credentials grant flow and grant access per mailbox via Add-MailboxPermission. |
| Allow receiving and sending email | Add the Exchange Online permissions IMAP.AccessAsApp (incoming) and SMTP.SendAsApp (outgoing). |
| Use Teams appointments and call history | Add the Microsoft Graph permissions Calendars.ReadWrite and CallRecords.ReadAll. |
| Use Microsoft single sign-on | Set the Graph permissions openid, profile, User.ReadAll and Domain.ReadAll and enter oauth2Gateway.url in the web.xml. |
| SMTP sending fails | Allow SMTP AUTH for the affected mailbox via Set-CASMailbox … -SmtpClientAuthenticationDisabled $false. |
| Make the permissions take effect | Click “Grant admin consent” in the enterprise application and confirm the Microsoft dialog. |
Related topics
- Connect mail accounts Configuration Configuration
- Set up single sign-on (SSO) Configuration Configuration