

The small red “badges” in the menu are teamspace notifications (also called alerts or notices). They appear when teamspace or a colleague wants to give you an important piece of information – for example when a task has been assigned to you. Here you will learn how to make better use of these notices: view them, revive them, configure them and create them yourself.
Receiving notifications
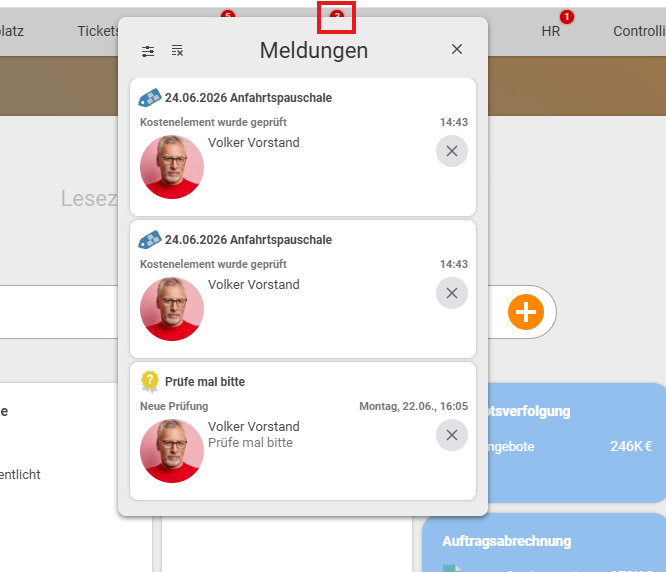
A notification is created, for example, when someone assigns something to you. When a colleague assigns you a project in “Projects → Project overview”, a new badge appears for you. If you click the badge at the top of the menu, the “Messages” list opens with the individual notices; clicking an entry takes you straight to the relevant place – for example into the project or the order that has just been reset to draft mode.
Viewing & restoring
Notifications should not always disappear once you have opened them – they may still contain important information or serve as a reminder.
- In the right-hand bar (“Messages”), the
Unreadtab shows the current badges. - At the top, the
Readtab switches to those you have already read (next to it isSent). - There, for each read notification, you have the option of reviving it. Revived notices automatically reappear at the top among the current ones, and from there you can jump back into the module.
Be careful with “mark all as read”: The action of marking all notices as read in one go makes all badges disappear. If this happens to you, you can revive the affected notifications individually via the read ones.

Quick win: view a notification without losing it
If you click directly on a notification, it is gone afterwards. If you want to see the content but keep the notification, proceed as follows:
- Move to the icon – you get the preview.
- In the preview, click the heading.
- You land in the element and see the content – and the notification is retained.
Configuring
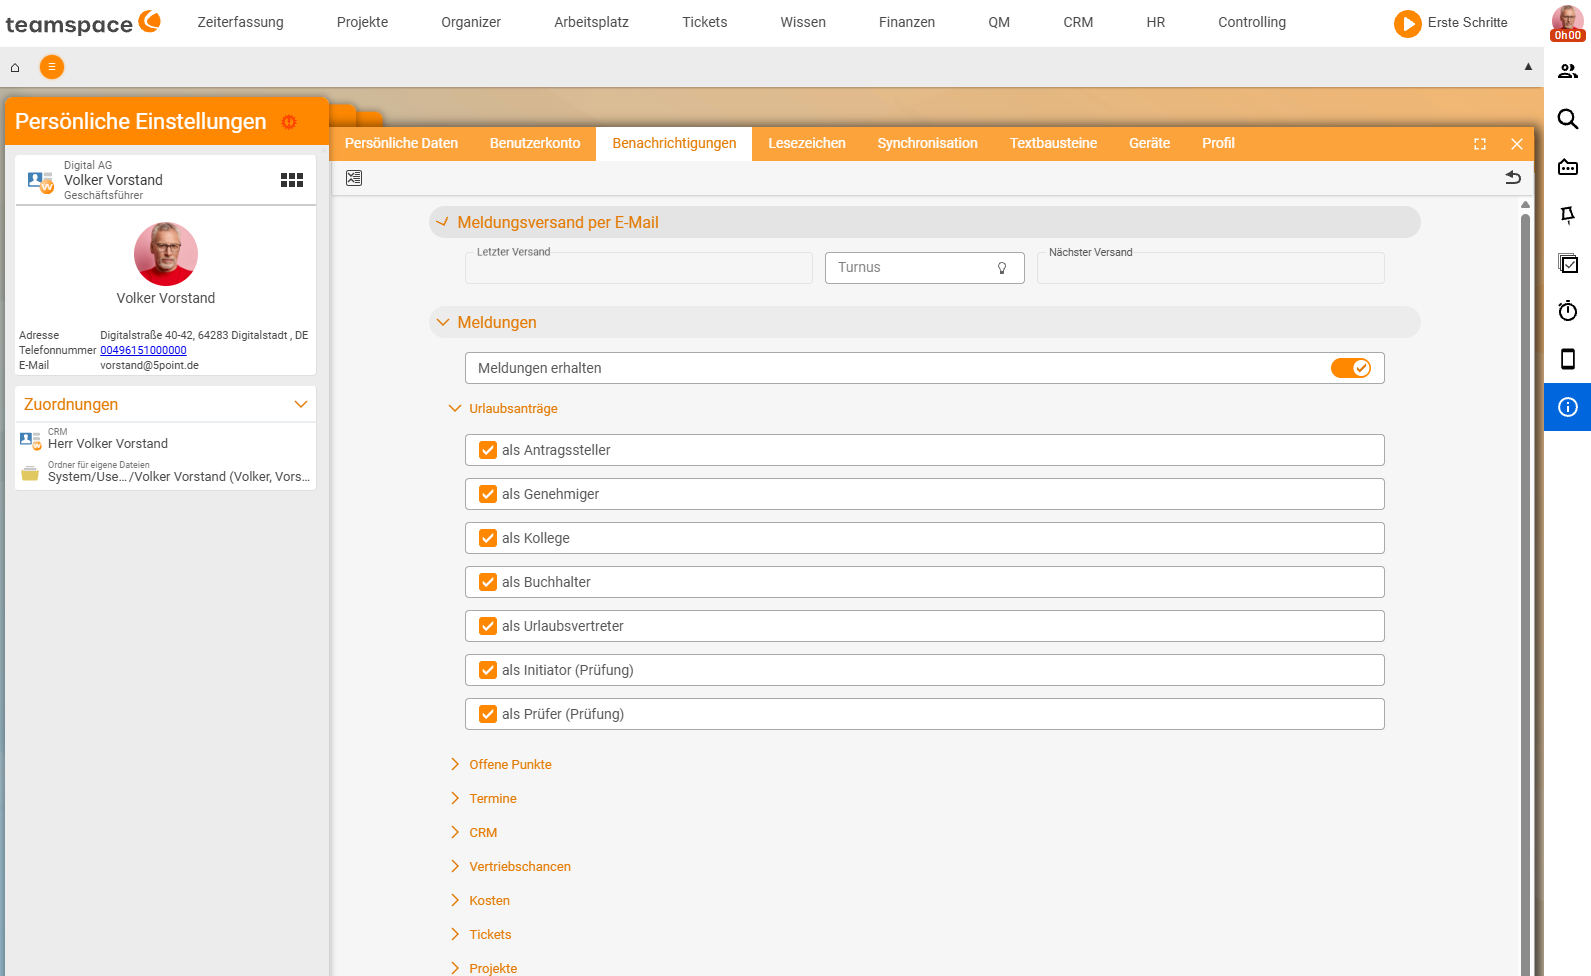
What you want to be informed about is defined in the settings:
- Via the “Settings” action on the notifications, or via “Personal settings → Notifications”.
- In the
Messagesaccordion, you tick a box per area (e.g.Leave requests,Open items,Appointments,Costs,Tickets,Projects) and role – for example, for leave requestsas approveror for reviewsas reviewer (review). If you no longer want to be informed in an area, you simply remove the tick; theReceive messagesswitch at the top turns them off entirely. - Above it you will find the
Send messages by emailaccordion with theFrequency: if you set it, you receive a summarised report by email at this interval (by default every four hours) – it tells you which information has come up for you. Without email sending, you only receive the notices as the small notifications in the system.
Creating a notification
You can also trigger an individual notification for colleagues yourself – directly from the respective module:
- Go into the module, for example Finance module → Document overview, and open the element you have a question about.
- At the top, choose the “Notification” action.
- Select the recipient and enter a text (e.g. “Hi, could we have a quick chat”).
- Send.
When the recipient clicks the notification they receive, they land directly in the element it refers to.
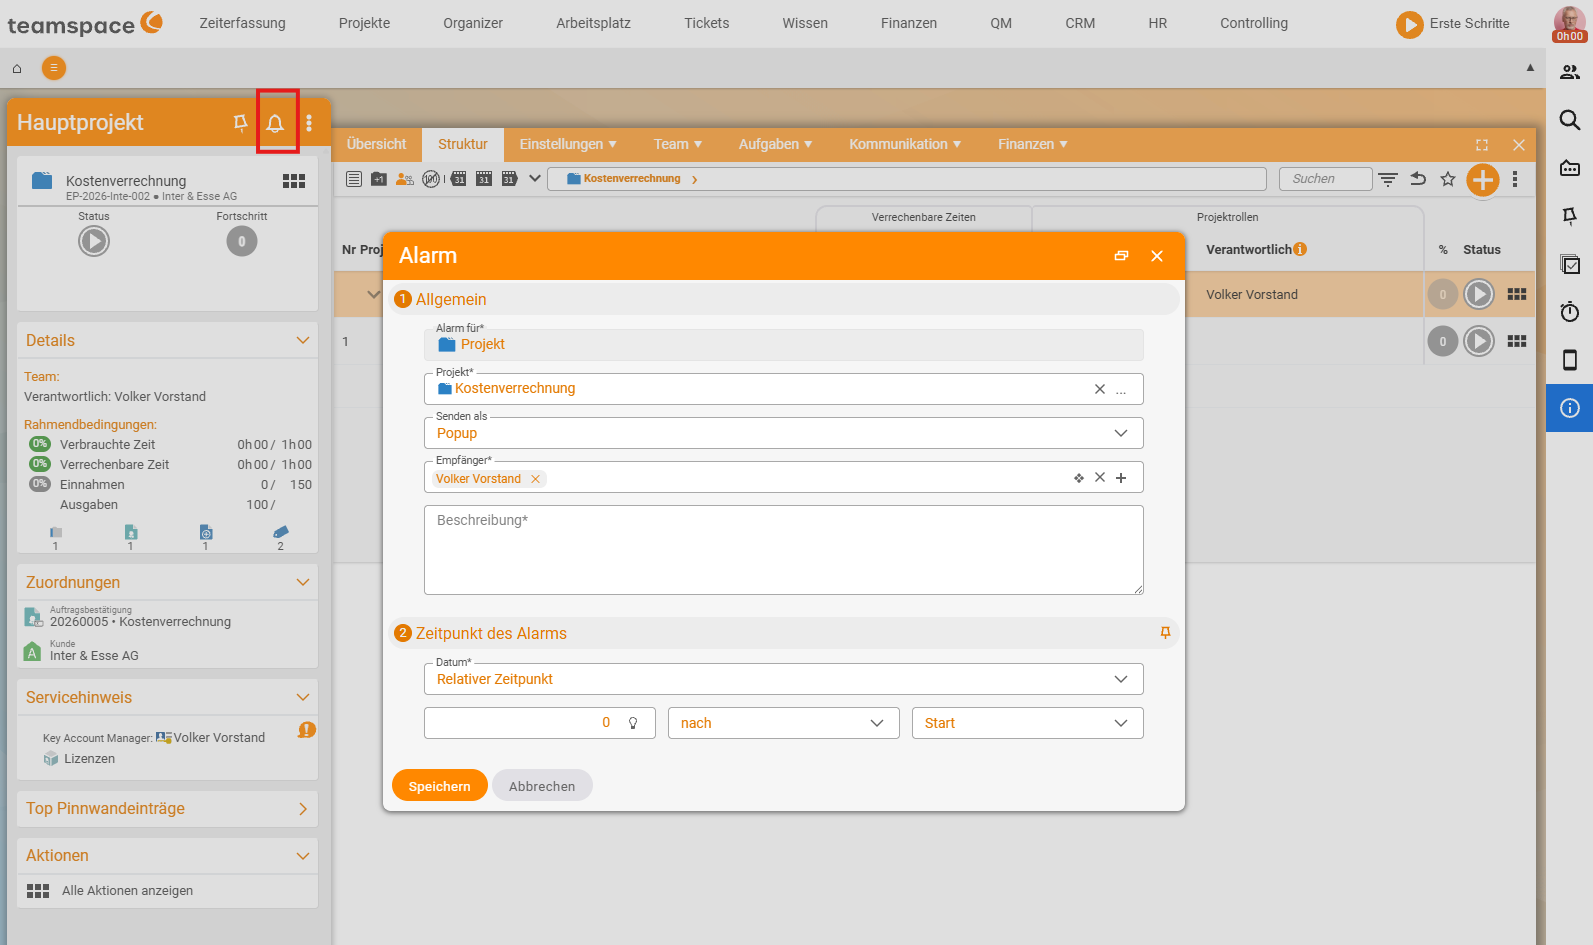
Using in alarms
Notifications can also be used as an alarm. In the detail manager you will find the bell for this:
- Open the bell – in the
Alarmdialog, theSend asfield is set toPopupby default. - Switch it to
Notification. - Define the
Recipient, description and, underTime of the alarm, theDatemode – fixed or as aRelative time(e.g. “0 after start”).
At the chosen time, the notification appears as a badge for the recipient. This works with almost any element. Relative alarms are also possible, for example one day before the project ends or at 70% consumption of the project.
Common questions & needs
| You want to … | How to |
|---|---|
| Keep a notification you have opened | In the right-hand bar, switch to the read ones and revive the notification. |
| See the content without the notice disappearing | Move to the icon → preview → click the heading; this keeps the notification. |
| Recover badges that disappeared by accident | After “mark all as read”, revive the notices individually via the read ones. |
| Be informed by email as well | In the notification settings, enable the email option – summarised report every four hours. |
| Stop being notified in a particular area | Under “Personal settings → Notifications”, remove the tick per area/role. |
| Inform a specific colleague | In the module, use the “Notification” action: recipient + text → send. |
| Remind yourself or others at a certain time | In the detail manager, open the bell and set the alarm type from Popup to Notification (fixed or relative time). |
Related topics
- Installing teamspace as an app (PWA) Configuration How-to
- Configuration – Introduction Configuration Introduction