
teamspace is a web application – the advantage being that you can use it from anywhere. With just a few clicks, you can additionally install teamspace as a Progressive Web App (PWA) so that it feels like a real program: its own window, a taskbar icon and quick shortcuts. This way you work comfortably at the desktop and on the move on mobile.
Installing on the PC
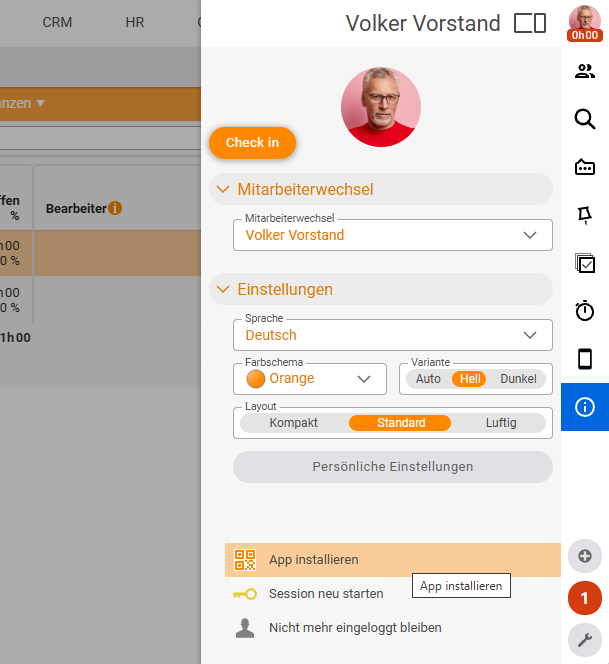
- Go into the menu on the right and choose “Install app”.
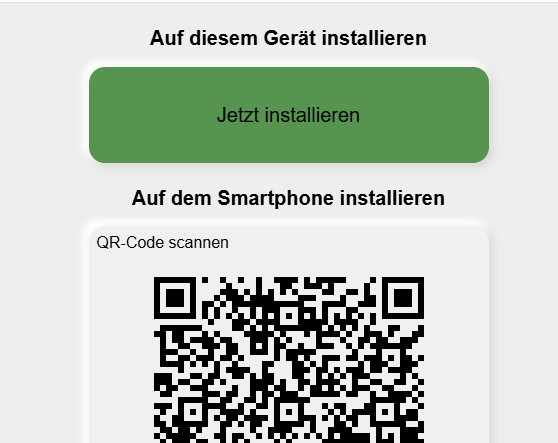
- Click “install now” – this refers to this device, the one you are currently using.
- Confirm the prompt; Chrome then asks once more as well – confirm here with “yes”.
- Optionally, you can pin teamspace.
The difference is immediately visible: the address bar disappears, you have more room and teamspace runs in its own window. Your taskbar now holds an icon that takes you straight into the program – and there you also see your notifications. By right-clicking the icon, shortcuts such as “Check In” and “Check Out” are available to you.
Installing on the smartphone
- Go into the menu again and choose “Install app”.
- The “on this device” option no longer appears now – the system has recognised that teamspace is already installed on the PC.
- Instead, a QR code appears. Scan it with the normal camera on your phone.
- Under “Option”, start the command offered – teamspace is then installed on the phone automatically.
The benefit on the phone: you can check in and check out directly via the shortcuts, without first switching into the program.
Removing a device
If you have installed teamspace on several devices, you sometimes want to get rid of it again – particularly handy when you no longer have access to a device (e.g. if it is lost).
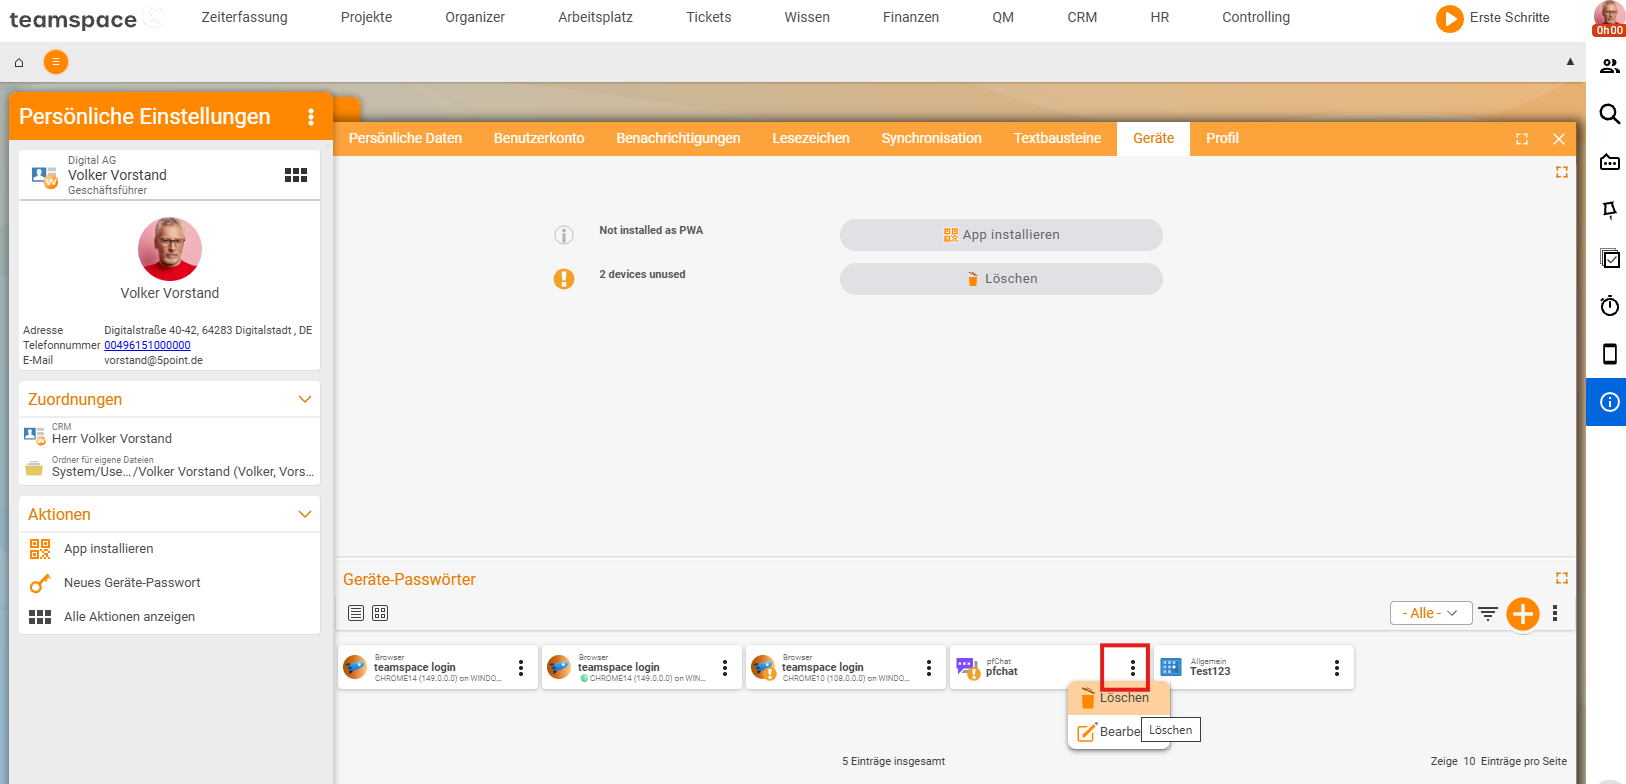
- Go into your own menu → Personal settings → Devices.
- There you can see which devices teamspace is installed on.
- Delete the entry – this means you can no longer get in from that device.
Common questions & needs
| You want to … | How to |
|---|---|
| Use teamspace like a program | Install it as a PWA via Menu → “Install app” → “install now”; confirm the Chrome prompt with “yes”. |
| Understand what the installation is good for | Its own window without an address bar, a taskbar icon, visible notifications and shortcuts. |
| Get to checking in/out quickly | Right-click the taskbar icon (PC) or the shortcuts on the phone: Check In / Check Out. |
| Install it on the smartphone | In the menu, choose “Install app”, scan the QR code with the phone camera and start the command under “Option”. |
| Block access to a lost device | Under “Personal settings → Devices”, delete the entry – then you can no longer get in from there. |
Related topics
- Device passwords Configuration How-to
- Notifications Configuration How-to