

If you work with files a lot, it pays to connect your teamspace file directory as a drive in Explorer (Windows) or Finder (Mac) via WebDAV. You then see and edit teamspace files as if on a network drive – and everything stays safely stored in teamspace: permissions still apply, and every save creates a new version automatically.
Step 1: Get the server address
- In teamspace, switch to any file directory – it doesn’t matter which; it is the starting point from which you later navigate on in Explorer. It can be the main directory or a project directory.
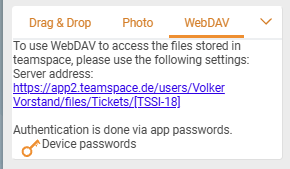
- In the Upload sidebar, open the
WebDAVtab. - Copy the
Server address:(e.g.https://<your-instance>.teamspace.de/users/<User>/files/).
Step 2: Create a device password
For signing in you use not your login password but a separate device password. There’s a reason for this: if you change computers, you can revoke the device password selectively, without changing your main password.
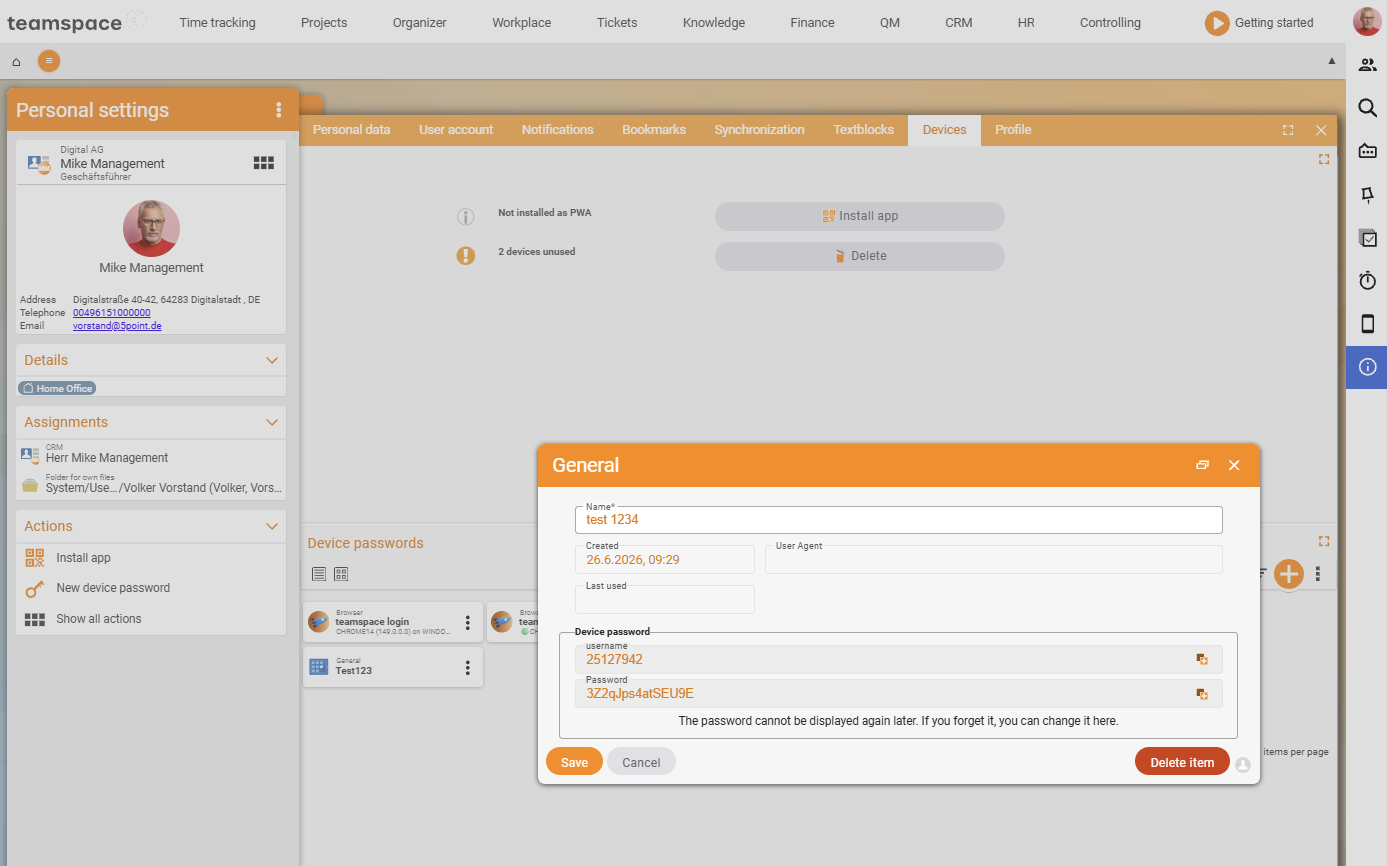
Avatar menu (top right) → Personal settings → Devices → New device password- Create a new device password and give it a name (e.g.
Explorer). - Save – teamspace now shows you a user name and a password. You’ll need both in a moment in the operating system’s login dialog.
⚙ Prerequisite. Create the device password once per device – your normal login password does not work for WebDAV.
Step 3: Connect the directory in Explorer/Finder
Using the Windows Explorer as an example (Mac/Finder is analogous):
- In Explorer choose Add a network location and click Next in the wizard.
- As the internet address, paste the
Server addresscopied in step 1 and click Next. (If you remove the trailing path part, you land in the main directory.) - In the login dialog, enter the user name and password of the device password, tick “remember credentials” and confirm with OK.
- Give the connection a name (e.g.
teamspace) and click Finish.
The teamspace directory now sits as a drive in Explorer. You can drag files into it, create new folders, open, edit and save files – everything lands directly in teamspace.
ℹ Info. Permissions apply over WebDAV too: in Explorer you only see files and directories you are authorised for in teamspace. So this “back door” does not get you to locked content.
⚠ Important. In Explorer or Finder you always see only the current version. You’ll find the version history only in the detail manager under the
Versionstab – File Explorer doesn’t know about it.
Step 4: Delete the device password again
If you want to revoke the access – for instance because you’ve changed computers:
Avatar menu → Personal settings → Devices → delete the entryAfter that, no one can reach your files through the permanently created Explorer location any more.
Common questions & needs
| You want to … | How to |
|---|---|
| Save straight from Word/Excel into teamspace | Connect the directory via WebDAV and save the file from the app into the drive – teamspace creates a new version automatically. |
| Cut off access from an old computer | Delete the associated device password under Personal settings → Devices. |
| Reach an older version | Not possible in Explorer – via the detail manager, Versions tab. |
| Login fails | Check that you are using the device password (not the login password); recreate it if necessary. |
Related topics
- Upload files File management How-to
- Manage versions (with video) File management How-to
- Edit and lock files online File management How-to