

In a user group you bundle rights and assign the employees who are to receive them. You create the group, set in the Permissions tab what members may see and do, and assign the people in the Members tab. Anyone who belongs to several groups collects the rights of all those groups.
Where user groups live
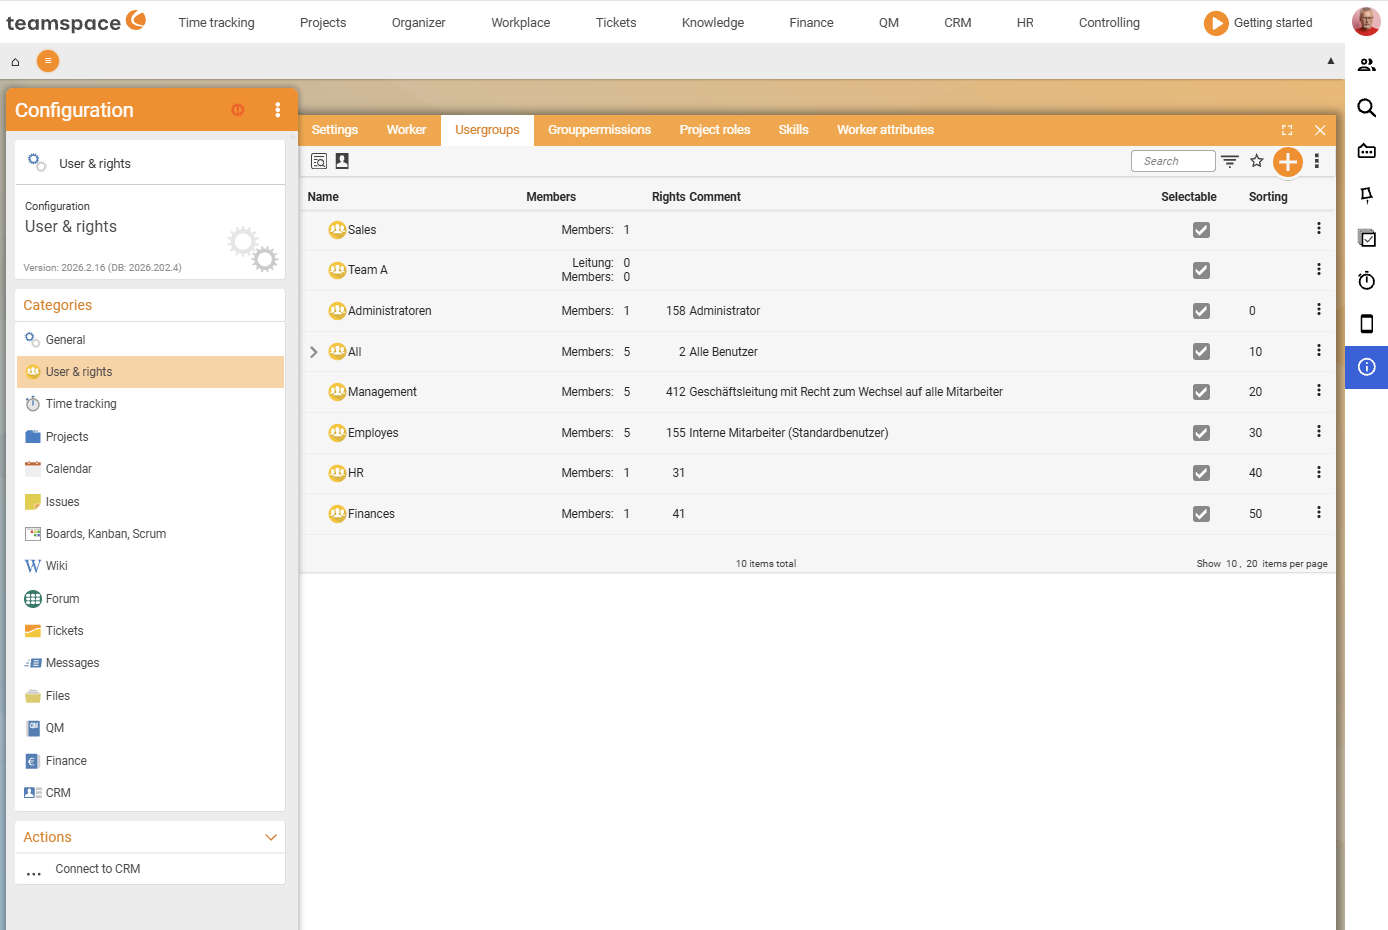
Tools icon (bottom right) → "Administrator mode" → "System configuration"
  → "User & rights" sidebar → "User groups" tab
For each group the list shows Name, Members, Rights, Remark, Selectable and Sorting. The column with the number of rights is helpful for seeing at a glance whether a group carries real rights or merely holds members together – standard users, for example, have 153 rights, while the All group typically has just a handful of basic rights. Using the two buttons on each row you can, among other things, display the members directly.
You create a new group via the blue + button on the right of the toolbar. Clicking a list row opens the group in a modal with three tabs: Master data, Permissions, Members.
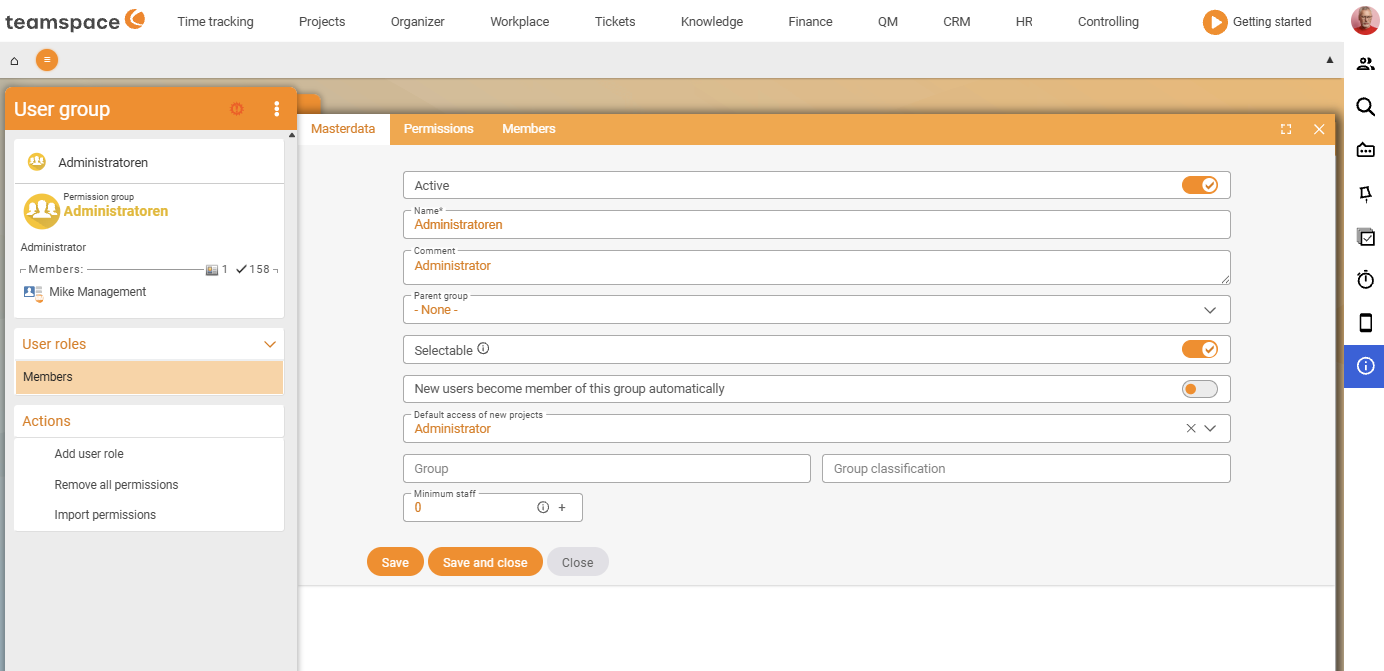
Master data tab
In the Master data tab you set the name, the inheritance and a few behaviour toggles:
- Active – toggle for whether the group takes effect. Inactive means: existing members do not receive the rights.
- Name – mandatory field. This is what the group is called in all selections.
- Remark – free text for your own notes.
- Parent group – drop-down, default
- None -. Sets the inheritance (see Group hierarchies). - Selectable – toggle. Off means: the group does not appear in selection drop-downs (e.g. when assigning an assignee) – but still carries rights for its members.
- New users are automatically members of this group – toggle. Ideal for the
Allgroup, off for specific roles. - Default project role for new projects – drop-down (e.g.
Colleague). When a new project is created, members of this group automatically receive the project role set here. - Group and Group classification – two free-text fields for structuring when you have many groups. Purely for statistics – no effect on rights.
- Minimum staffing – number field. If someone from the group takes leave and the number of people present drops below the value, the leave request flags this – both to the person requesting and to the approver.
ℹ Selectable off, still active. A group can be invisible in selections and still hand out rights – useful for internal bracket groups that you only need for the permissions model.
Permissions tab
In the Permissions tab you set what members may see and do. The content is organised into six top-level accordions – Main menu, Detail manager, Permissions, Group-specific permissions, Global search, Configuration rights. What each level does and how they interact is explained in detail in How permissions interact.
Using the search field at the top right you filter for individual rights; the back arrow next to it resets the filter.
ℹ Main menu and Detail manager are entry points, not a barrier. The actual data access is governed under the
Permissionsaccordion. Anyone who sees the document overview as a tile but does not haveView documentsset will get an empty list.
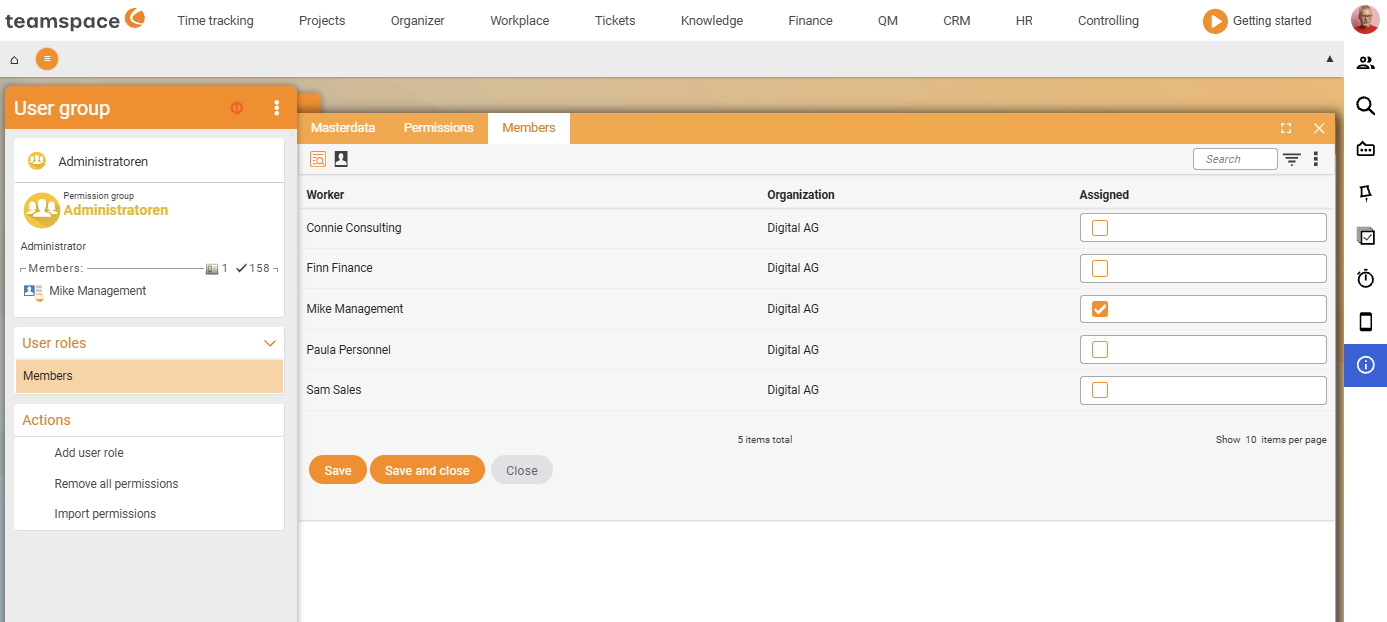
Members tab
In the Members tab you assign the employees. The table shows Employee, Organisation and Assigned (checkbox). Using the checkbox you set a person as a member – on saving, they land in the group and inherit the rights. If you clear the tick, they no longer belong to it and lose this group’s rights.
On the left of the modal you see the membership figures with two counts: the number next to the person symbol is the number of direct members, the number next to the tick is the effectively entitled users (including members from child groups via inheritance). For Employees, for example, you see 5 direct and 153 effectively entitled.
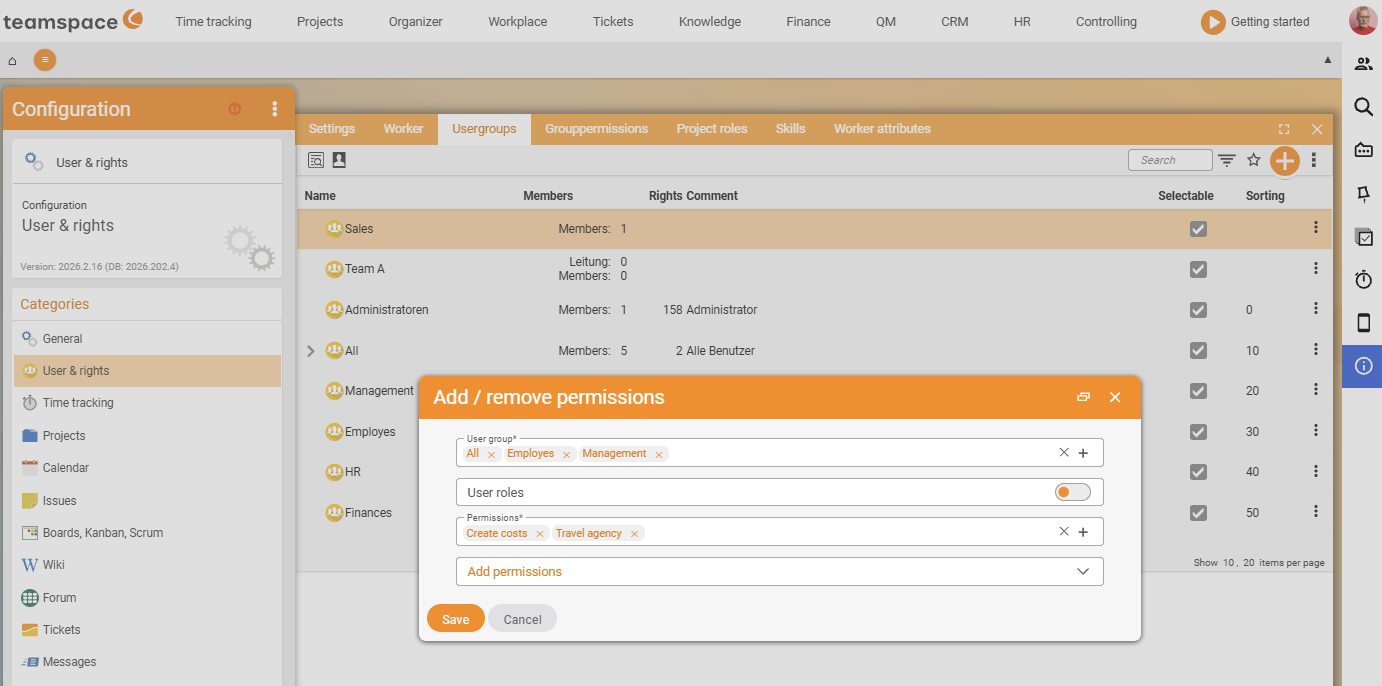
Change rights in many groups at once
If you want to change the same right in many groups – e.g. switch off the News area in Knowledge for everyone – you do not have to open each group individually. In the user groups list you select the affected groups and use the Add and remove permission action from the actions sidebar:
- Select the groups in the list, choose the Add and remove permission action and click
Next. teamspace shows which groups are affected. - Expand and select the right (in the example, the
Newsmenu item). - Choose
addorremoveand save.
Menu still showing after removal? For speed reasons the menu is cached. Restart the session once – the menu then loads fresh and the removed entry is gone.
Further actions on the group detail are Add user role, Remove all permissions and Import permissions.
Common questions & needs
| You want to … | How to |
|---|---|
| Create a new group | Blue + button in the toolbar of the User groups tab. |
| Define what a group may see/do | Permissions tab → the relevant accordions; for details see The six levels. |
| Add someone to a group | Members tab → set the Assigned checkbox, save. |
| A group just for assigning, without rights | Create a group without rights (e.g. Team A) and use it as an assignee assignment – grant rights via functional roles. |
| Hide a group from selection drop-downs | Master data → Selectable off (rights are retained). |
| Capture new employees automatically | Master data → New users are automatically members on (typical for All). |
| Warn against leave gaps in a department | Master data → set Minimum staffing. |
| Change a right in many groups at once | Select the groups → Add and remove permission action. |
| Map hierarchies/locations or hidden roles | See Group hierarchies, inheritance & user roles. |
| Avoid locking yourself out | At least one person as tenant admin – see Tenant admin. |
Related topics
- How permissions interact – the six levels Permissions Concept
- Group hierarchies, inheritance & user roles Permissions Configuration
- Set up group-specific permissions (with video) Permissions Configuration
- Tenant admin & not locking yourself out Permissions Configuration