
Lists are the entry point into every module – and they can do far more than first appears. Using a documents list as an example, this guide shows you how to use the display, columns, filters and saved views. The steps work identically in all lists.
teamspace distinguishes two things here: the display of the data and the filtering of the data.
Choosing a display mode
At the top of the list you will find several icons – the display modes. Click the active icon again to adjust it.
- Standard – the reduced list; used mainly for selection, deliberately lean so you aren’t overwhelmed.
- Details – a second, freely configurable list; a good basis for analysis.
- Tile view – size selectable (large / medium / small) and can also be split by type. Add the months as well and you build yourself a matrix (row × column).
- Statistics – starts with default values; click again to show further values (e.g. status or contractor) and split by type.
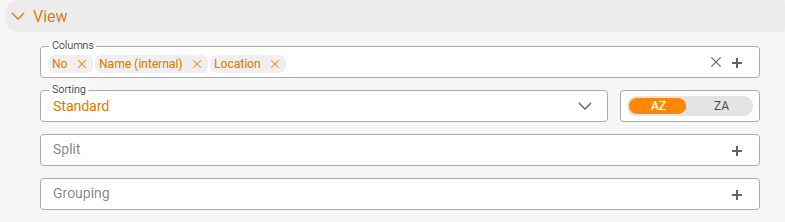
Showing/hiding and moving columns
- Click the active display icon to open the configuration.
- Hide: Remove, for example, the “split by type” – the list adapts immediately.
- Show: Add further data as a column, such as
Gross,Payment statusorPrice list. The list updates live (without reloading). - Move: Drag a column (e.g.
Price list) to the desired position, for instance right to the front.
Grouping and aggregating
When you click a column that can be grouped, teamspace combines the rows into groups and aggregates all addable values (you see the sum per group). Click again to cancel the grouping. In the same way, you can split a list by a value (e.g. type or size).
Searching and filtering
Quick search
Simply start typing at the top – the list reduces immediately to the matches. Use the X to clear the search again.
Quick filters
On the right are the quick filters (expandable). These are often time filters, but depending on the list they can be others too.
Summary box
Many lists have a summary box on the left. When you click a value there (e.g. “unpublished”), the list filters directly on it.
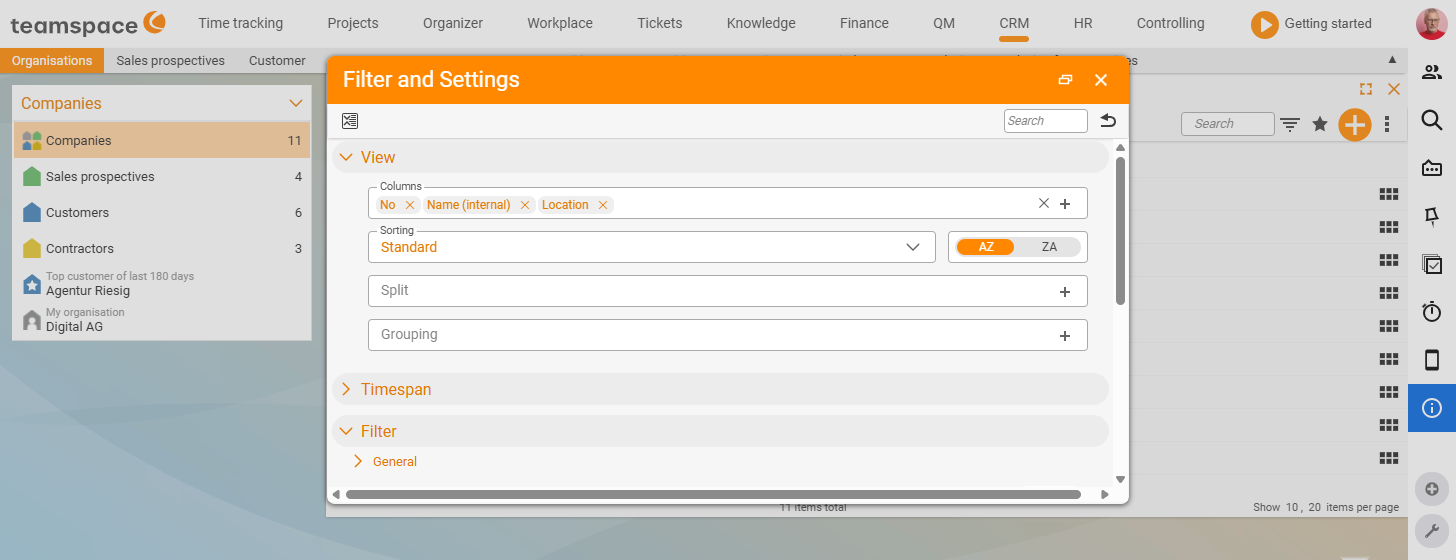
Filter area
Open the filter for full control:
- at the very top the view area (identical to the display icon),
- below it the time-range area (all time filters bundled),
- below that the remaining, content-sorted filters.
Type the start of a field name into the filter search field (e.g. “Si” for Size) and set the value. Active filters are shown directly in the row – so you can see at a glance what is in effect. Use the expand/collapse icon to open or close everything in toggle mode; a separate icon restores the original state.
Don’t get lost: If a list ever looks odd, reset it to the delivery state via the back arrow or the original-state icon.
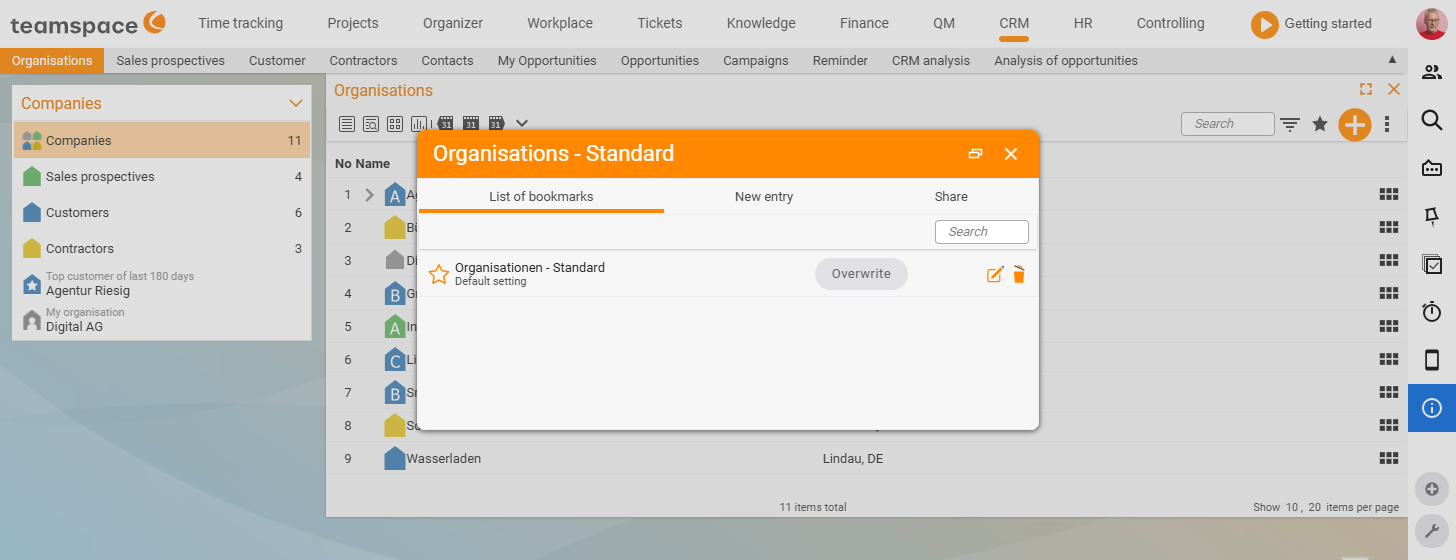
Saving a view as your own list
Once you have put together a view that you need regularly, you save it:
- Click the star.
- Choose Save as new, enter a name (e.g. “My list”) and define where it should appear (e.g. under
Finance). - A green confirmation appears at the bottom. When you then open the menu (e.g.
Finance), you find your list at the top – with exactly your display (tiles, statistics, columns, filters).
Editing directly in the list
You don’t have to switch into the element first: click the edit icon on a value (tooltip Edit list entries; the row action is called Edit cells) and change it directly. teamspace respects your permissions here – protected fields stay locked. This is far more convenient than opening the element, finding the field and editing it there.
Remembering elements (filtering across lists)
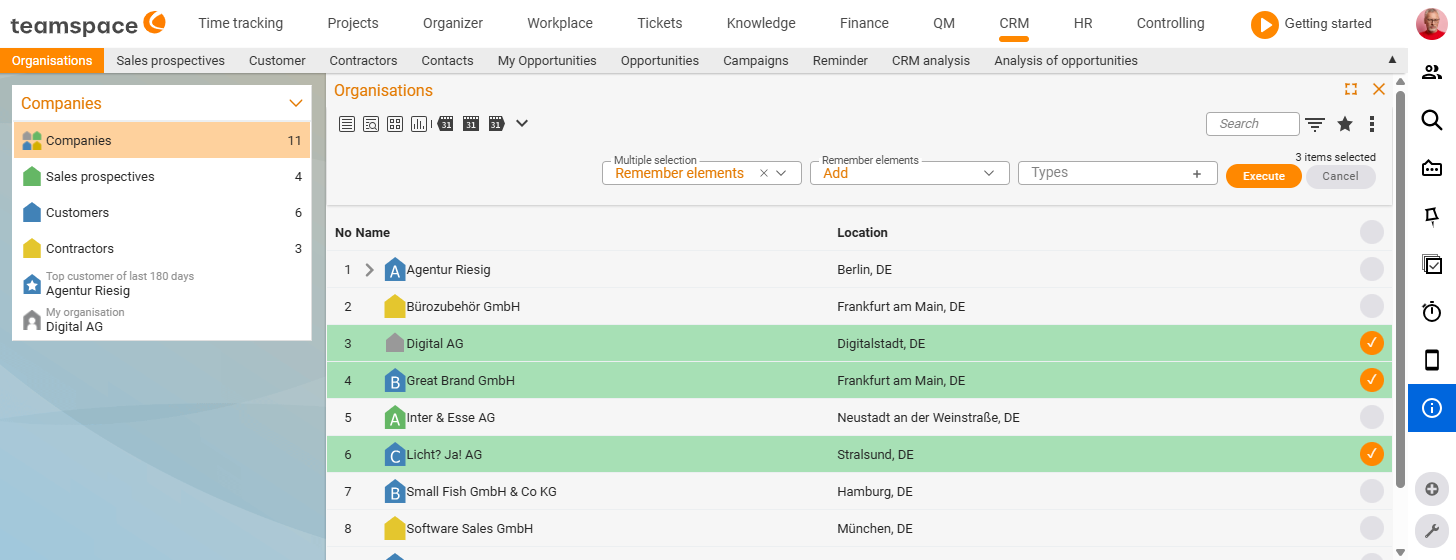
With remembered elements you transfer a selection from one list into another – e.g. “first select three organisations, then see in the billing item what was sold to them”:
- In the first list, tick the elements via the multiple selection.
- Choose Remember elements – with the option
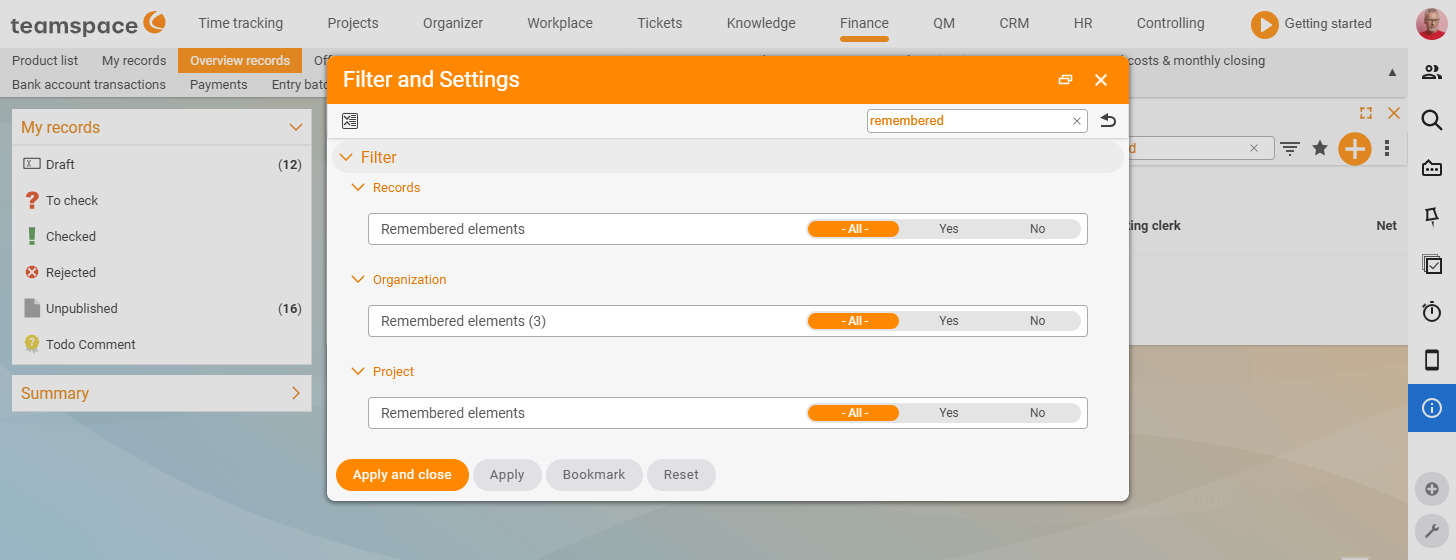
add,removeorset, and decide whether to remember the organisations themselves or, for example, their contacts/projects (without a selection, teamspace takes what is currently displayed). - In the target list, type
RMinto the filter search field → select remembered elements and apply. The list now shows only the entries for your selection.
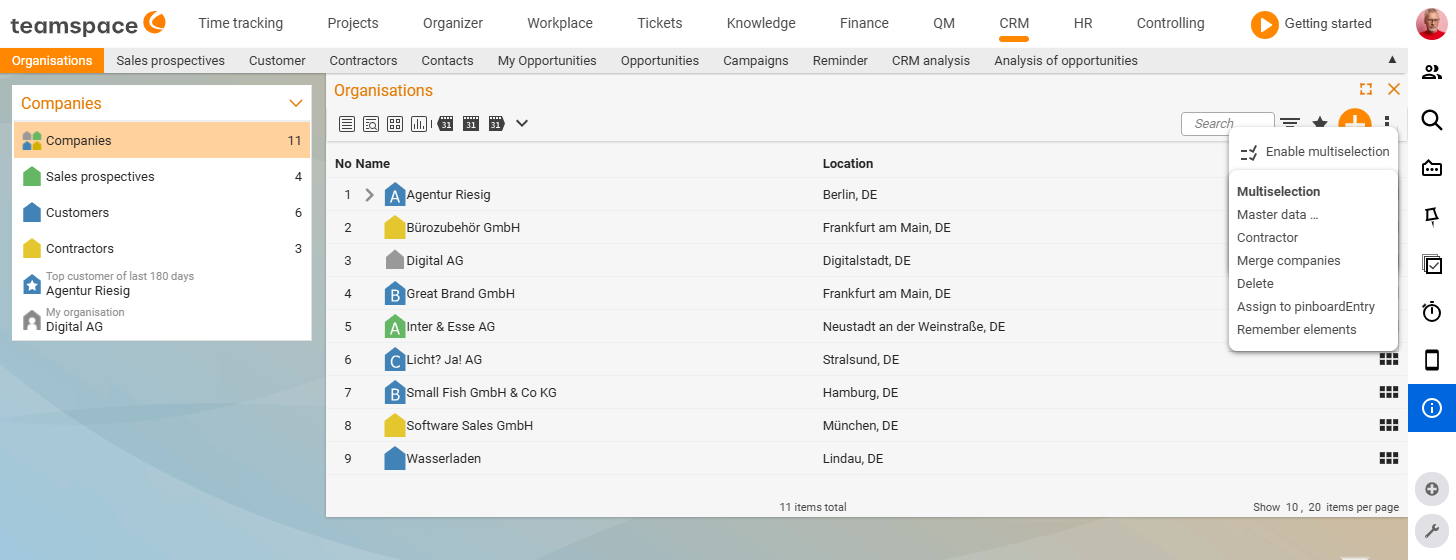
Editing several elements at once
Via the multiple selection (at the end of the list, also in the action box) you edit many records at the same time:
- Selection trick: the topmost checkbox selects all; a group’s checkbox selects only that group; tick individual records as needed.
- Change master data: after
Next, you define the new value (Set value). If a document is still in draft, for example, the change is applied. - Export / print: via the multiple selection you export the list to Excel or print it.
Creating a new element
Via the plus sign you create a new element that belongs in the respective list – e.g. new quote, new invoice or, generally, new document (then you choose the document type).
Notes
- This operation applies across modules – learned once, usable everywhere.
- In the “Genua” interface, lists, filters and direct editing have been freshly tidied up; the logic stays the same. What has changed for existing customers is described in The new “Genua” interface.
Common questions & needs
| You want to … | How it works |
|---|---|
| A different display of the list (tile view, statistics) | Choose the appropriate display icon at the top; click the active icon again to adjust it (size, split, values). |
| See more/other columns | Click the active display icon and add data such as Gross, Payment status or Price list as a column. |
| A column in a different position | Move the column (e.g. Price list) by dragging it to the desired position. |
| Combine rows and see sums | Click a groupable column – teamspace forms groups and aggregates addable values; another click cancels the grouping. |
| Quickly find something in the list | Simply start typing at the top (quick search); use the X to clear the search again. |
| Filter specifically by a field | Open the filter and type the start of the field name into the filter search field (e.g. “Si” for Size) and set the value. |
| Keep a view you have put together | Via the star → Save as new as your own list in the menu (with name and location). |
| Bring a list back to the delivery state | Reset it via the back arrow or the original-state icon. |
| Change a value without switching into the element | Click the edit icon on the value and edit directly in the list (within your permissions). |
| Reuse a selection in another list | Via the multiple selection → Remember elements, then type RM into the filter search field of the target list and apply the remembered elements. |
| Change many records at once | Via the multiple selection → Next → Set value. |
| Export or print the list | Via the multiple selection, export to Excel or print. |
| Create a new element | Via the plus sign of the list (e.g. new quote, new invoice or, generally, new document). |