

This run-through shows how the modules work together: you create a quote, send it by email, generate an order from the acceptance, then a project from that, book a time entry and finally bill via e-invoice. The best part: after the quote, almost everything happens at the push of a button – the data is carried over, so you never enter anything twice.
Each individual step has its own detailed guide in the relevant topic. This article is about the overview of the whole process.
1. Create the quote
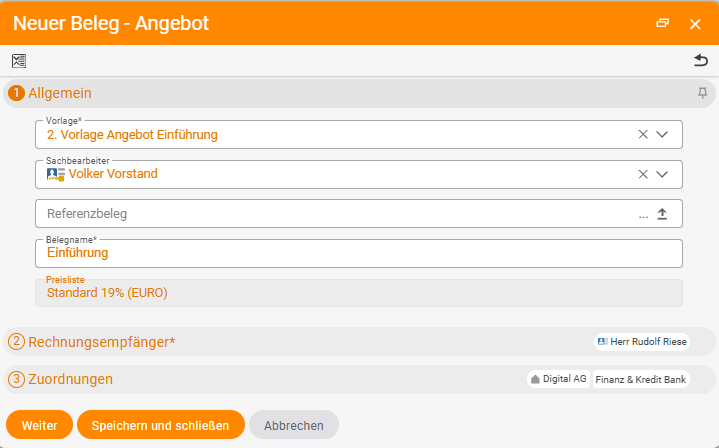
- Click the plus sign at the bottom and choose Quote → empty quote (in practice you usually take a template).
- Choose the recipient – in the example the prospect “Ingo Interessent”. teamspace fills in their data automatically.
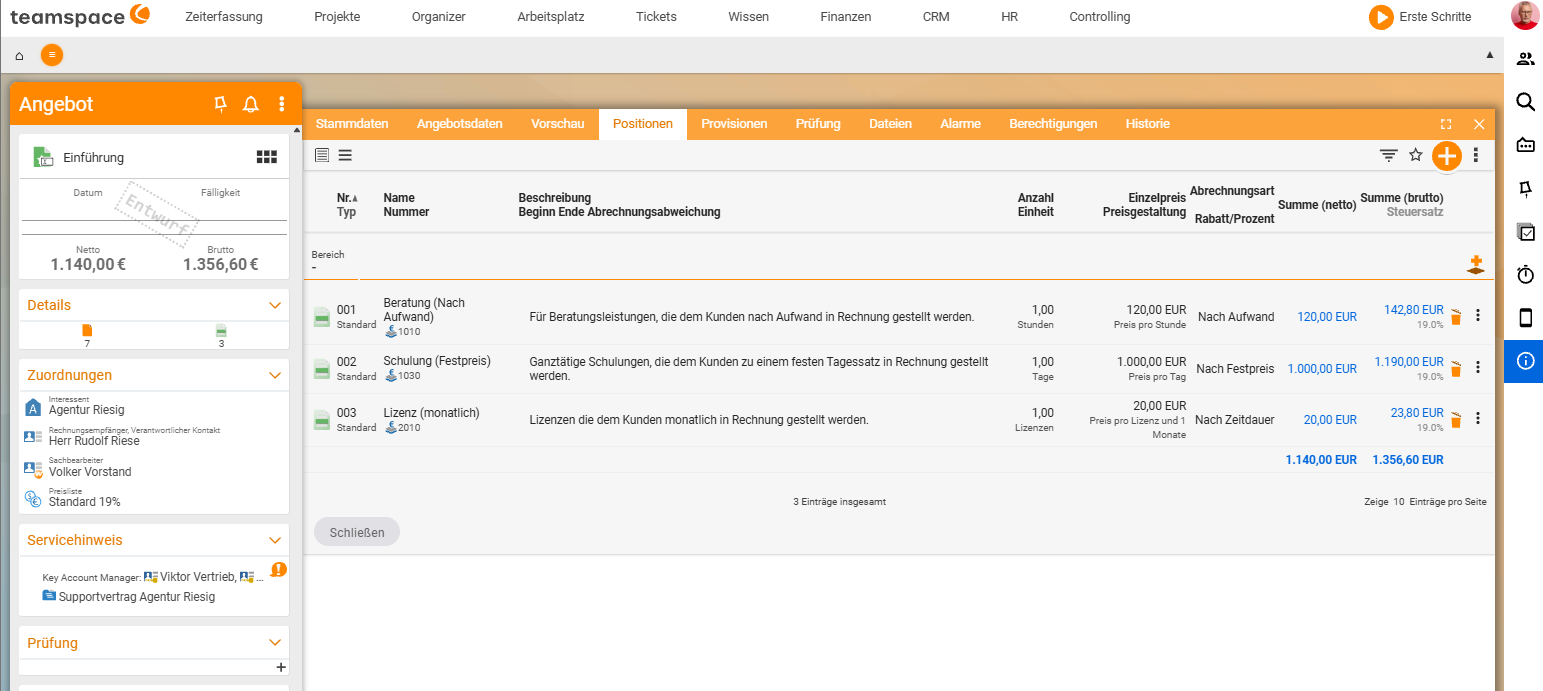
- Add items via the plus. The items cover almost every case (effort, fixed price, mileage, expenses, surcharge …):
- Consulting by effort – e.g. 16 hours at €120.00.
- Training at a fixed price – e.g. one day, €1,000.00.
- Monthly base fee – take a licence item and rename it (e.g. “Base fee data protection”), €120.00 per month.
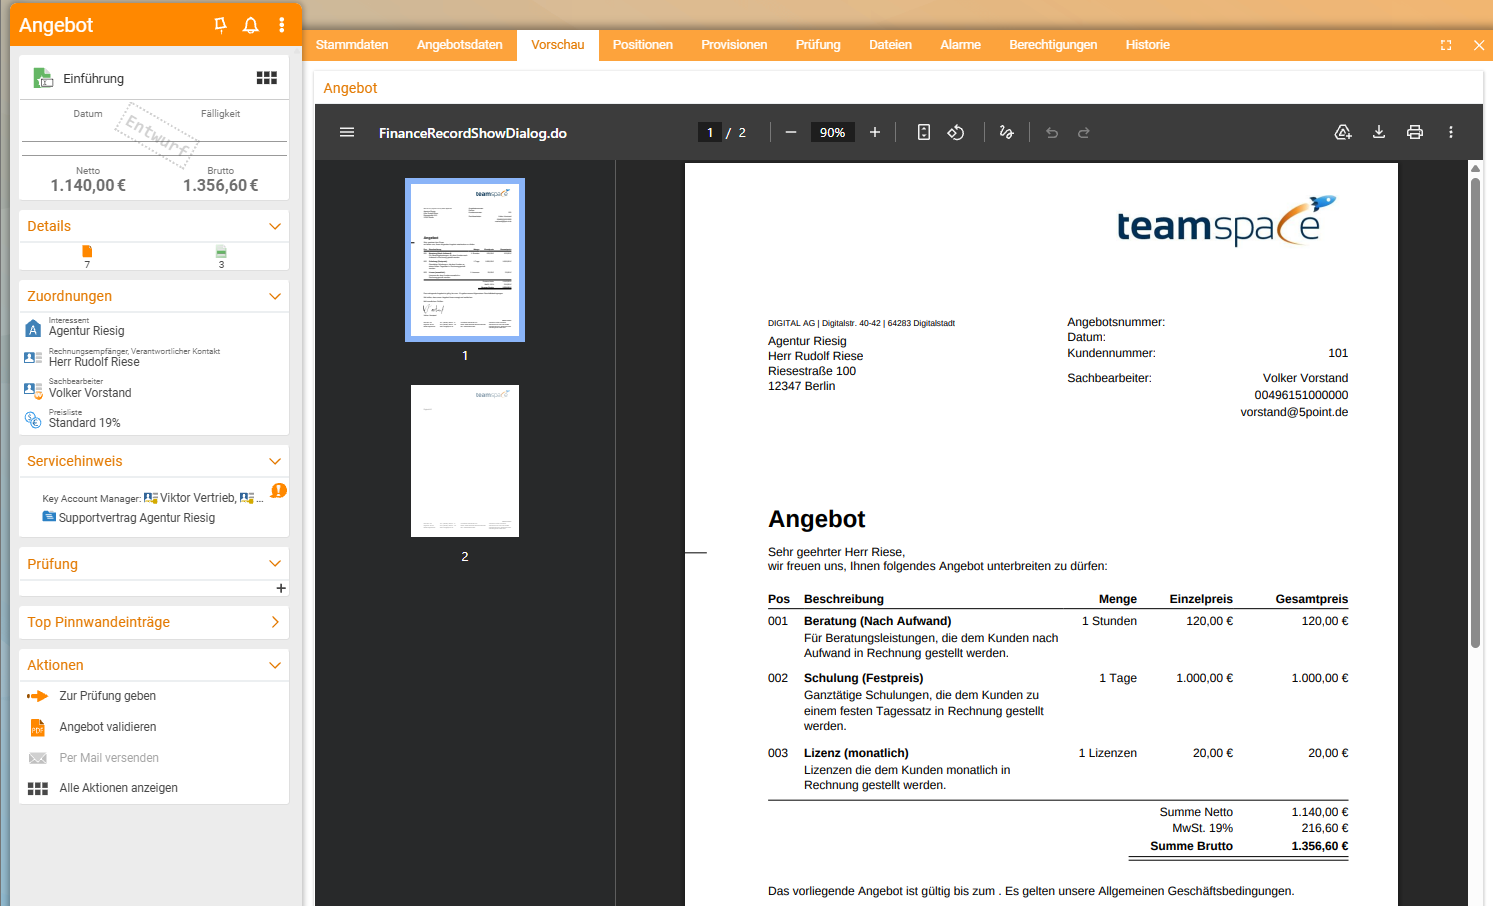
- Use Preview to check how the quote looks.
- Create quote generates the PDF and assigns the quote a number (alternatively, hand it for review to a colleague).
2. Send by email
Once created, the quote is ready at the bottom. teamspace has already pulled the email address from the data and prepared a covering text. Click Send and close – done. (Prerequisite: a connected mail account.)
3. Generate the order
When the customer accepts, a counter appears at the top (e.g. a “1”). Click it to go to the new item.
- Open the quote and choose the action Generate order (all data is carried over).
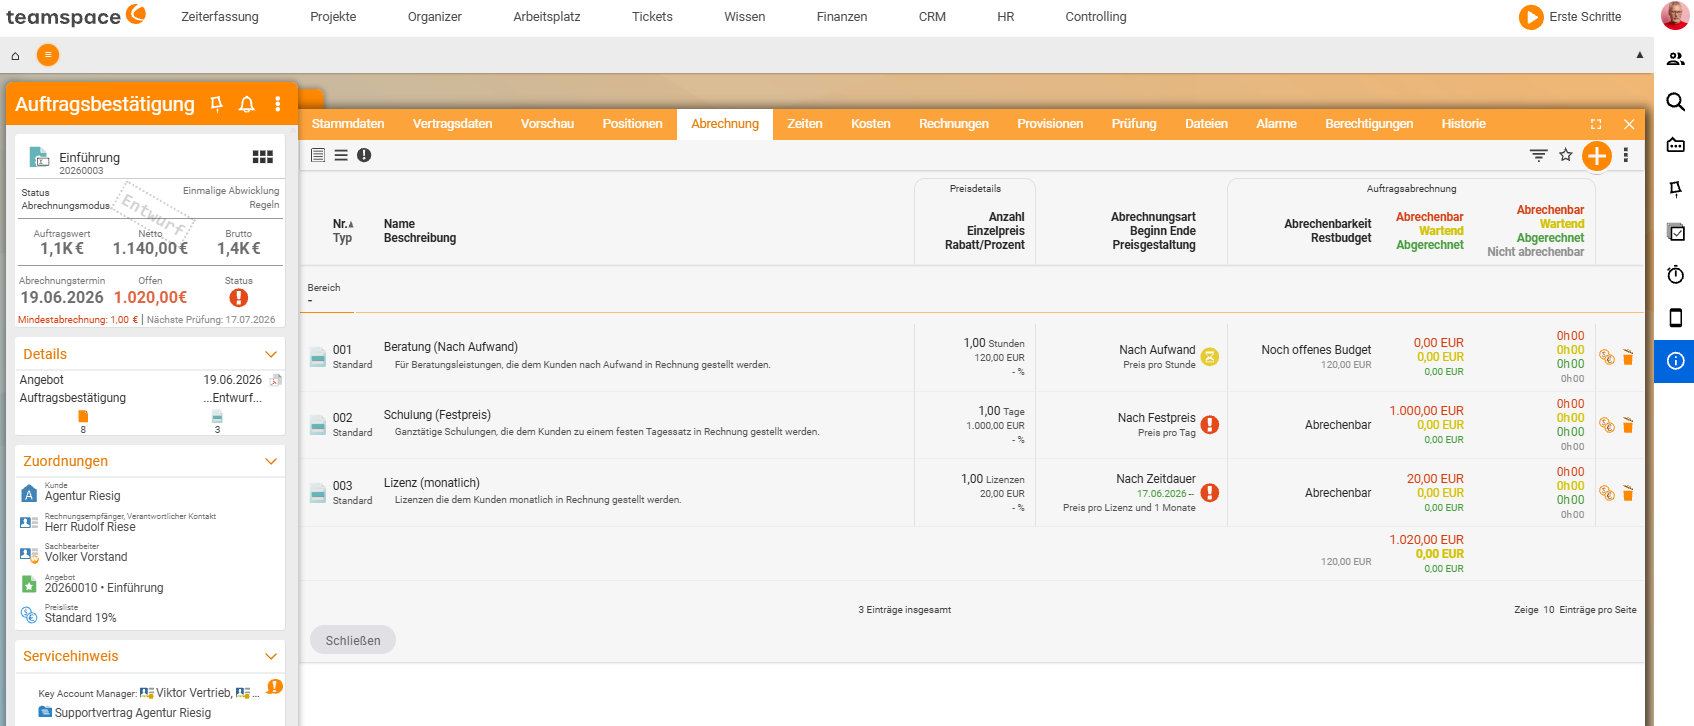
- The items are copied into the order. Switch to the Billing tab.
- If a yellow hourglass appears on an item, you cannot bill anything yet – for example because it runs by effort and no time has been booked yet, or because a start date is missing.
- Take the monthly base fee as an example: enter the start date (e.g. from 1 October). teamspace reports immediately that “the first month has started” – and the item becomes billable.
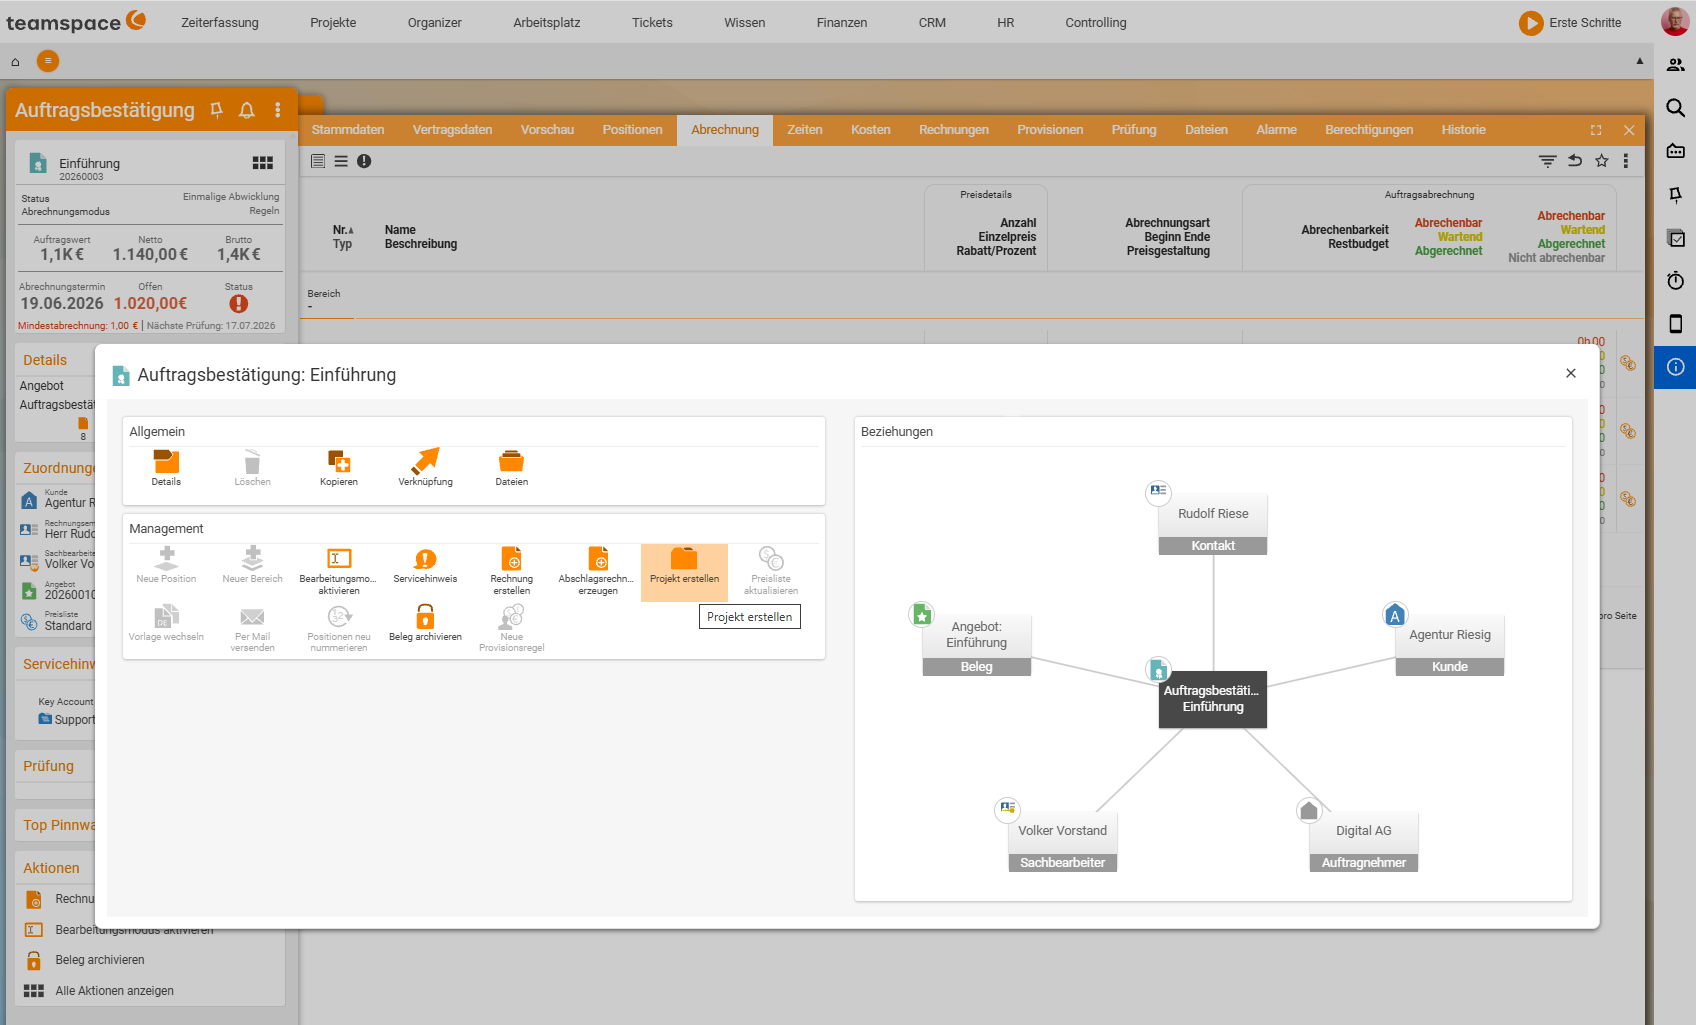
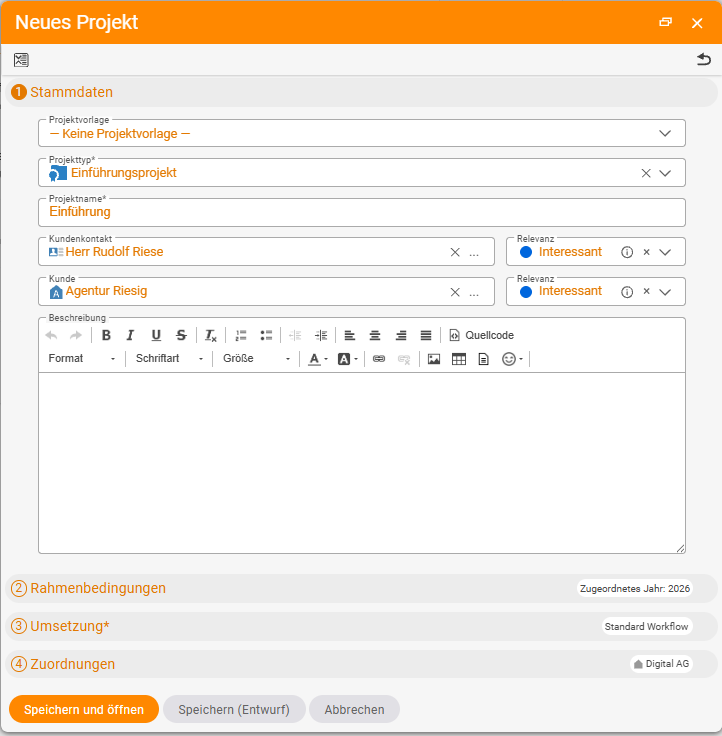
4. Create the project and book time
- In the order, via All actions (or the action box), choose Create project → Main project → Save and open.
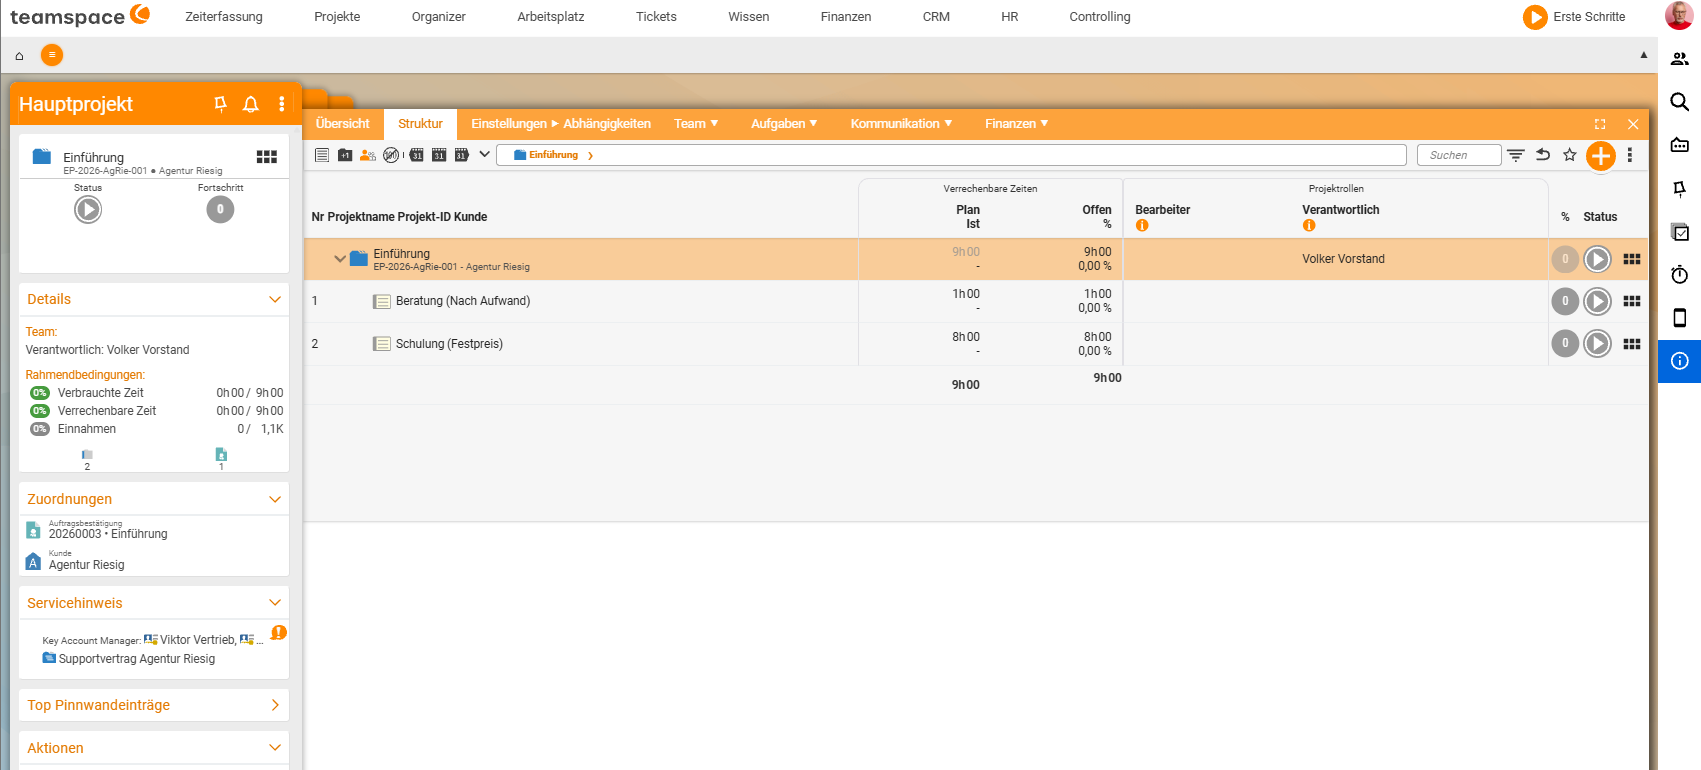
- teamspace turns the items to be worked on into work packages (here: consulting and training) and carries over the budgets.
- Optionally, plan a date and enter assignees (“Who should do it?”).
- On the Consulting work package, book a time entry: Book time → e.g. 2 hours, billable → Save.
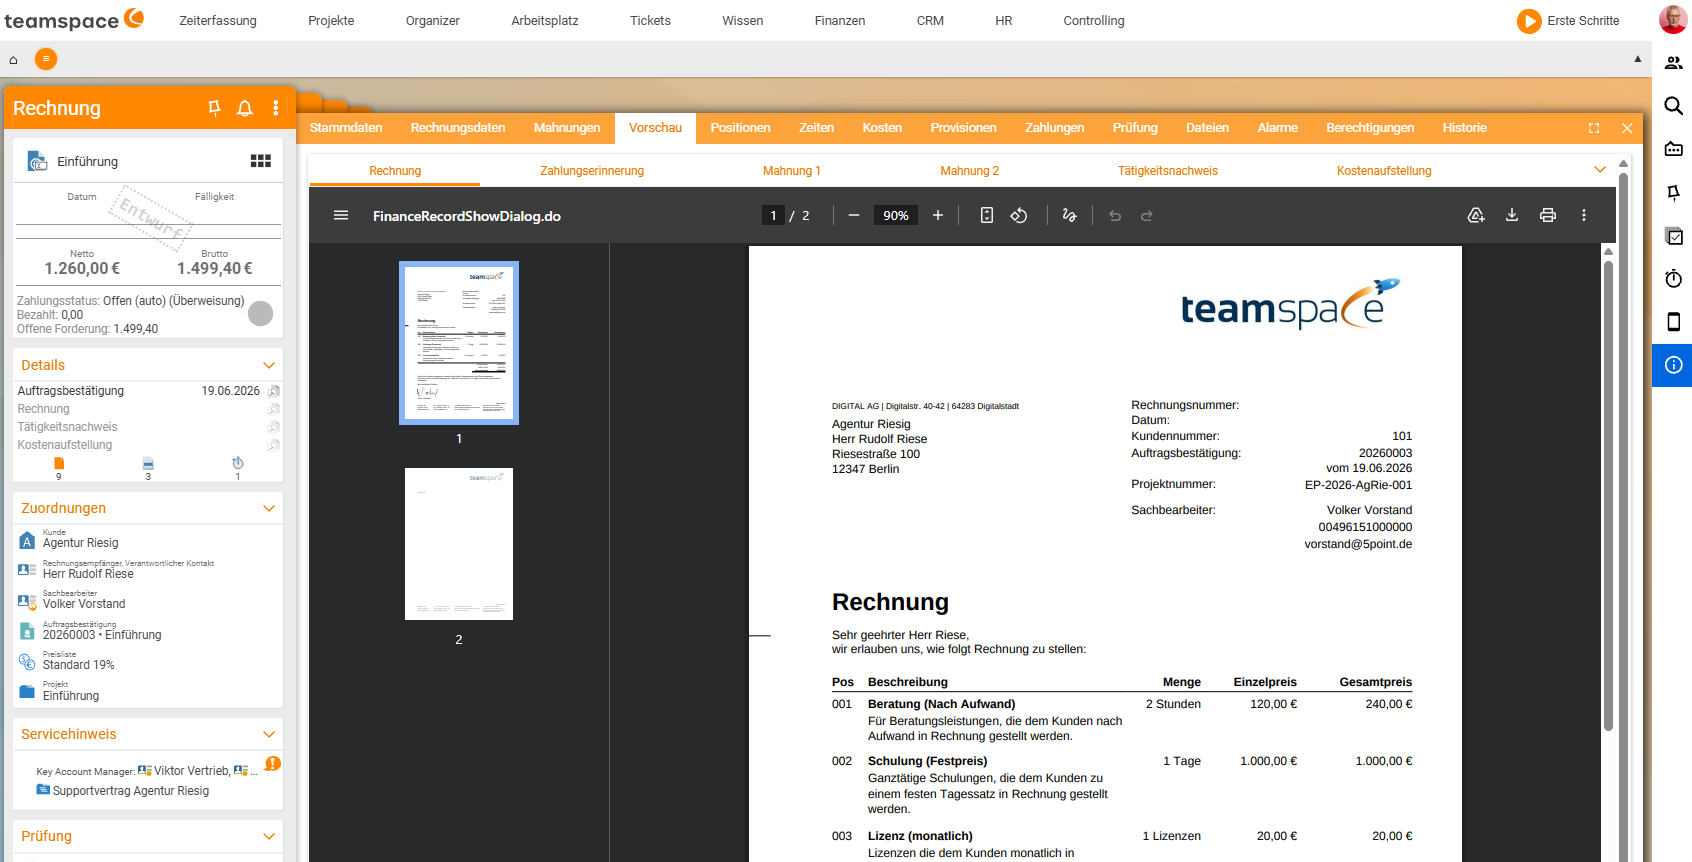
5. Bill via e-invoice
- Back in the order: now more is billable (in the example €1,360.00 – 2 hours of effort, the full fixed price and the first base fee).
- First create the order confirmation (documents are either in draft or validated).
- Create invoice → choose what should be billed (e.g. everything).
- In the preview, check the invoice and the activity report. You can switch the activity report on or off per document; when switched on, it shows the hours performed with date and assignee.
- Create invoice assigns a date and number. Via Send by email, the invoice goes out as an e-invoice (which will be mandatory in any case in future).

Notes
- Push-of-a-button chain: quote → order → project → invoice each carry over the predecessor’s data. The biggest effort is in the quote (the costing); after that it goes quickly.
- Partial billing: you don’t have to bill everything at once – use the multiple selection or the project progress to bill individual items selectively.
- The process will no doubt look different in detail for you – but teamspace covers almost every variant.
Common questions & needs
| You want to … | How it works |
|---|---|
| Set up a quote quickly | Via the plus sign → create a quote; in practice usually choose a template rather than an empty quote. |
| Represent different item types (effort, fixed price, monthly fee) | Add items via the plus – e.g. consulting by effort, training at a fixed price or a renamed licence item as a monthly base fee. |
| Check the quote before sending | Check the PDF via Preview; alternatively hand it for review to a colleague. |
| Turn the acceptance into an order | In the quote, choose the action Generate order – all data is carried over. |
| Make a still-waiting item billable | In the order’s Billing tab, enter the missing start date (yellow hourglass = not yet billable). |
| Create a project from the order | Via All actions or the action box, Create project → Main project – teamspace turns the items into work packages. |
| Record time performed | On the work package, Book time → enter the hours, set billable → Save. |
| Avoid billing everything at once | Use the multiple selection or the project progress to bill individual items selectively. |
| Show the hours performed on the invoice | In the preview, switch the activity report on or off per document (shows the hours with date and assignee). |
| Send via e-invoice | After Create invoice, send it as an e-invoice via Send by email. |
| Practise the whole process yourself | Step by step with the Exercises for beginners. |