

teamspace has a great many functions – but all modules are operated in essentially the same way. That makes getting started surprisingly easy: once you master these three interface elements, you can operate teamspace everywhere. What you learn after that is the methodology behind the modules, no longer the operation.
The three elements are:
- The list – how you find, sort, filter and work with data.
- The detail manager – how you see everything about an item and jump between items.
- The action box (internally nicknamed the “chocolate bar”) – how you run actions on an element.
1. The list
All data in teamspace is sorted into lists. Whether you go into Contacts, Customers or Documents: you always see a list first and then drill down one level with a click. Because this runs through all modules, confident handling of lists is the most important basic skill.
You can do far more with lists than it first appears:
- Adjust the display (show/hide and move columns, tile and statistics views, split by type or month),
- Filter data (quick filters, quick search, filter area, summary box),
- Save views (via the star as your own list in the menu),
- Process further (Excel export, print, multiple selection for bulk changes),
- Create new via the plus sign.
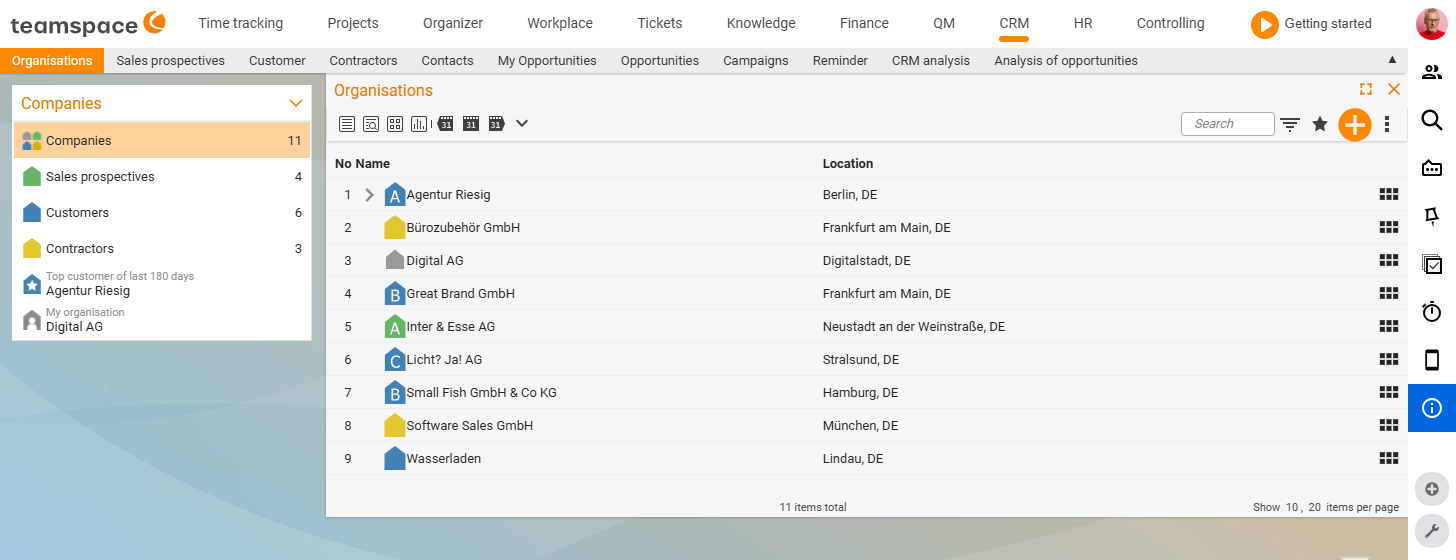
The list is so powerful that it deserves its own, detailed article: Working with lists: columns, filters & saved lists.
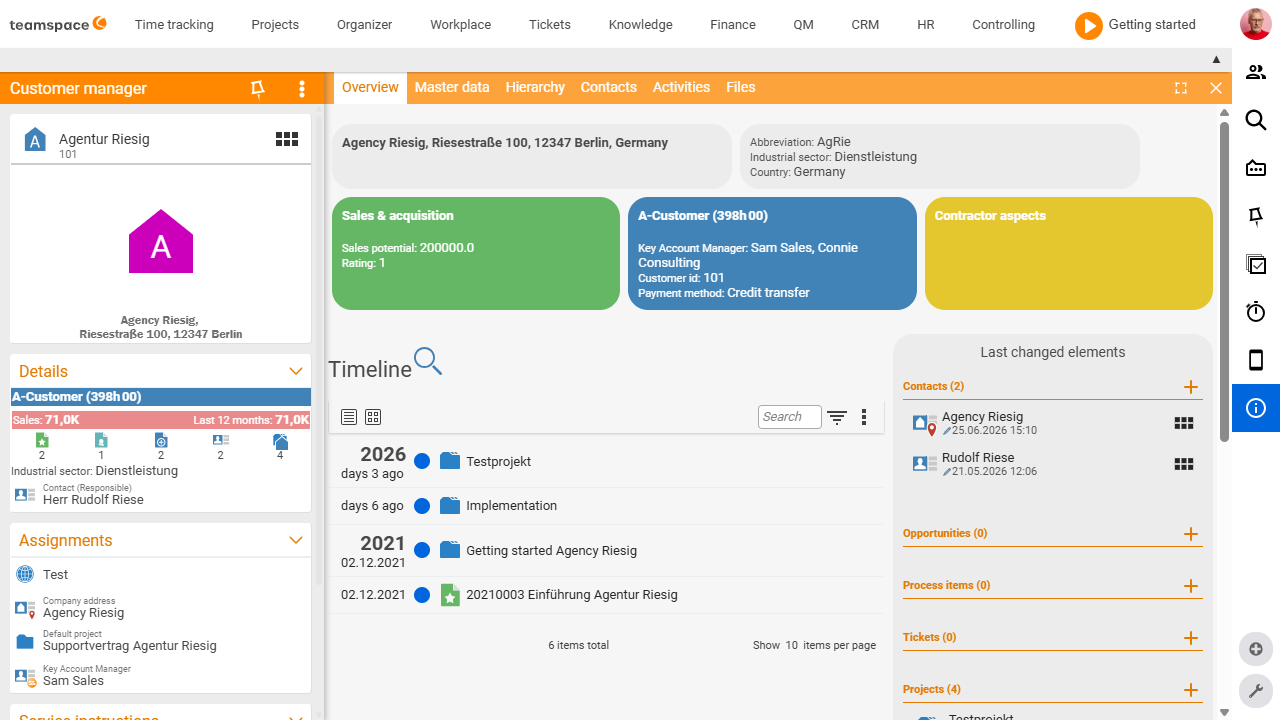
2. The detail manager
When you click an element in a list, you land in the detail manager. It gathers all the information about exactly one entity in one place. Take an invoice as an example: you see not only the invoice itself, but also the times billed with it, the associated project, the order and the customer.
The special part: you can jump from one detail manager to the next – from the invoice into the project, from there into the order, on to the customer. This lets you move back and forth freely, the way you naturally think.
- Use the X to undo a jump and return to the previous detail manager.
- A small counter/stack indicator shows which detail managers are currently “stacked on top of each other” – so you can find your way back.
- When you start a new item from the menu, teamspace forgets the stack and you start afresh.
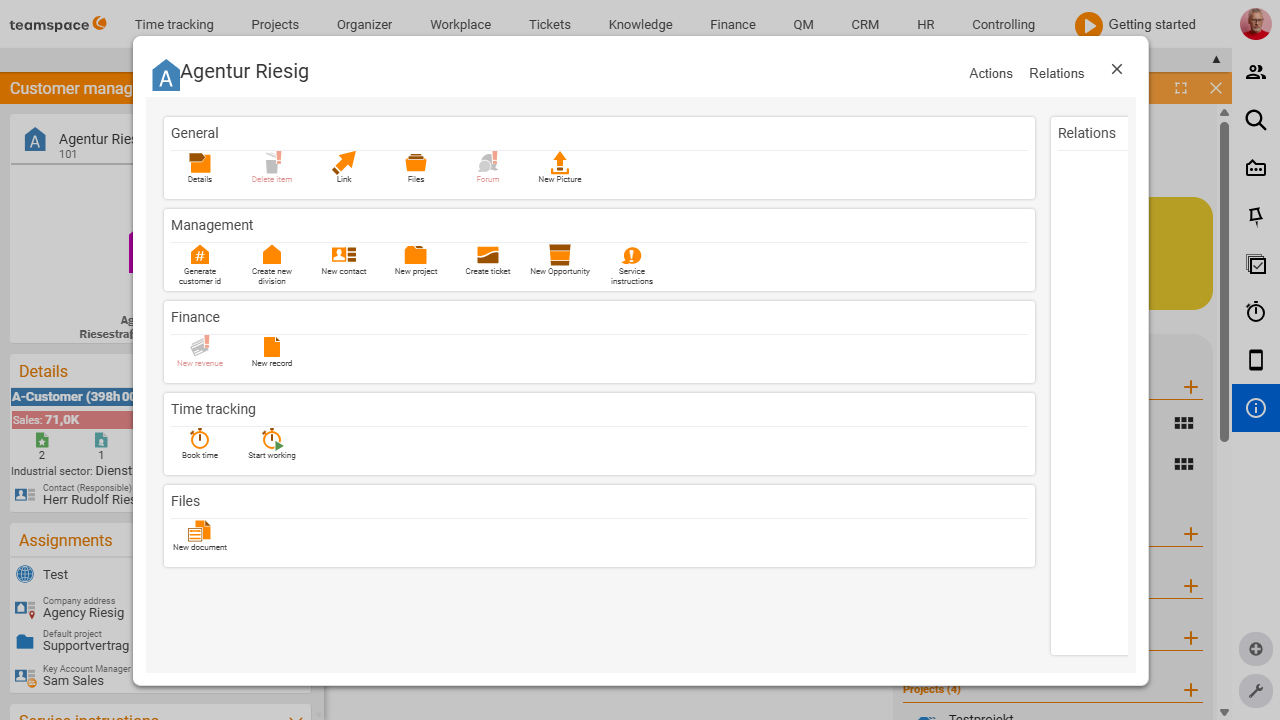
3. The action box (chocolate bar)
Whenever you want to do something, you need an action. Individual actions usually sit at the bottom edge of the screen. You open the full collection via Show all actions – the icon with the six dots (2×3 grid). We call this collection of actions the action box (internally nicknamed the “chocolate bar” for its look) – a term many customers already know.
There you see everything you can do with the element: book a time on it, create a document or a milestone, validate a document, post an incoming payment and much more. On the right there is also a relationship network, which you can use to switch to linked items (e.g. to the client).
- You’ll find the action box everywhere – in lists and in every detail manager.
- If an action currently cannot be run, it is greyed out. Hover over it and teamspace explains why.
Notes
- Practising pays off: the list “can do more than you think at first”. Anyone who deliberately adjusts, filters and saves one or two lists has understood the most important tool.
- Three elements, one system: list → detail manager → action box interlock. You find something in the list, open the detail manager, jump to linked items and run actions.
- You can practise all of this hands-on with the Exercises for beginners.